> ## Documentation Index
> Fetch the complete documentation index at: https://trainings.air.athelas.com/llms.txt
> Use this file to discover all available pages before exploring further.
# Navigate your Chart Note
As you begin a patient consult, set up, complete, and submit a Chart Note.
## Navigate your Chart Note
### **Opening a Chart Note**
✨**Smart Tip:** Ask Athelas AI to navigate you to the relevant Chart Note. You can also use Voice Mode.
Manually open Chart Note:
1. Open the **Calendar**.
2. Select the desired **Appointment**.
3. Click **View Note** in the top-right corner.
4. Once opened, patient details appear in the top bar, with Chart Note sections listed in the left sidebar.
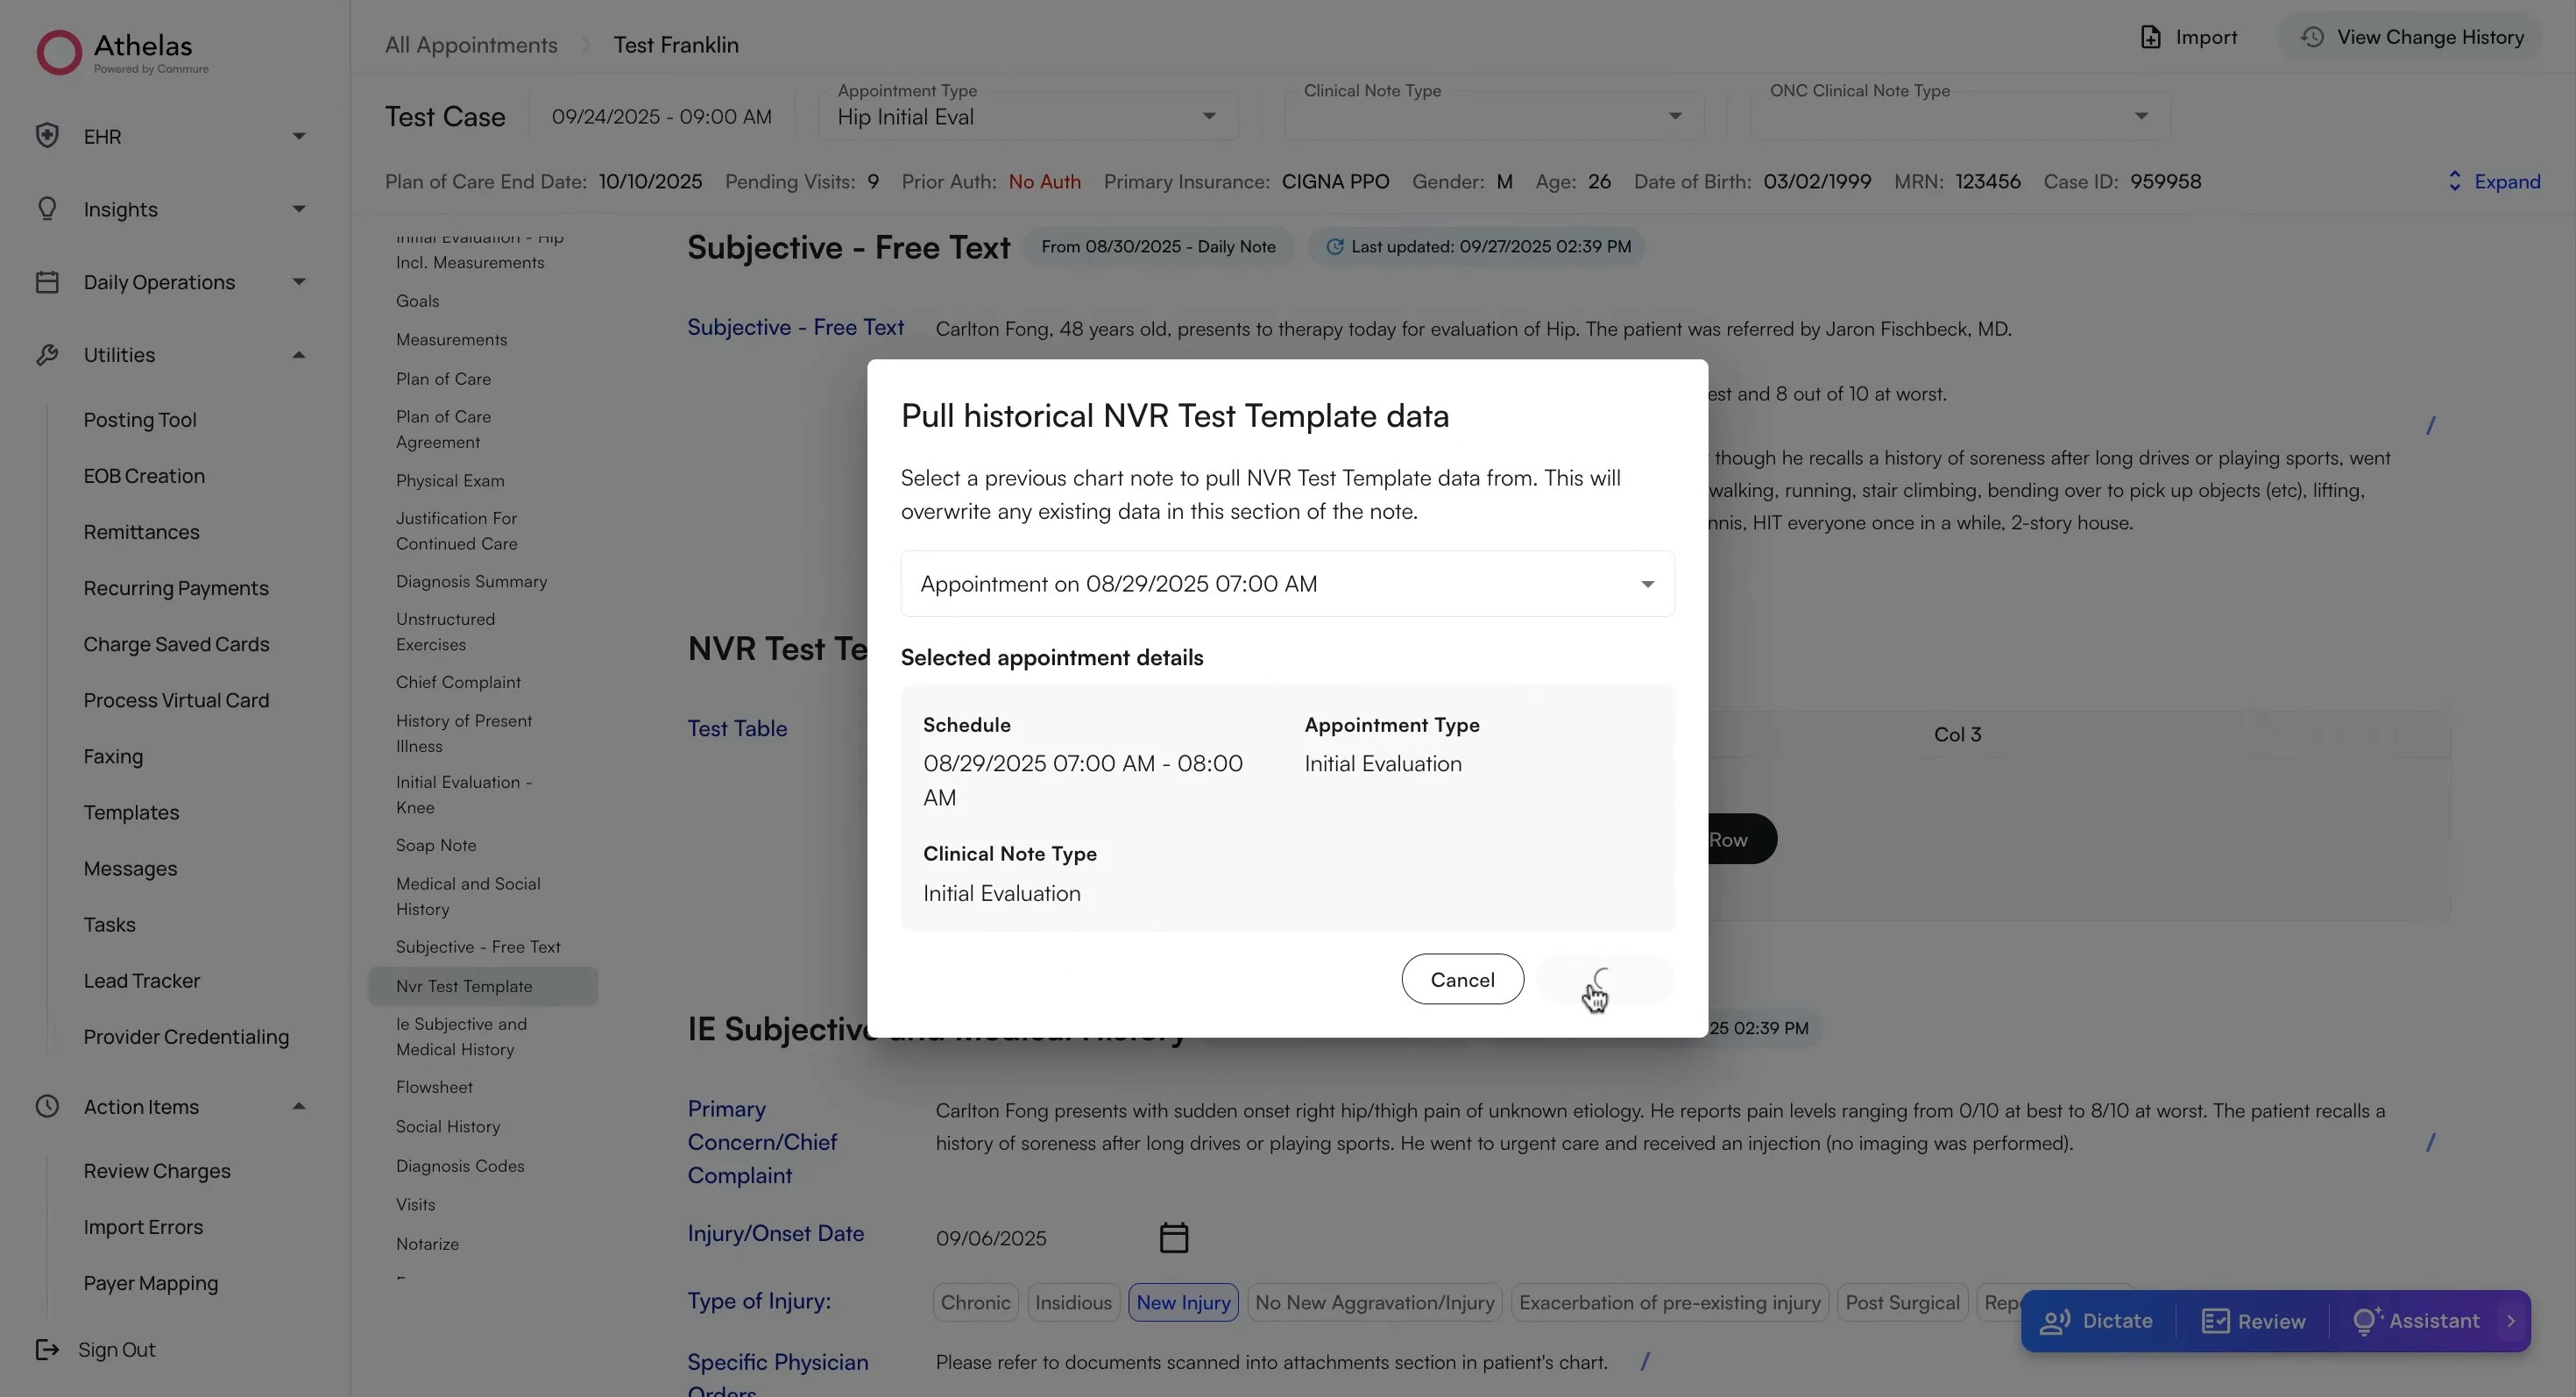 **Note:** You must check-in the appointment before you can open its Chart Note.
For appointments of the same case - you can review the AI generated summary of the chart notes from past appointments.
Alternate method: [View Chart Notes from Patient Profile](/air_provider/review_patient_details/patient_appts#view-chart-notes-for-an-appointment)
\*\*Tip: \*\*View change history of the chart note by clicking on View Change History on the top right of the page.
### View the Pre-Visit Summary
### **Plan of Care**
When selecting **Plan of Care**, you will be prompted to enter: Start Date and End Date,
Frequency & Units, Duration & Units, Visit Count.
The visit count will auto-count down every session and be available to review in the Calendar and Chart Note.
✨ **Smart Tip**: If you enter a Start Date, Frequency, and Duration, the system will automatically calculate the End Date and Visit Count.
### **Diagnosis Codes**
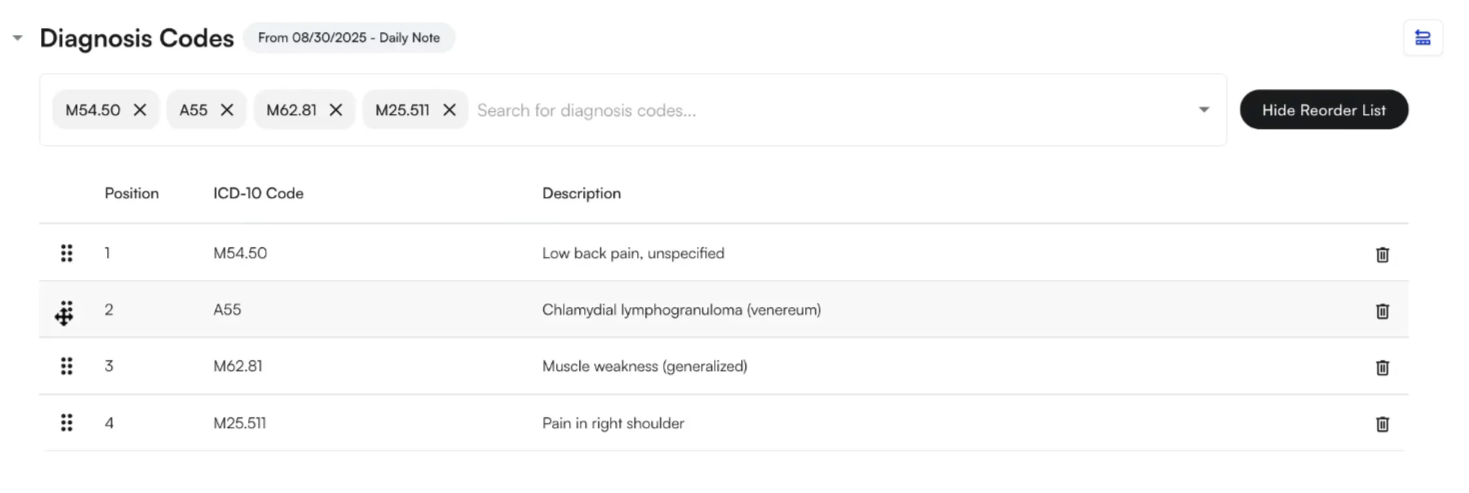
Diagnosis Codes will be auto-populated through Scribe, however, you are recommended to review them in detail before submitting the chart note.
To manually add a \*\*Diagnosis Code: \*\*Select ICD-10 codes from the drop down. Click on the Reorder List button to review the code list and drag codes to reorder them.
**Note:** You must check-in the appointment before you can open its Chart Note.
For appointments of the same case - you can review the AI generated summary of the chart notes from past appointments.
Alternate method: [View Chart Notes from Patient Profile](/air_provider/review_patient_details/patient_appts#view-chart-notes-for-an-appointment)
\*\*Tip: \*\*View change history of the chart note by clicking on View Change History on the top right of the page.
### View the Pre-Visit Summary
### **Plan of Care**
When selecting **Plan of Care**, you will be prompted to enter: Start Date and End Date,
Frequency & Units, Duration & Units, Visit Count.
The visit count will auto-count down every session and be available to review in the Calendar and Chart Note.
✨ **Smart Tip**: If you enter a Start Date, Frequency, and Duration, the system will automatically calculate the End Date and Visit Count.
### **Diagnosis Codes**
Diagnosis Codes will be auto-populated through Scribe, however, you are recommended to review them in detail before submitting the chart note.
To manually add a \*\*Diagnosis Code: \*\*Select ICD-10 codes from the drop down. Click on the Reorder List button to review the code list and drag codes to reorder them.
 ### **Other sections in the Chart Note**
In addition to the Plan of Care and Diagnosis sections, you can view other sections such as:
* [Goals](/air_provider/fill_a_chart_note/other_sec_chart_note#goals)
* [Treatments](/air_provider/fill_a_chart_note/other_sec_chart_note#treatments)
* [**Visits**](/air_provider/fill_a_chart_note/other_sec_chart_note#visits)
* [**Medications**](/air_provider/fill_a_chart_note/medications), [**Medication Order Set**](/air_provider/fill_a_chart_note/medication_order_set), and [**Prescriber Agents**](/air_provider/fill_a_chart_note/prescriber_agents)
* [**Flowsheets**](/air_provider/fill_a_chart_note/flowsheets)
* [Measurements](/air_provider/fill_a_chart_note/other_sec_chart_note#measurements)
* [**Functional Outcome Measurements**](/air_provider/fill_a_chart_note/functional_outcomes)
Add a section to the Chart Note by selection options from the dropdown.
**Note:** Adding a **Flowsheet** section will remove the **Treatments** section.
## Smart fill your Chart Note using AI Scribe
### **Other sections in the Chart Note**
In addition to the Plan of Care and Diagnosis sections, you can view other sections such as:
* [Goals](/air_provider/fill_a_chart_note/other_sec_chart_note#goals)
* [Treatments](/air_provider/fill_a_chart_note/other_sec_chart_note#treatments)
* [**Visits**](/air_provider/fill_a_chart_note/other_sec_chart_note#visits)
* [**Medications**](/air_provider/fill_a_chart_note/medications), [**Medication Order Set**](/air_provider/fill_a_chart_note/medication_order_set), and [**Prescriber Agents**](/air_provider/fill_a_chart_note/prescriber_agents)
* [**Flowsheets**](/air_provider/fill_a_chart_note/flowsheets)
* [Measurements](/air_provider/fill_a_chart_note/other_sec_chart_note#measurements)
* [**Functional Outcome Measurements**](/air_provider/fill_a_chart_note/functional_outcomes)
Add a section to the Chart Note by selection options from the dropdown.
**Note:** Adding a **Flowsheet** section will remove the **Treatments** section.
## Smart fill your Chart Note using AI Scribe
### **Patient Consent for Scribe**
Re-confirm patient consent before recording. Patient consent will be taken as part of the Patient Intake Form
### **Record using Scribe**
* Click the blue button in the bottom-right corner to open the AI Widget
* Select **Scribe**
* Click **Start Recording**. You can minimize the widget and continue working within the EHR
\*\*Note: \*\*The scribe can translate conversations from other languages as well, such as Spanish.
* End or cancel the recording when finished
✨ **Smart Tip:** While uploading, you can start a new chat on the script to ask questions about the current consultation recording.
### **Apply scribe**
* Review the generated content in the Scribe Application Page. Scroll through the Tabs to review all sections
* Each section includes a checkbox to apply or exclude the scribe output into the Chart Note.
* Click **Apply Scribe**
* \*\*Note: \*\*Scribe can auto-populate all sections, however, we recommend filling the flowsheet interventions manually.
Note: You can also [lock a section to disable the scribe](/air_provider/fill_a_chart_note/scribe_faq#how-do-i-lock-sections-from-ai-scribe) for that section.
✨ **Smart Tip**: Use **Reapply Scribe** to restore the most recent recording if you need to revert back. This is helpful if you've edited fields after scribing.
Alternate Option: [**Air scribe (mobile app)**](https://athelas-public.notion.site/Air-Scribe-User-Guide-1dcf92a633f28089ad12c6783d5b8ec0)
### **Quickly access scribes**
The **Visits** tab provides a quick view of today’s appointments. It displays only the appointments assigned to your provider.
* **If a scribe already exists** for an appointment, clicking the appointment opens the **Scribe Application Page**, where you can review and apply the scribe to the patient’s Chart Note.
* **If no scribe exists,** clicking the appointment opens the **New Recording Page**, where you can start a new audio recording for the visit.
You can also view past or upcoming appointments by selecting a date in the **date picker** at the top or by using the **left and right arrows** to move one day forward or backward.
### **Update your text using Athelas AI**
Select the text and click on **Cmd / Ctrl + K**. Select the update type to the text.
You can choose to select or reject the change which will automatically update in the Chart Note.
### **Review Section Updates**
Click the “Last updated” button in the heading of a section to view updates made.
Click on a change log to view the detailed changes.
## Other ways to fill your Chart Note
### **Dictate into a section**
More details: [EHR Dictation v1 User Guide](https://www.notion.so/EHR-Dictation-v1-User-Guide-1c9f92a633f28000a6e7e0517ece550a?pvs=21)
Once a note is generated, you have the option to add more content through a direct dictation. Dictation allows you to use your voice to enter text directly into a Chart Note.
* Open Athelas AI and click **Dictate**.
* Speak normally and watch text appear in real time.
* Smart punctuation automatically inserts commas, periods, and question marks based on sentence structure.
* Click **Stop** to end dictation.
Note: Punctuations cannot be dictated (e.g. there is no need to say "comma"), the AI will auto infer the required punctuations based on the sentence.
### **Pull from a previous Chart Note**
Click the curled arrow icon in any section to import data from a patient’s prior Chart Note.
**Note**: Historical data can only be pulled forward between appointments of the same Case.
### **Use pre-defined Text Snippets**
Type "/**"** in a text field to quickly insert pre-made text snippets.
**Note**: You can customize your text snippets from the **Preferences tab.**
To set up snippets that guide **AI Scribe** note generation, see [**Scribe Text Snippets & Macros**](/air_provider/fill_a_chart_note/scribe_text_snippets).
## Sign & Submit
### **Compliance Checks with Athelas AI**
**Compliance checkmarks** ensure that specific details required for compliance are captured in the Chart Note.
* If the detail is missing, the checkmark appears **grey**.
* Once the detail is documented, the checkmark turns **green**.
Click on **Review** on the bottom right of the Athelas AI widget. This will ask Athelas AI to provide a comprehensive compliance check.
* You will get a **compliance score out of 100**
* Additional recommendations to ensure no billing compliance issues related to the Chart Note.
You can also check the compliance status for each chart note section while entering it in.
### **Sign a Note**
The signature section compiles all compliance validations for review. Here, the rendering provider and any co-signers can sign the note.
\*\*Note: \*\*If you do not need a supervising provider's signature you can amend the preferences from the Providers Tab within Preferences.
* To fax the encounter to a referring provider, select their name from the dropdown, enter their fax number, and check **Fax note to referring provider**.
* You may also include a signature request section if needed.
**Note**: You can also view detailed audit logs of the Chart Note before signing the note
### Streamline Patient Care with AIR Assistant
### Preview Chart Note
Navigate to **Notarize** within the Chart Note and select **Preview Billing PDF** (next to Fax to Ref. Provider).
### **Submit Encounter**
* Sign the note under **Notarize** and click **Submit**.
* If the patient has future appointments scheduled, you can choose to update them with the completed note.
* Next, you’ll be asked if you’d like to review the appointment in RCM/Billing. Click **View Encounter Details** or **View Claim Details**, or simply click **Complete**.
### **Post Submission**
Once you sign & submit a Chart Note, you can:
Once a Chart Note is completed, it becomes visible in the [Appointments section](/air_provider/review_patient_details/patient_appts#view-chart-notes-for-an-appointment) of the Patient’s Profile.
To fax a completed chart note, click **“+Create Fax”** at the bottom of the note. A side panel will open where you can choose the fax type.
**Three fax types are available:**
* **Provider:** Select from a dropdown of referring providers within Air. If a fax number is saved for the provider, it will auto-populate.
* **Individual Fax Number:** Enter any fax number manually to send the completed chart note.
* **Imaging Request:** Sends the chart note along with an imaging request. This includes diagnosis codes, procedure codes, rule-out information, result medium, attachments, and imaging facility details.
**Note**: You can set the default PDF type in the Preferences tab which will set the default PDF to be sent as a fax (options including Billing PDF, Billing PDF without measurements, Plan of Care PDF or Physician PDF).
* **If the patient is in-office:** Change your Chart Note to a Discharge Note to automatically adjust the template and included sections.
* \*\*If the patient does not visit the office: \*\*Discharge the patient from the [case table within the Patient Profile](/air_provider/review_patient_details/patient_demog#active-and-discharged-cases)
## FAQs
### I can't see my patient's past chart notes from my old EHR
**Import Records for Past Appointments**
**Context:**
* Plan of Care details may not be migrated from the old EHR into Athelas Air.
* For returning patients seen in Air for the first time, providers will need to reference their previous documentation and set up the Plan of Care in Air.
* **This is a one-time step: once entered, the Plan of Care will automatically carry forward from note to note.**
**Open the recent-most Progress note / Initial Eval for the patient:**
* Go to the Patient's Profile → \*\*Appointments \*\*and locate the \*\*date of service \*\*of the latest Progress note / Initial Eval appointment for the case.
* Go to **Attachments**, search for the **date of service** corresponding to the note from which you want to carry forward the measurements.
* Click the **eye icon** to **view the PDF**, then **download** the PDF to your device.
**Add the note to the relevant appointment:**
* Go back to the \*\*Appointments \*\*Tab
* Click the **+ icon** to the right of the appointment → **Set Up Chart Note**.
* Select the right **Case, Appointment Type,** and **Clinical Note Type** \[Progress Note, Initial Evaluation, etc.]
* Select **For Documentation Only**. This option ensures the imported chart note is **not billable**.
* Select **Set-up.** This will open the chart note on a new screen
* Click on \*\*Import \*\*at the top right → Upload the attachment → Scribe processes the PDF.
* Track progress by clicking into \*\*Athelas AI → \*\*Select the sections you would like to pull and \*\*Apply Scribe \*\*to desired sections once complete.
* Review, edit if needed, and exit (***auto-saves, no signature required***). This information should then start pulling into all future notes made on Air.