
Overview
Key benefits of POC Tracking:
- Automated Compliance Tracking: Never miss a certification deadline.
- Risk Mitigation: Reduce claim denials due to missing or late POC signatures.
- Real-time Visibility: See all POC statuses at a glance from a single dashboard.
- Audit Trail: Complete documentation history for compliance audits.
- Workflow Support: Streamlined signature collection and follow-up.
Medicare Compliance Requirements
Initial Certification — 30-Day RuleThe Plan of Care must be signed and dated by the referring or ordering physician within 30 days of the initial evaluation appointment date (date of service).
Example: If a patient’s initial evaluation is on January 15th, the POC must be signed by February 14th.Recertification — 90-Day RulePOCs must be recertified every 90 days. This timeline is calculated from the initial evaluation date of service or the date of the previous recertification.
Example: If the initial evaluation was on January 15th, recertification is due on April 15th.
Dashboard Overview
The POC Tracking dashboard displays all Plans of Care grouped by status. Access it from the Plan of Care Tracking section in Air.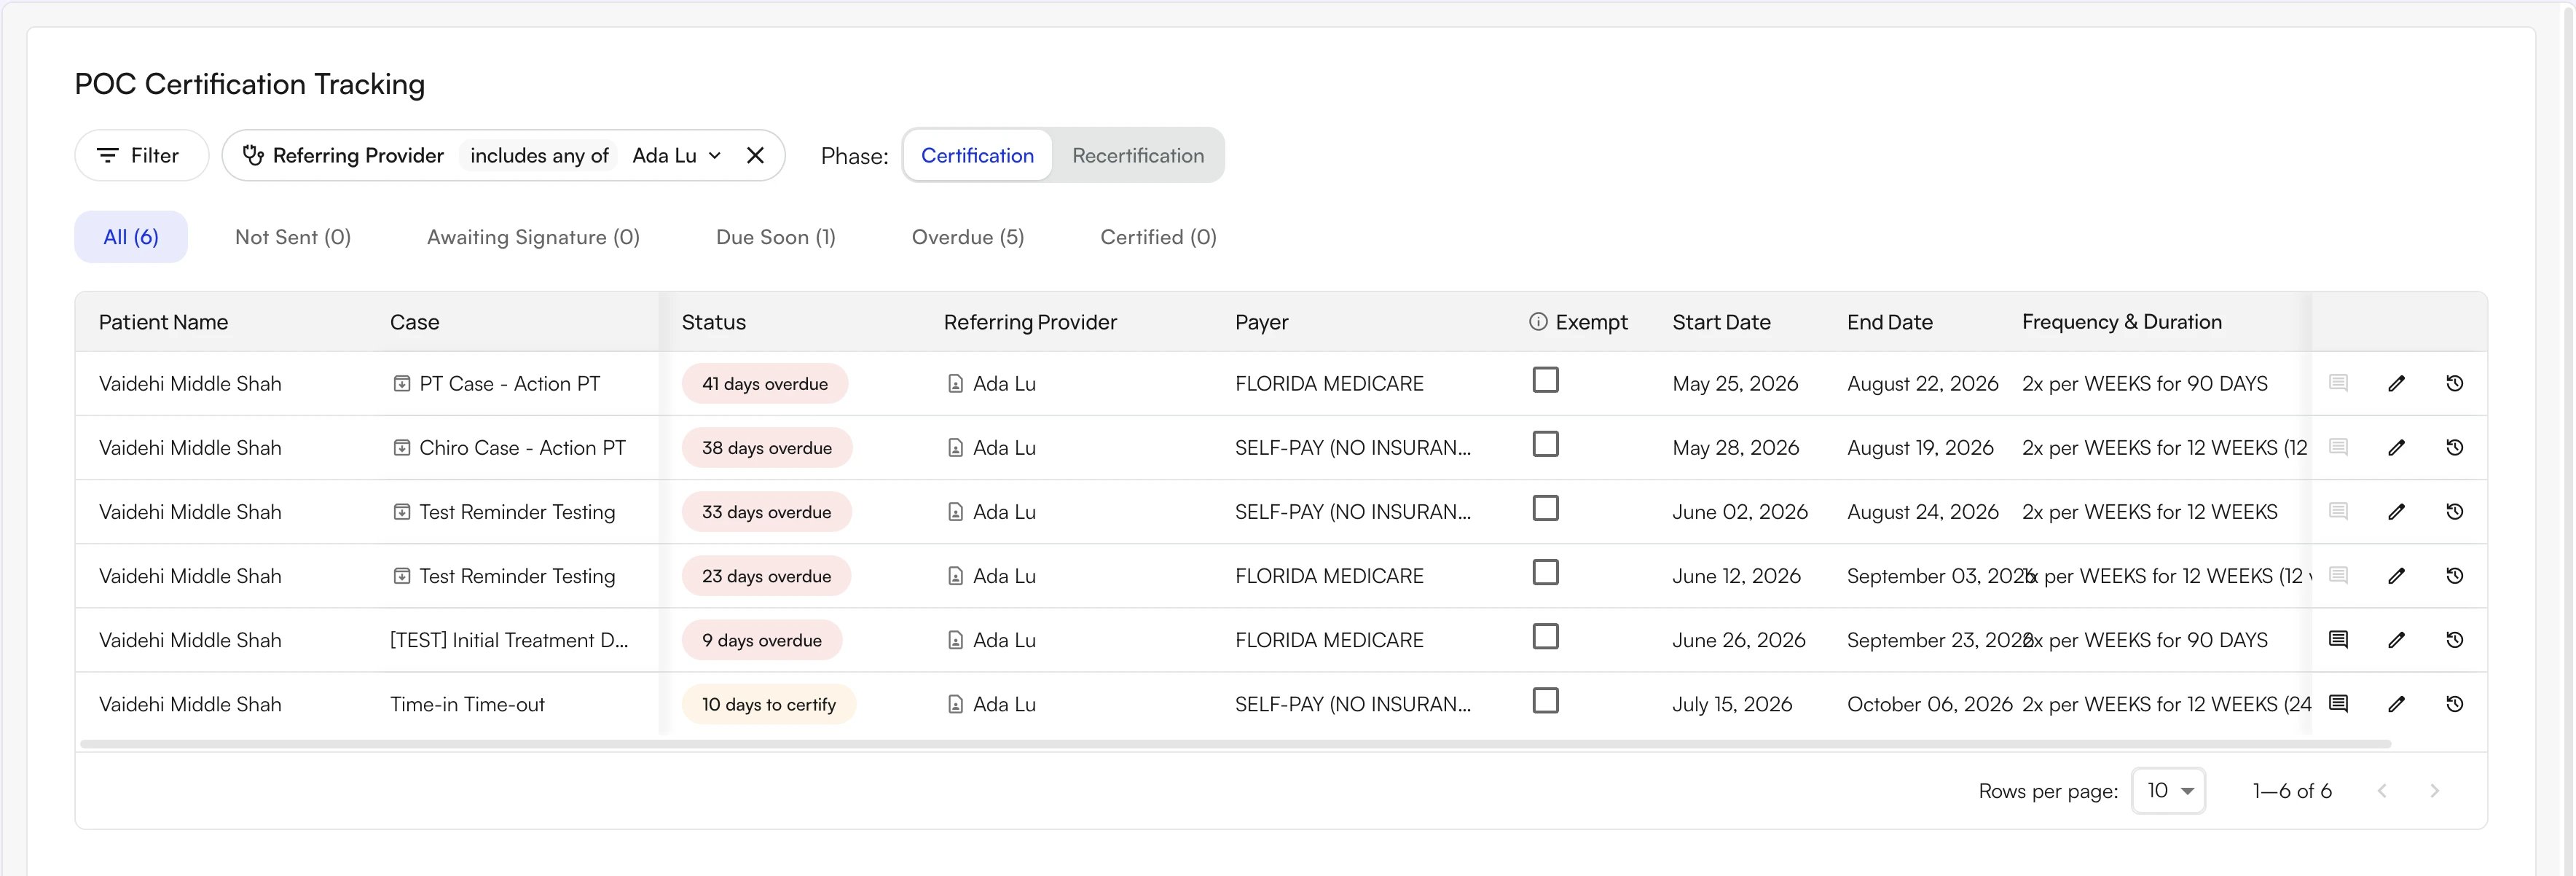
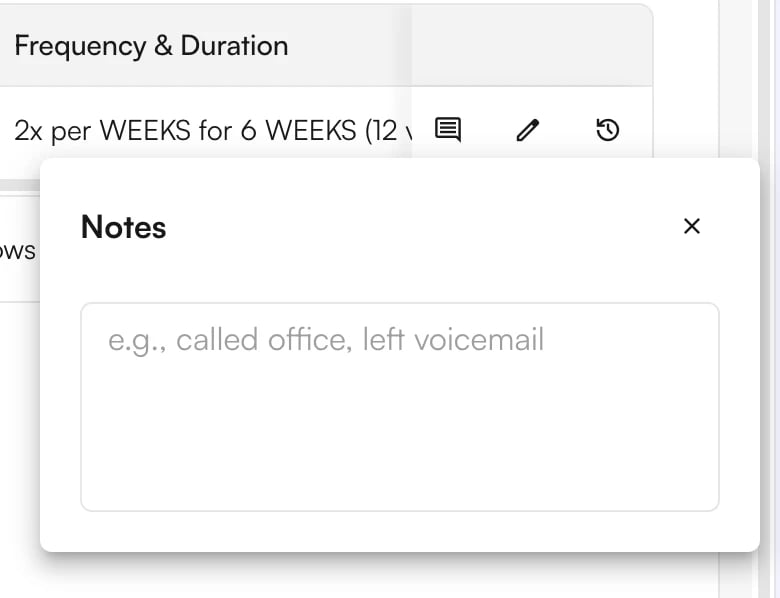
Each tab shows its row count in parentheses. Use the Phase: toggle above the tabs to switch between the Certification phase (initial evaluations) and the Recertification phase.Filter OptionsClick Filter (or press f) to add a filter. You can combine:
- Patient
- Referring Provider
- Payer
- Insurance Type
- Facility
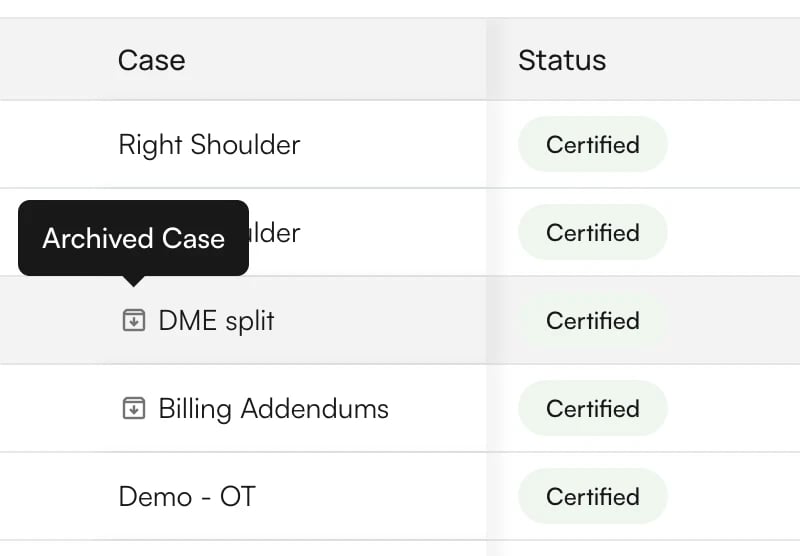
- Case Status — All Cases, Open, or Closed
Saved Views
A saved view stores a filter combination under a name so you can return to that combination with one click. Views appear as chips at the top-left of the dashboard, next to the Phase: toggle. The built-in All view is always first, followed by the views you have saved.
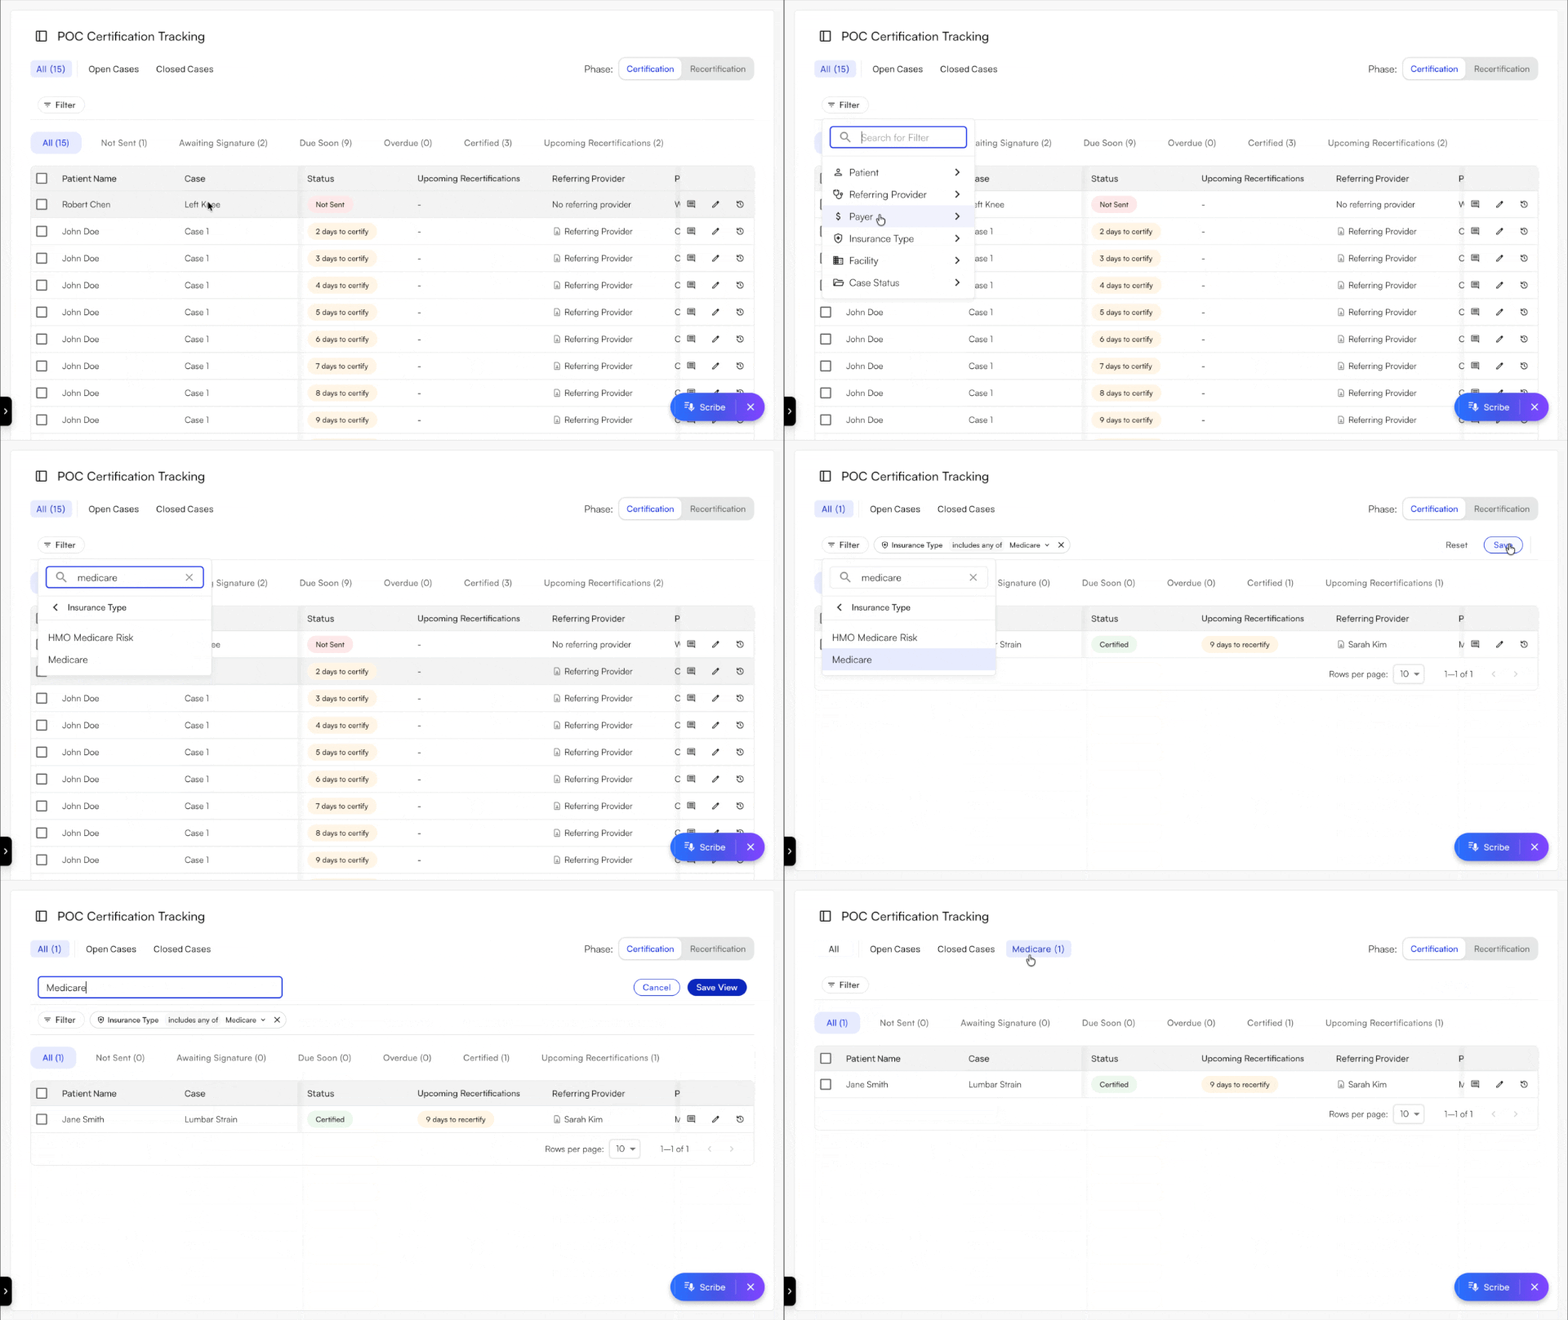
- Add the filters you want, for example Insurance Type set to Medicare.
- Click Save on the right of the filter row. The Reset button next to Save discards your changes instead.
- Type a name of at least 3 characters in the Name your view… field.
- Click Save View. The new view becomes the selected chip.
POC Tracking Preferences
Configure how the system handles faxing and tracking from your practice settings.Auto-Faxing Eval NotesDetermines when an evaluative note is automatically faxed to the referring physician:
- Always — Fax every evaluative note automatically.
- POC Updates — Fax only when the POC is created or updated.
- Never — Do not auto-fax; staff sends manually.
- Always — Track all evaluative notes.
- POC Updates — Track only when the POC is created or updated.
Certification Workflow
Initial Certification Process
Recertification Process
Discharge WorkflowWhen a patient is discharged, the system marks the case as closed. No further recertification alerts are generated, and all documentation is retained for audit purposes.
- Case creation (automatic): When an Initial Eval note is signed, POC tracking begins automatically.
- Auto-fax: The system faxes the visit notes to the referring physician based on your preferences. If the fax fails, the case is flagged; if not sent, it moves to Not Sent status.
- Awaiting Signature: The system tracks the number of days elapsed since the date of service. At 20 days, the status changes to Due Soon. At 30 days, it changes to Overdue.
- Attach signed POC: When the signed document is received, staff attaches it and marks the case as signed. Status updates to Certified.
- Signature tracking stops: The system stops reminders and begins tracking toward the next recertification date.
Recertification Process
- Upcoming recertification alert: Once a POC is certified, the system counts toward the 90-day recertification deadline from the Plan of Care start date. From day 76 the case appears in the Upcoming Recertifications tab and column as Due Soon, and from day 91 as Overdue. The POC’s own status stays Certified throughout.
- New recertification note: When the provider submits a Re-Certification Note or Progress Note for the case, the system creates a new POC entry in the Recertification phase and clears the alert from the previous entry.
- Follow standard signature process: The new entry follows the same send-and-sign workflow as the initial certification. Its status changes to Due Soon at 76 days and Overdue at 91 days from its start date.
Discharge WorkflowWhen a patient is discharged, the system marks the case as closed. No further recertification alerts are generated, and all documentation is retained for audit purposes.
Status Types
Upcoming Recertifications
A certified POC never changes back to Due Soon or Overdue. The approaching recertification deadline is tracked separately, so you can see both facts at once: the current POC is certified, and a new one is due.Where it appears
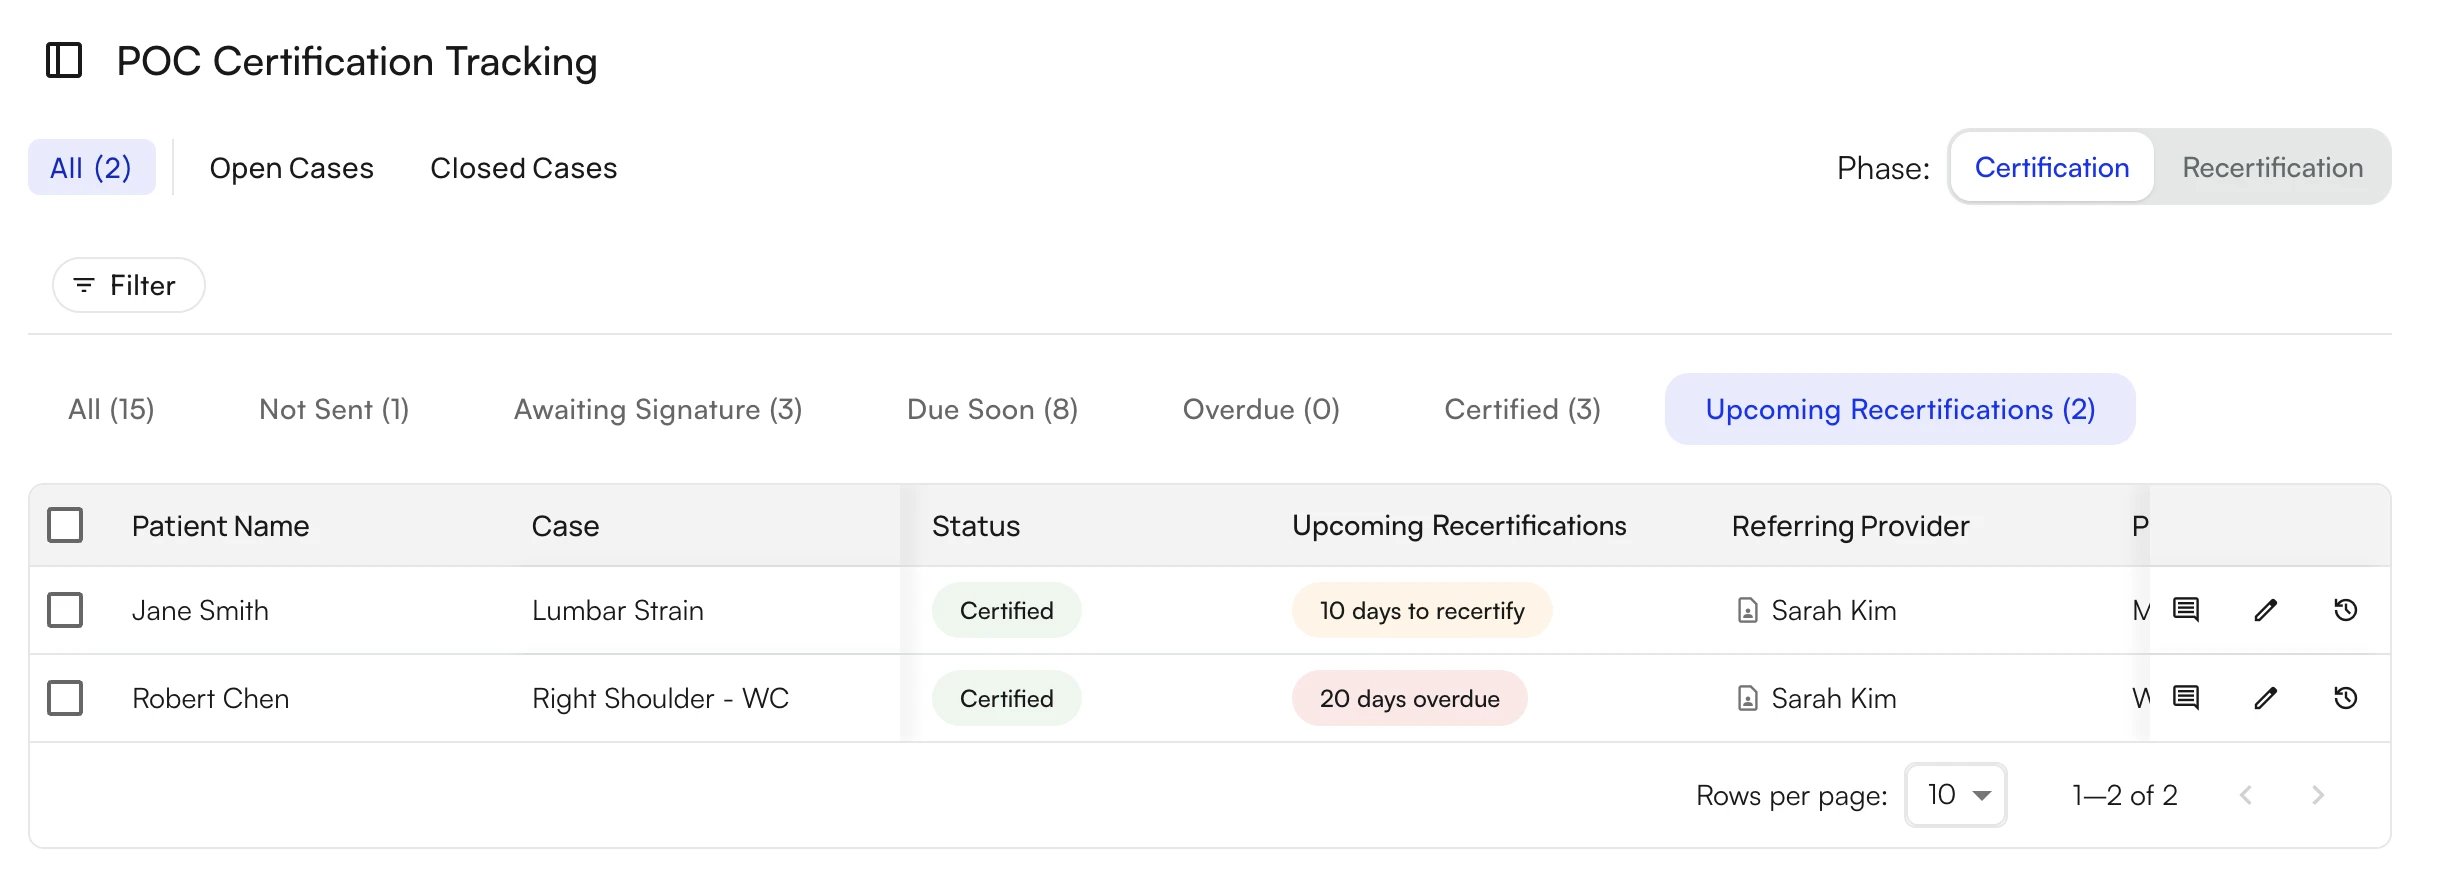
- Upcoming Recertifications column: Sits right after Status in every tab and phase. The column shows an orange N days to recertify badge from day 76 after the Plan of Care start date and a red N days overdue badge from day 91. The column is blank when nothing is due.
- Upcoming Recertifications tab: The last tab in both the Certification and Recertification phases. The tab lists only the certified POCs that currently carry a badge, and the tab label shows the count.
- The POC is certified. In the Certification phase that means signed, marked Script Exempt, or certified by an attached document. In the Recertification phase a signed POC or attached document is required.
- No newer POC has been created for the case yet.
- The case is still open.
- At least 76 days have passed since the Plan of Care start date on the chart note.
Initial Script Exemption
What is the Initial Script Exemption?A Medicare allowance that permits providers to demonstrate a “good faith effort” in obtaining a POC signature for the initial certification only. When this exemption is applied, the system stops alerting for that case and a returned signed POC is not required.Requirements to Use the Exemption
- A written referral (script) from the physician that is signed, dated, and attached to the patient’s medical record.
- Documented proof that the POC was sent within 30 days of the initial evaluation date (fax confirmation or delivery record).
- One send attempt is sufficient — you do not need to receive the POC back signed.
System Behavior When Exemption is Applied
- The system stops alerting for that certification.
- A returned signed POC is not required for compliance.
- The system still records that the POC was sent (for audit trail).
- Recertification will still require a signed POC.
- Requires both a signed script and proof that the POC was sent.
- Should only be used when the physician is unresponsive after a documented good faith effort.
- Does not apply to recertifications under any circumstances.
Tracking and Managing POCs
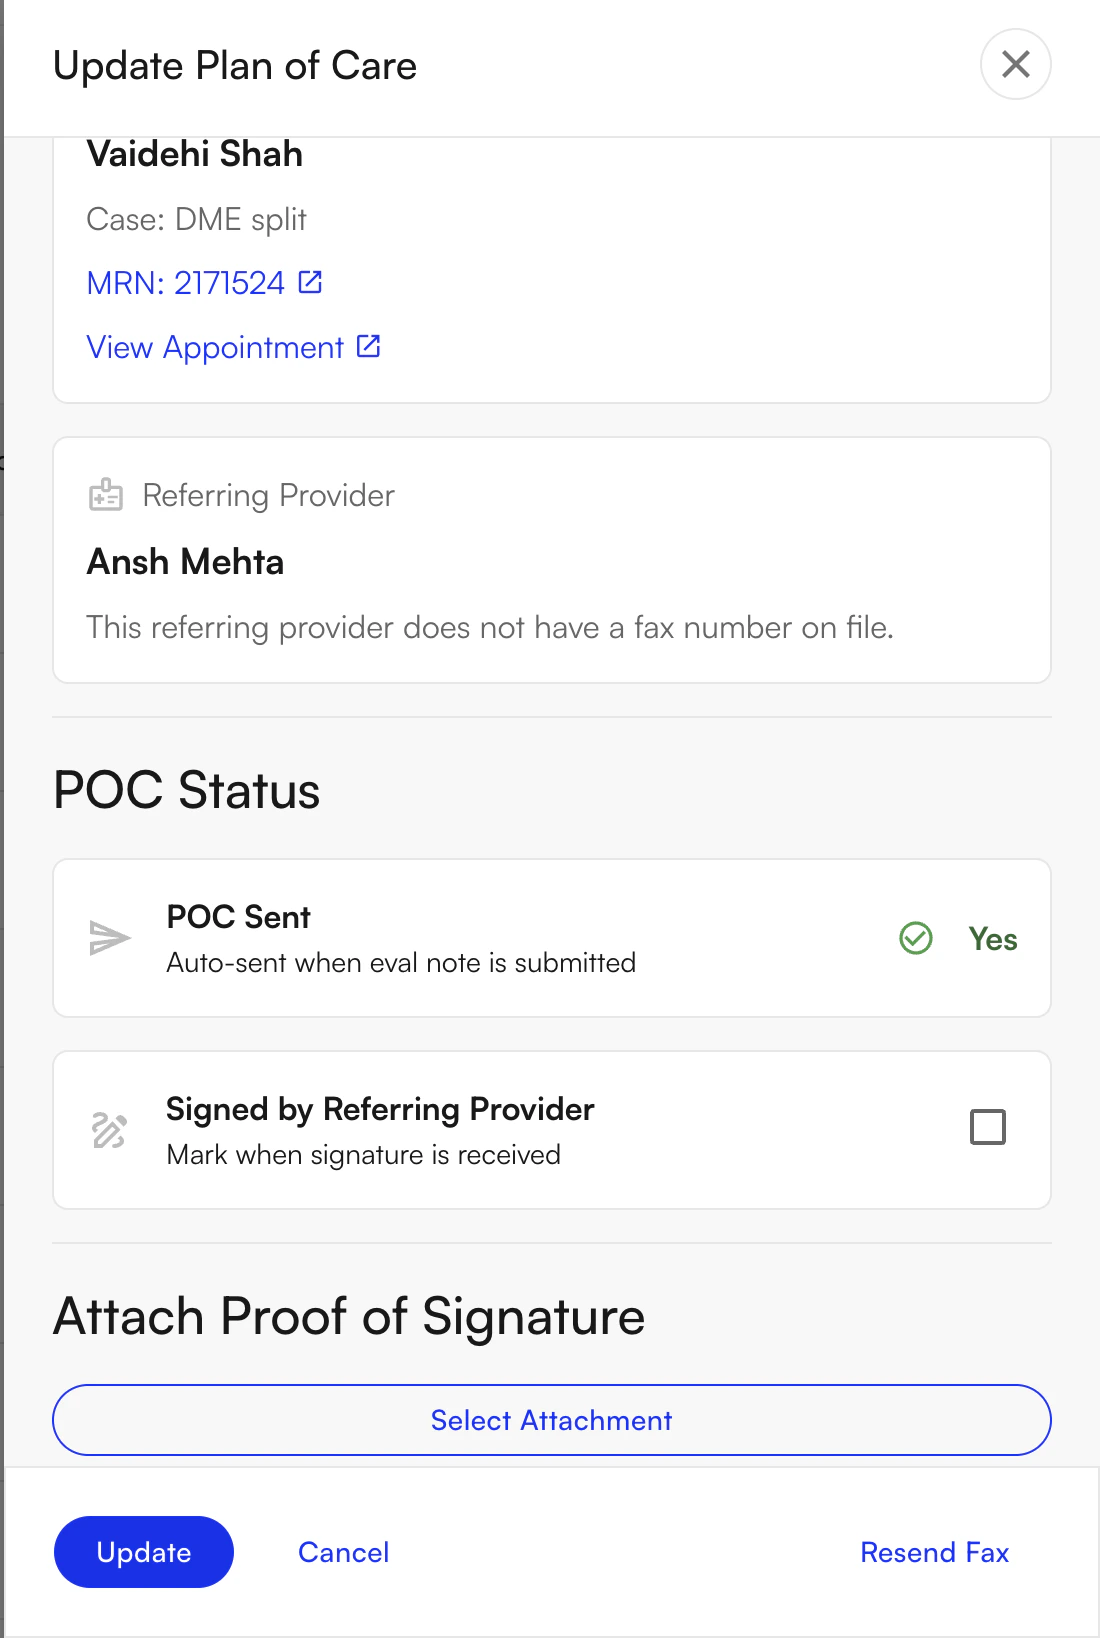
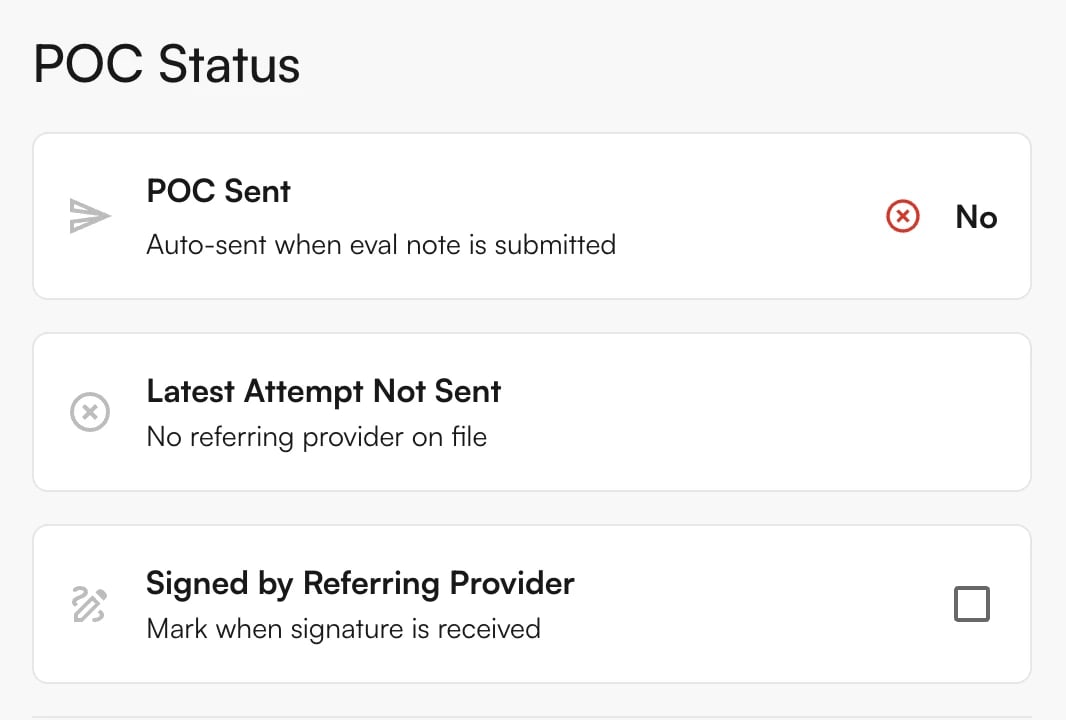
Fax Tracking in the POC DrawerThe POC Status section of the drawer shows what happened to the most recent fax, so you can trace a missing signature without leaving the tracker.Under POC Sent, the latest fax that was actually sent shows:
- Send method: Automated (sent when the note was submitted), Manual (sent from the drawer or a bulk action), or Manual (Bundle) (sent with other documents from the faxing page).
- Fax status: Delivered, Failed, In progress, Queued, Batching, Partially delivered, or Status unavailable. A failed fax also lists the Failure reason in red.
- View Fax: opens the fax record on the Faxing page in a new tab.
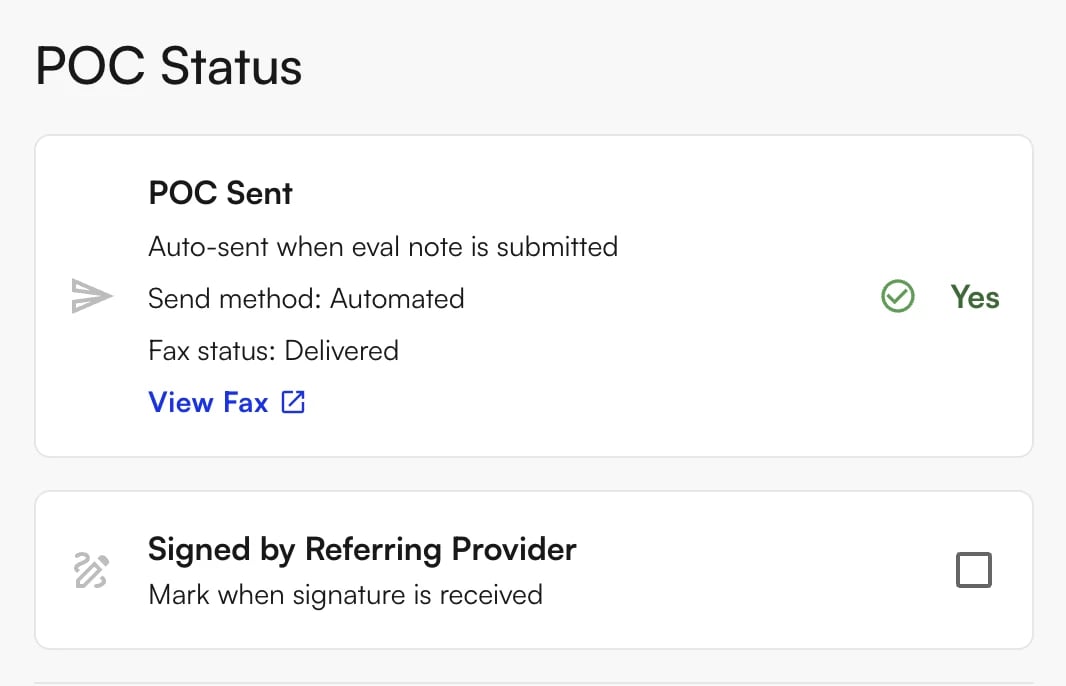
Sending a POC to a PhysicianTo send or resend a POC:
- Navigate to the patient’s case in the dashboard.
- Click Resend Fax or the fax icon.
- The system automatically sends the POC via fax, updates the status to Awaiting Signature, and begins tracking days elapsed.
Marking a POC as SignedTo mark a POC as certified:
- Click the edit (pencil) icon at the end of the patient’s row.
- Click Attach Signed POC.
- Upload the signed document.
Using the Script ExemptionTo apply the Initial Script Exemption:
- Confirm you have a signed, dated referral script on file.
- Confirm the POC was sent to the referring physician at least once.
- Check Script Exempt on the case.
- Attach the signed referral script.
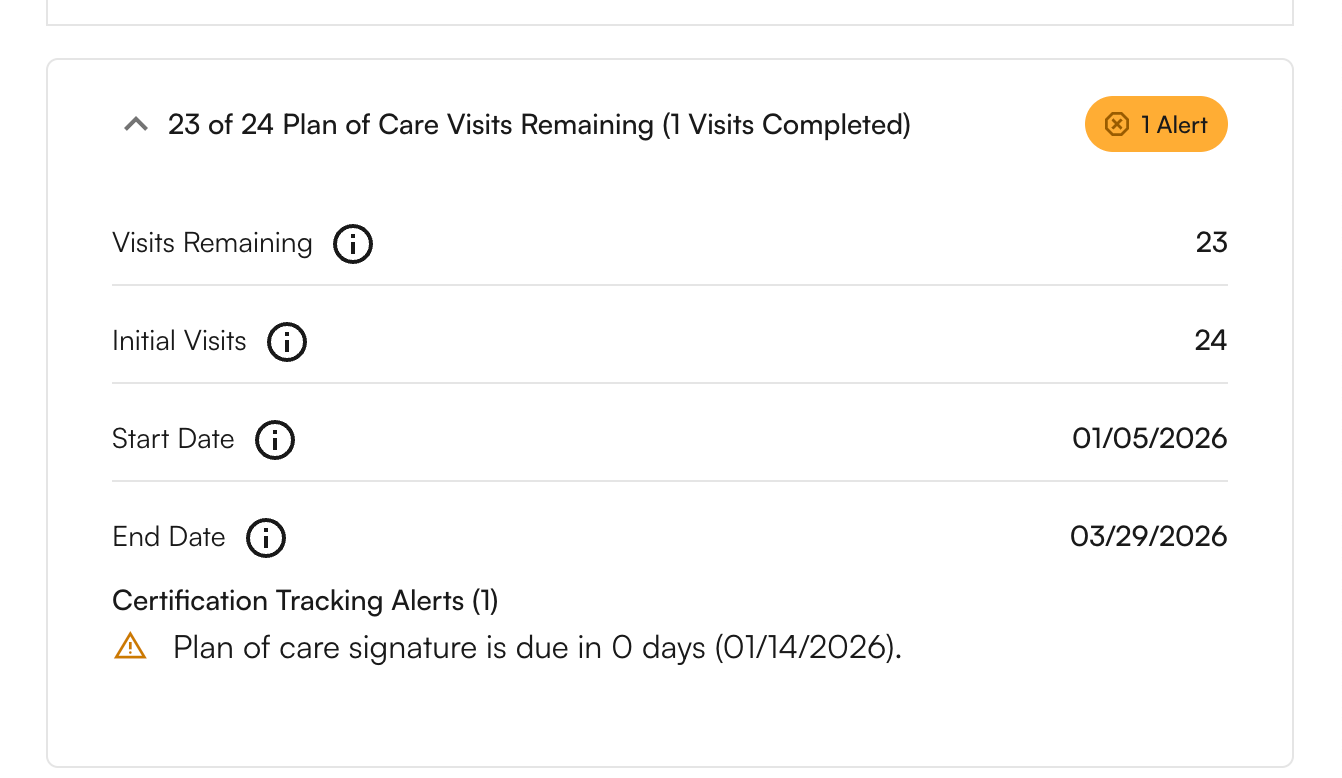
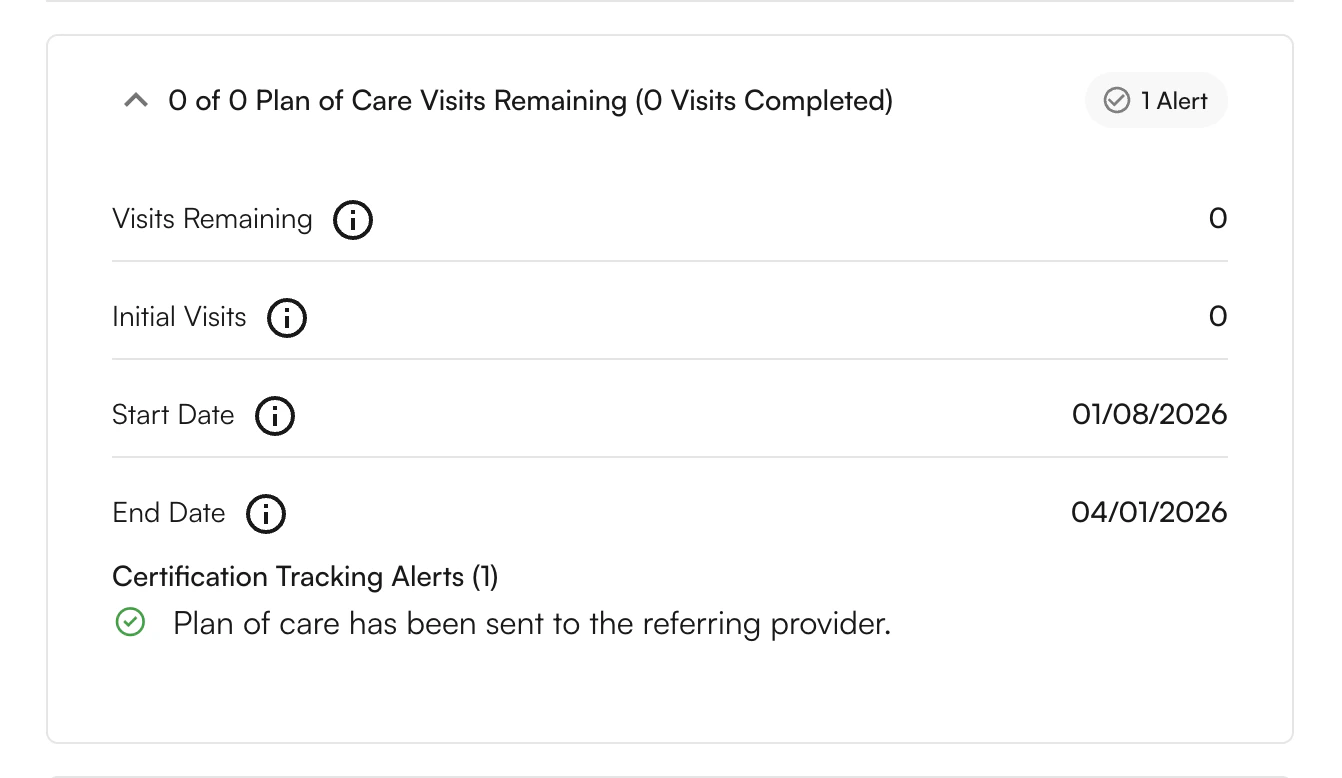
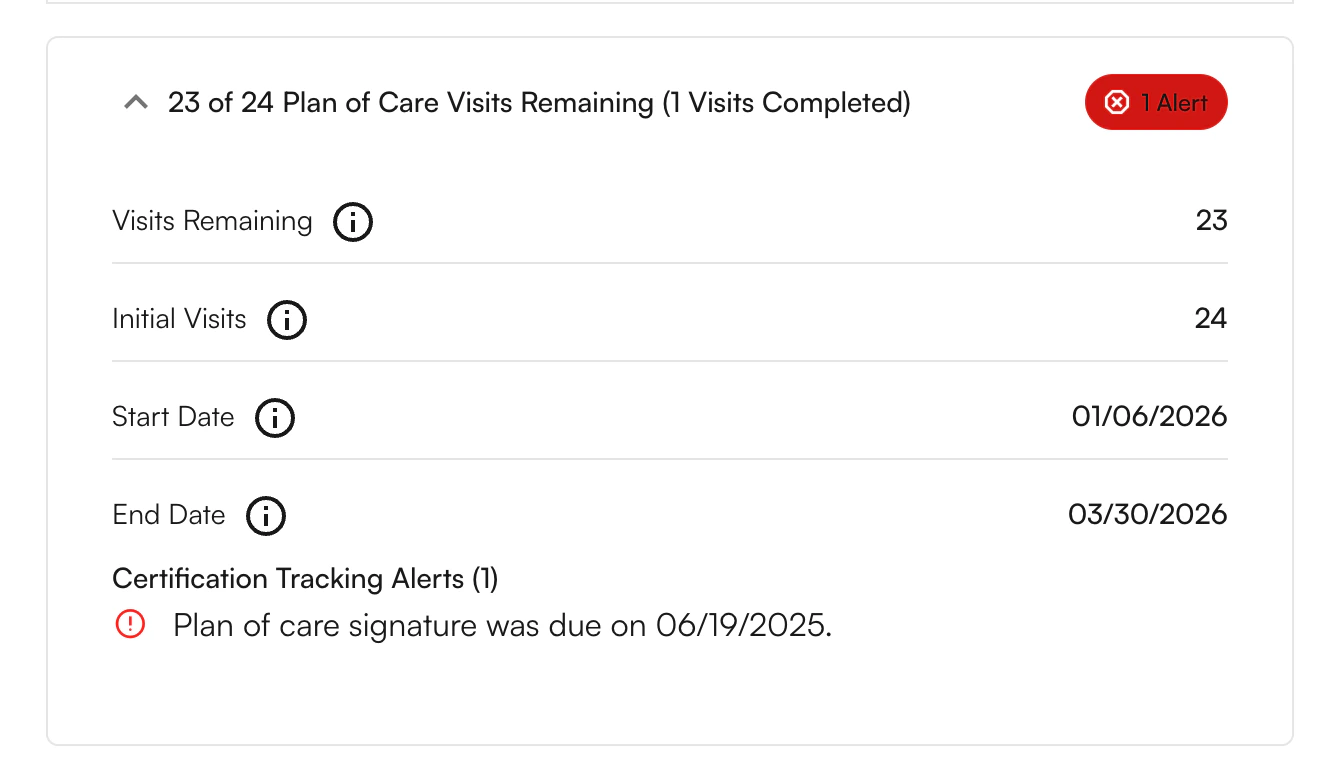
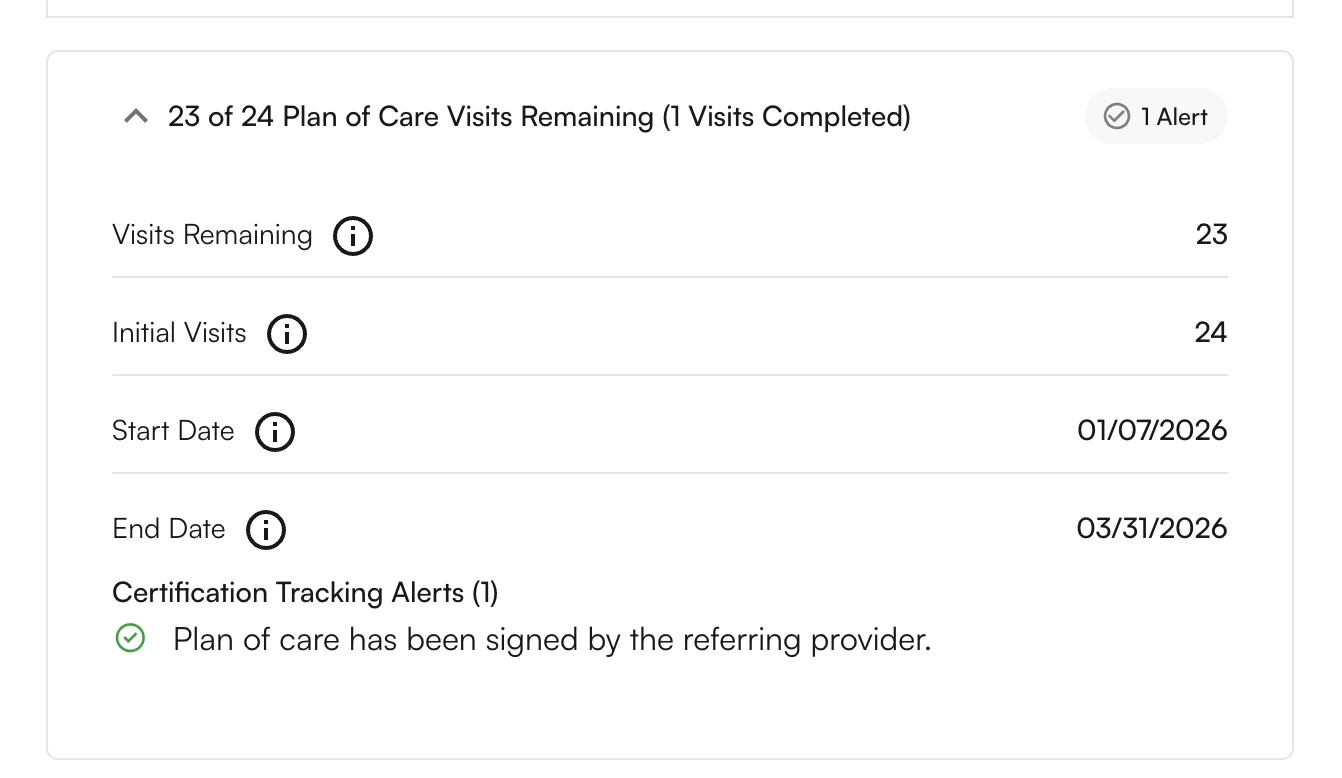
POC Alerts in the Appointment Details ModalThe Plan of Care section within the Appointment Details modal reflects the current POC alert status at the individual appointment level. The alert badge changes color based on urgency.Not Sent — The POC has been created but has not yet been sent to the referring physician. Send the POC via fax to move this case forward.
Bulk Actions
Select several POCs and act on them at once instead of opening each row.Selecting rows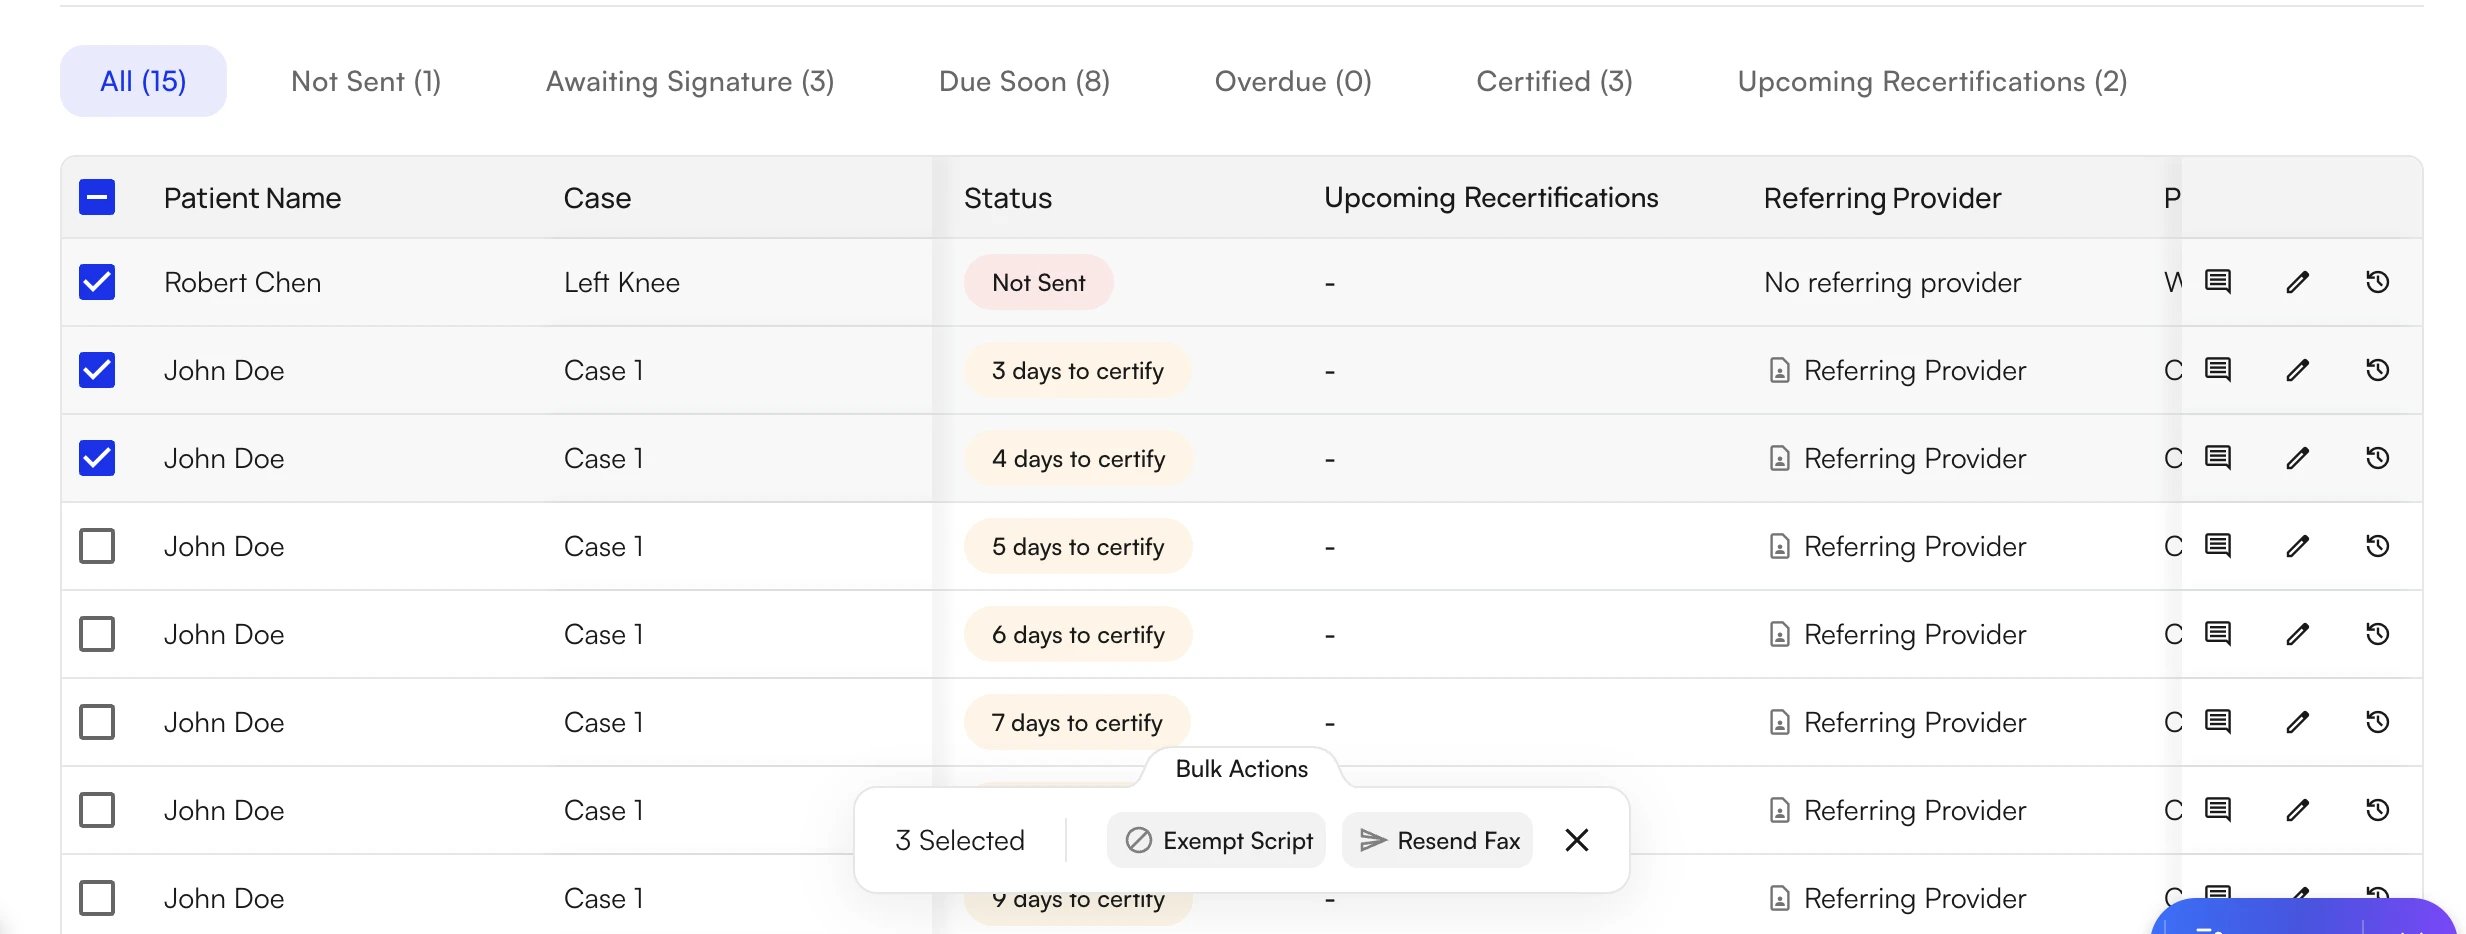
- Tick the checkbox at the start of a row to select it. Hold Shift and tick another row to select everything in between.
- Tick the checkbox in the table header to select every row on the current page. Selection covers the current page only, so change the page size (10, 20, or 50 rows) if you need more rows at once.
- A panel appears at the bottom of the screen showing how many rows are selected. Click the X (Clear selected) to start over.
Reviewing results
- When every row succeeds, a short confirmation appears, for example Resent fax for 3 plans of care.
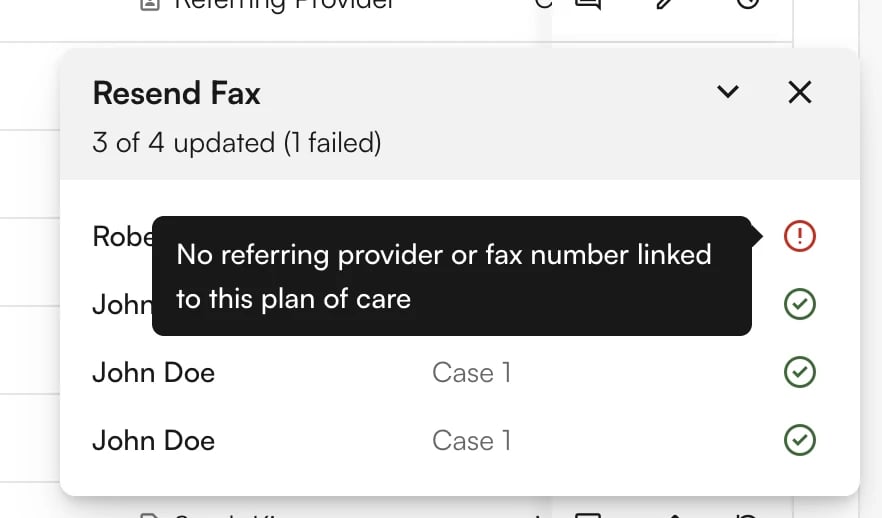
- When any row fails, a summary card opens in the bottom-right corner. The card lists each patient and case with a green check or a red error icon under a header such as 7 of 10 updated (3 failed). Hover a red icon to read why that row failed. Rows that succeeded are not rolled back.
- Common reasons a fax fails: the referring provider has no fax number on file (the system also creates a reminder task under the patient), the note is marked documentation only, or your site has no outbound fax number configured.
Best Practices
Front Desk / Care Coordination Staff
Therapists / Providers
Admins / Operations Managers
- Send POCs within 1–2 days of the initial evaluation and confirm fax delivery.
- Check the Due Soon tab every morning and follow up on cases approaching 20 days.
- Call physician offices at 20 days if no response has been received.
- Check the Upcoming Recertifications tab weekly and flag cases to the treating provider before the 90-day deadline.
- Save a view for each payer group you review, so the daily check is one click.
- Only apply the Script Exemption when a valid signed script is on file; always document that the POC was sent.
Therapists / Providers
- Finalize initial evaluation documentation within 24–48 hours so the POC is clear and ready to send.
- Review your caseload 2 weeks before a POC expires and decide whether to discharge or recertify.
- Create new POCs in advance if a patient’s condition changes significantly.
- Do not document visits without a valid POC — update or recertify before continuing treatment.
Admins / Operations Managers
- Review the dashboard regularly to identify patterns and problem areas (e.g., a specific referring provider with high overdue rates).
- Streamline the POC sending process and build relationships with high-volume physician offices.
- When one referring provider has several POCs outstanding, filter by that provider and use the Resend Fax bulk action, then follow up by phone.
- Train staff on Medicare requirements and the correct handling of Due Soon and Overdue alerts.
FAQ
Why is physician signature required on the Plan of Care?
Why is physician signature required on the Plan of Care?
Medicare requires physician certification to confirm that therapy services are medically necessary and appropriate for the patient’s condition. Without this signature, claims may be denied.
What is the difference between initial certification and recertification?
What is the difference between initial certification and recertification?
- Initial Certification: The first POC signed after the initial evaluation — must be signed within 30 days of the date of service.
- Recertification: Renewal of the POC every 90 days to continue therapy services.
Does the 30-day deadline start from when I finish documenting or when the patient was seen?
Does the 30-day deadline start from when I finish documenting or when the patient was seen?
The 30-day deadline starts from the appointment date of the initial evaluation (the date of service), not when you finish documentation or submit the claim.
What should I do if a physician does not sign within 30 days?
What should I do if a physician does not sign within 30 days?
Claims for dates of service after 30 days are at risk of denial. Document all follow-up attempts, continue pursuing the signature, and consider applying the Initial Script Exemption if you have a valid signed referral on file.
When should I use the Initial Script Exemption?
When should I use the Initial Script Exemption?
Use the Script Exemption when:
- You have a signed, dated referral script attached to the patient’s medical record.
- The POC has been sent to the physician at least once within 30 days.
- The physician is unresponsive despite a good faith effort.
What documentation do I need for an audit if I used the Script Exemption?
What documentation do I need for an audit if I used the Script Exemption?
- Signed, dated referral script attached to the patient’s medical record.
- Proof the POC was sent (fax confirmation or send record).
- The Script Exempt checkbox checked in the tracking system.
- Documentation of the attempt to obtain a signature.
What if the referring provider information on file is incorrect?
What if the referring provider information on file is incorrect?
Update the referring provider in the patient’s chart, then resend the POC to the correct physician using the Resend Fax option and attach the corrected record.
Why does a Certified POC show a recertification alert?
Why does a Certified POC show a recertification alert?
The alert and the status are two separate facts. Certified means the current POC has the required signature and keeps that status permanently. The Upcoming Recertifications badge means the 90-day recertification deadline for the next POC is within 15 days or has passed. Submit the Re-Certification Note or Progress Note for the case and the badge clears.
Can I run a bulk action on every filtered row at once?
Can I run a bulk action on every filtered row at once?
Bulk actions apply to the rows you select on the current page. Set the page size to 50 and tick the header checkbox to select the whole page, then repeat on the next page. Resend Fax accepts up to 10 rows per batch, so split larger lists into batches.
Can my teammates use the views I saved?
Can my teammates use the views I saved?
No. Saved views are private to the user who created them. Each teammate saves their own views, and there is no shared or default view for the practice.
Why was a POC not faxed automatically?
Why was a POC not faxed automatically?
Open the row with the edit (pencil) icon and look for the Latest Attempt Not Sent card in the POC Status section. The card names the reason, such as a practice setting, an appointment type that blocks auto-fax, or a missing referring provider. Fix the cause where needed and click Resend Fax.
How far back can I view POC history?
How far back can I view POC history?
The system maintains a complete historical record of all POC activity from the release date of the feature. Click the edit icon on any patient row to view the full send and status history for that case.