
Overview
With Care Team Communications you can:- Build a patient’s care team from a searchable Contact Book of providers, facilities, and hand-entered contacts.
- Decide, per contact and per case, who receives the note and by which channel.
- Review and adjust recipients inside the chart note before you sign.
- Track per-recipient delivery status and keep a record of who was sent what, and when.
Key terms
Build a patient’s care team
Care team members are added and managed in the Contact Book. Open a patient chart and click the book icon in the toolbar above the chart tabs.
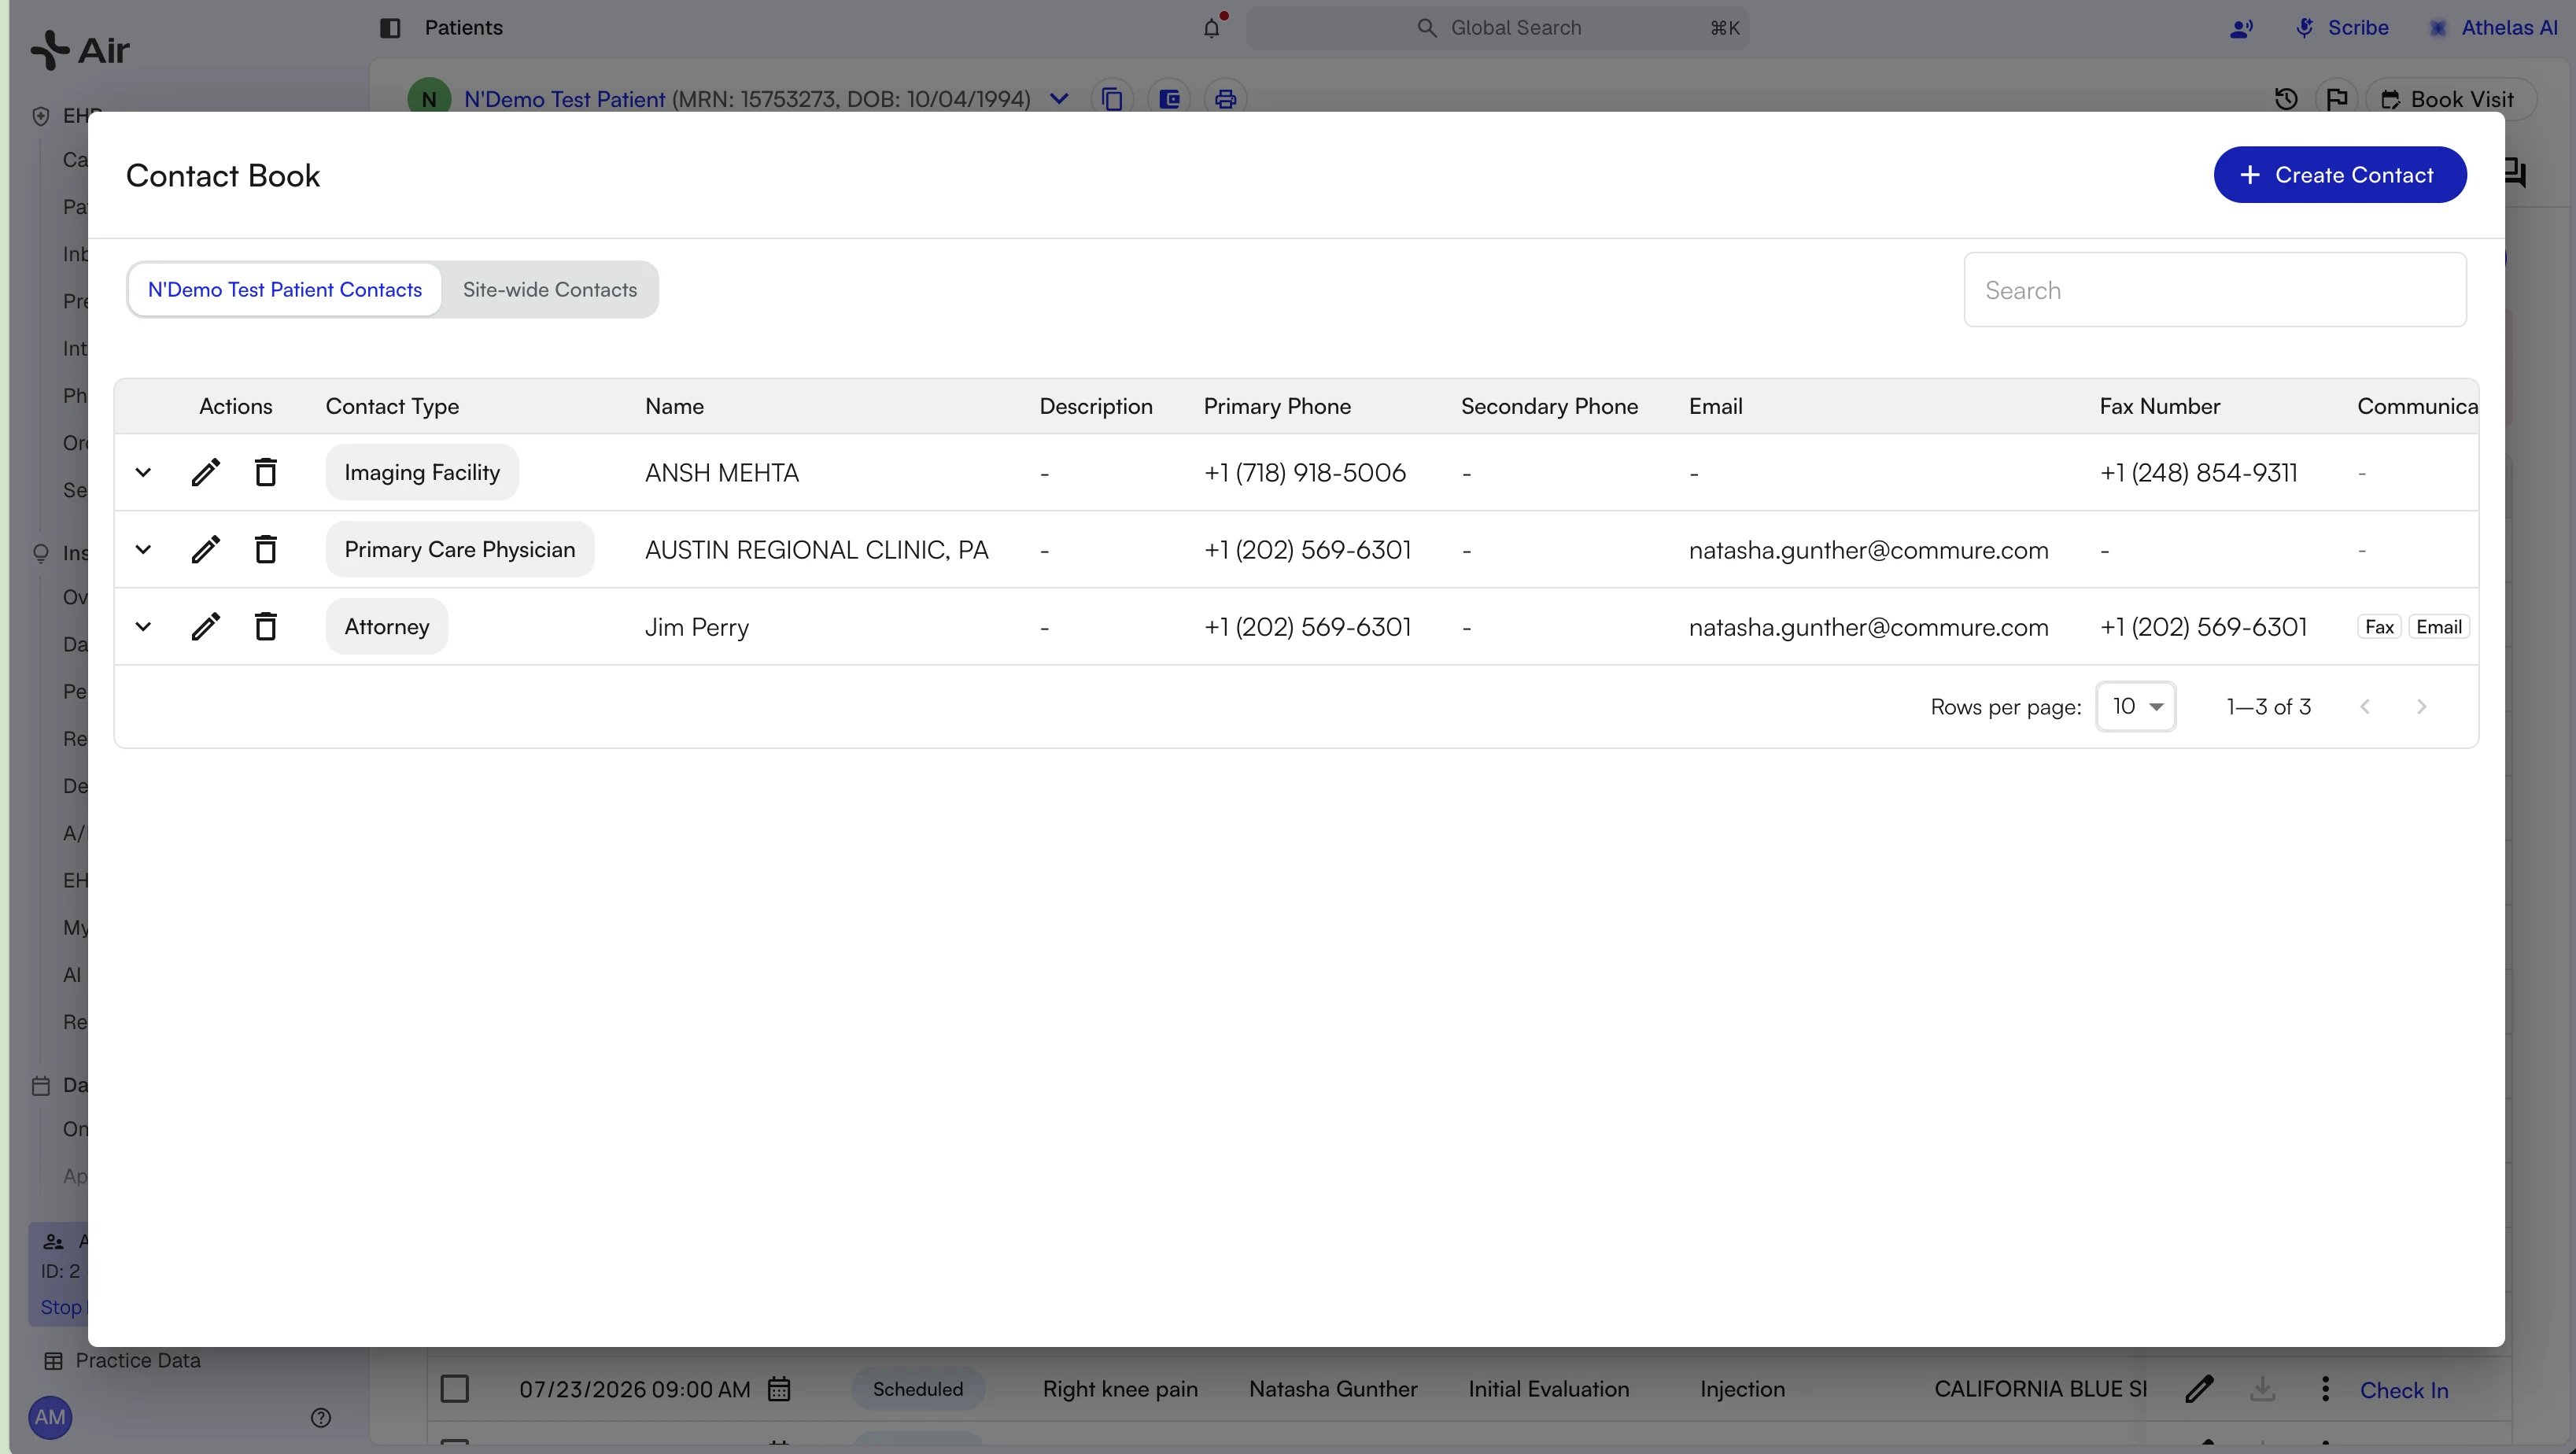
Add a provider by search
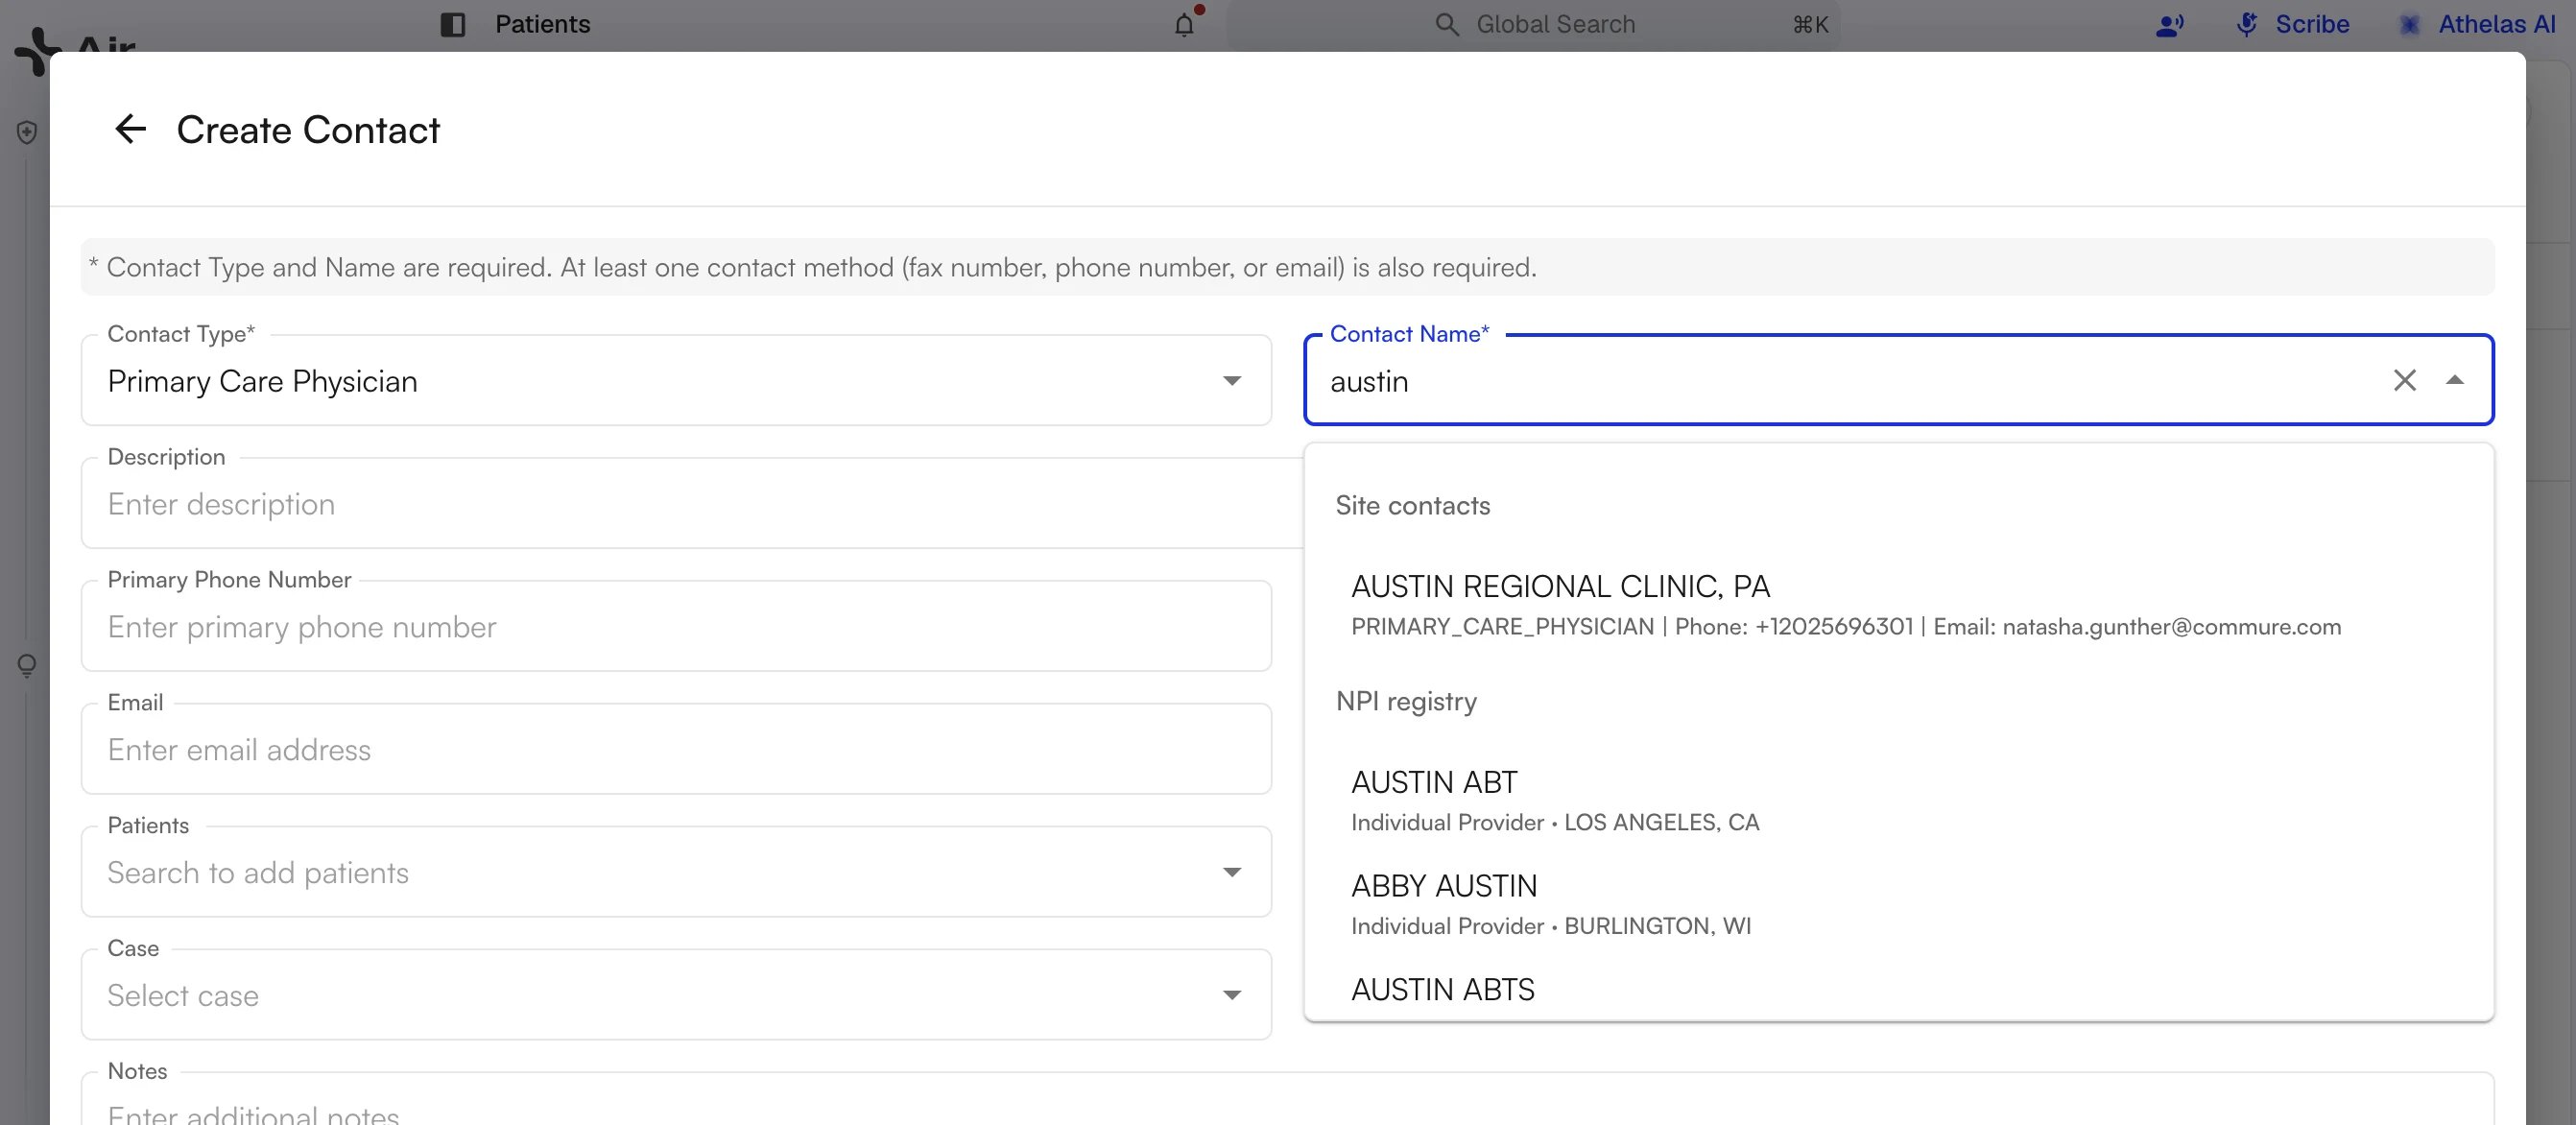
Searching is the recommended path, because it fills in the contact details for you.- Click Create Contact and choose the Contact Type.
- Start typing the provider’s name in Contact Name. Results are grouped under Site contacts, which your site already has on file, and NPI registry, the same registry Air draws referring providers from.
- Pick the right result. Name, phone, and fax populate from the record, so there is nothing to type by hand.
- Review the details and save.
Add a whole facility
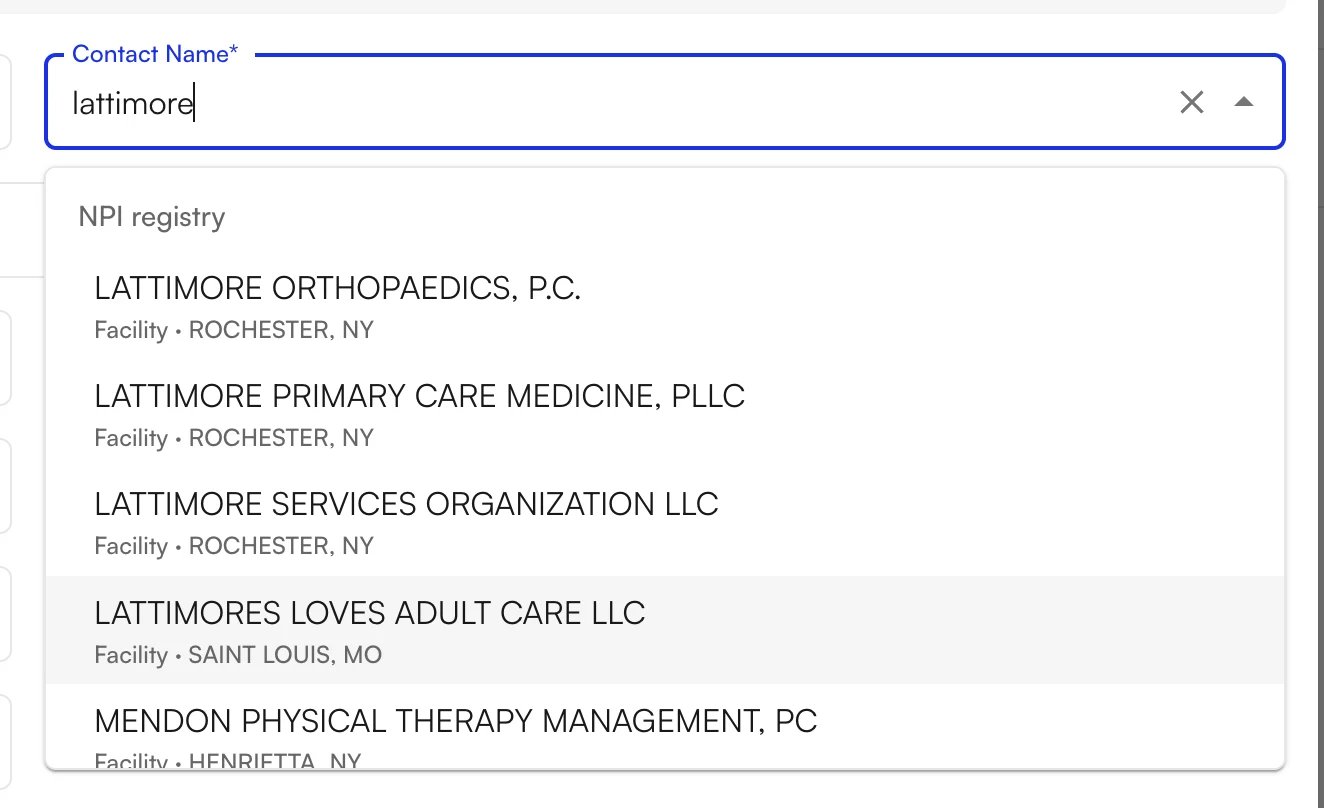
You can add an entire organization, such as a clinic or a surgery center, as a single recipient instead of a named person.- Search the facility name in Contact Name. The search covers the whole NPI registry rather than just your own facilities, and labels each result Facility with its city and state.
- Check the city and state to confirm you have the right location.
- Save. A facility behaves like any other contact: one contact type, one phone, one email, one fax, and one address.
Add a contact who is not in the registry
Attorneys, workers’ comp adjusters, nurse case managers, and DME suppliers have no NPI record, so a workers’ comp case would stall if the registry were the only way in. Enter these contacts by hand instead.- In Create Contact, choose the Contact Type. The list covers roles such as Attorney, Case Manager, DME Supplier, Imaging Facility, Authorized Representative, and Other.
- Type the name into Contact Name rather than picking a search result. This path stays open even when the search does return matches.
- Fill in the contact fields — the same ones a searched contact requires — and save.
Reuse a contact across patients
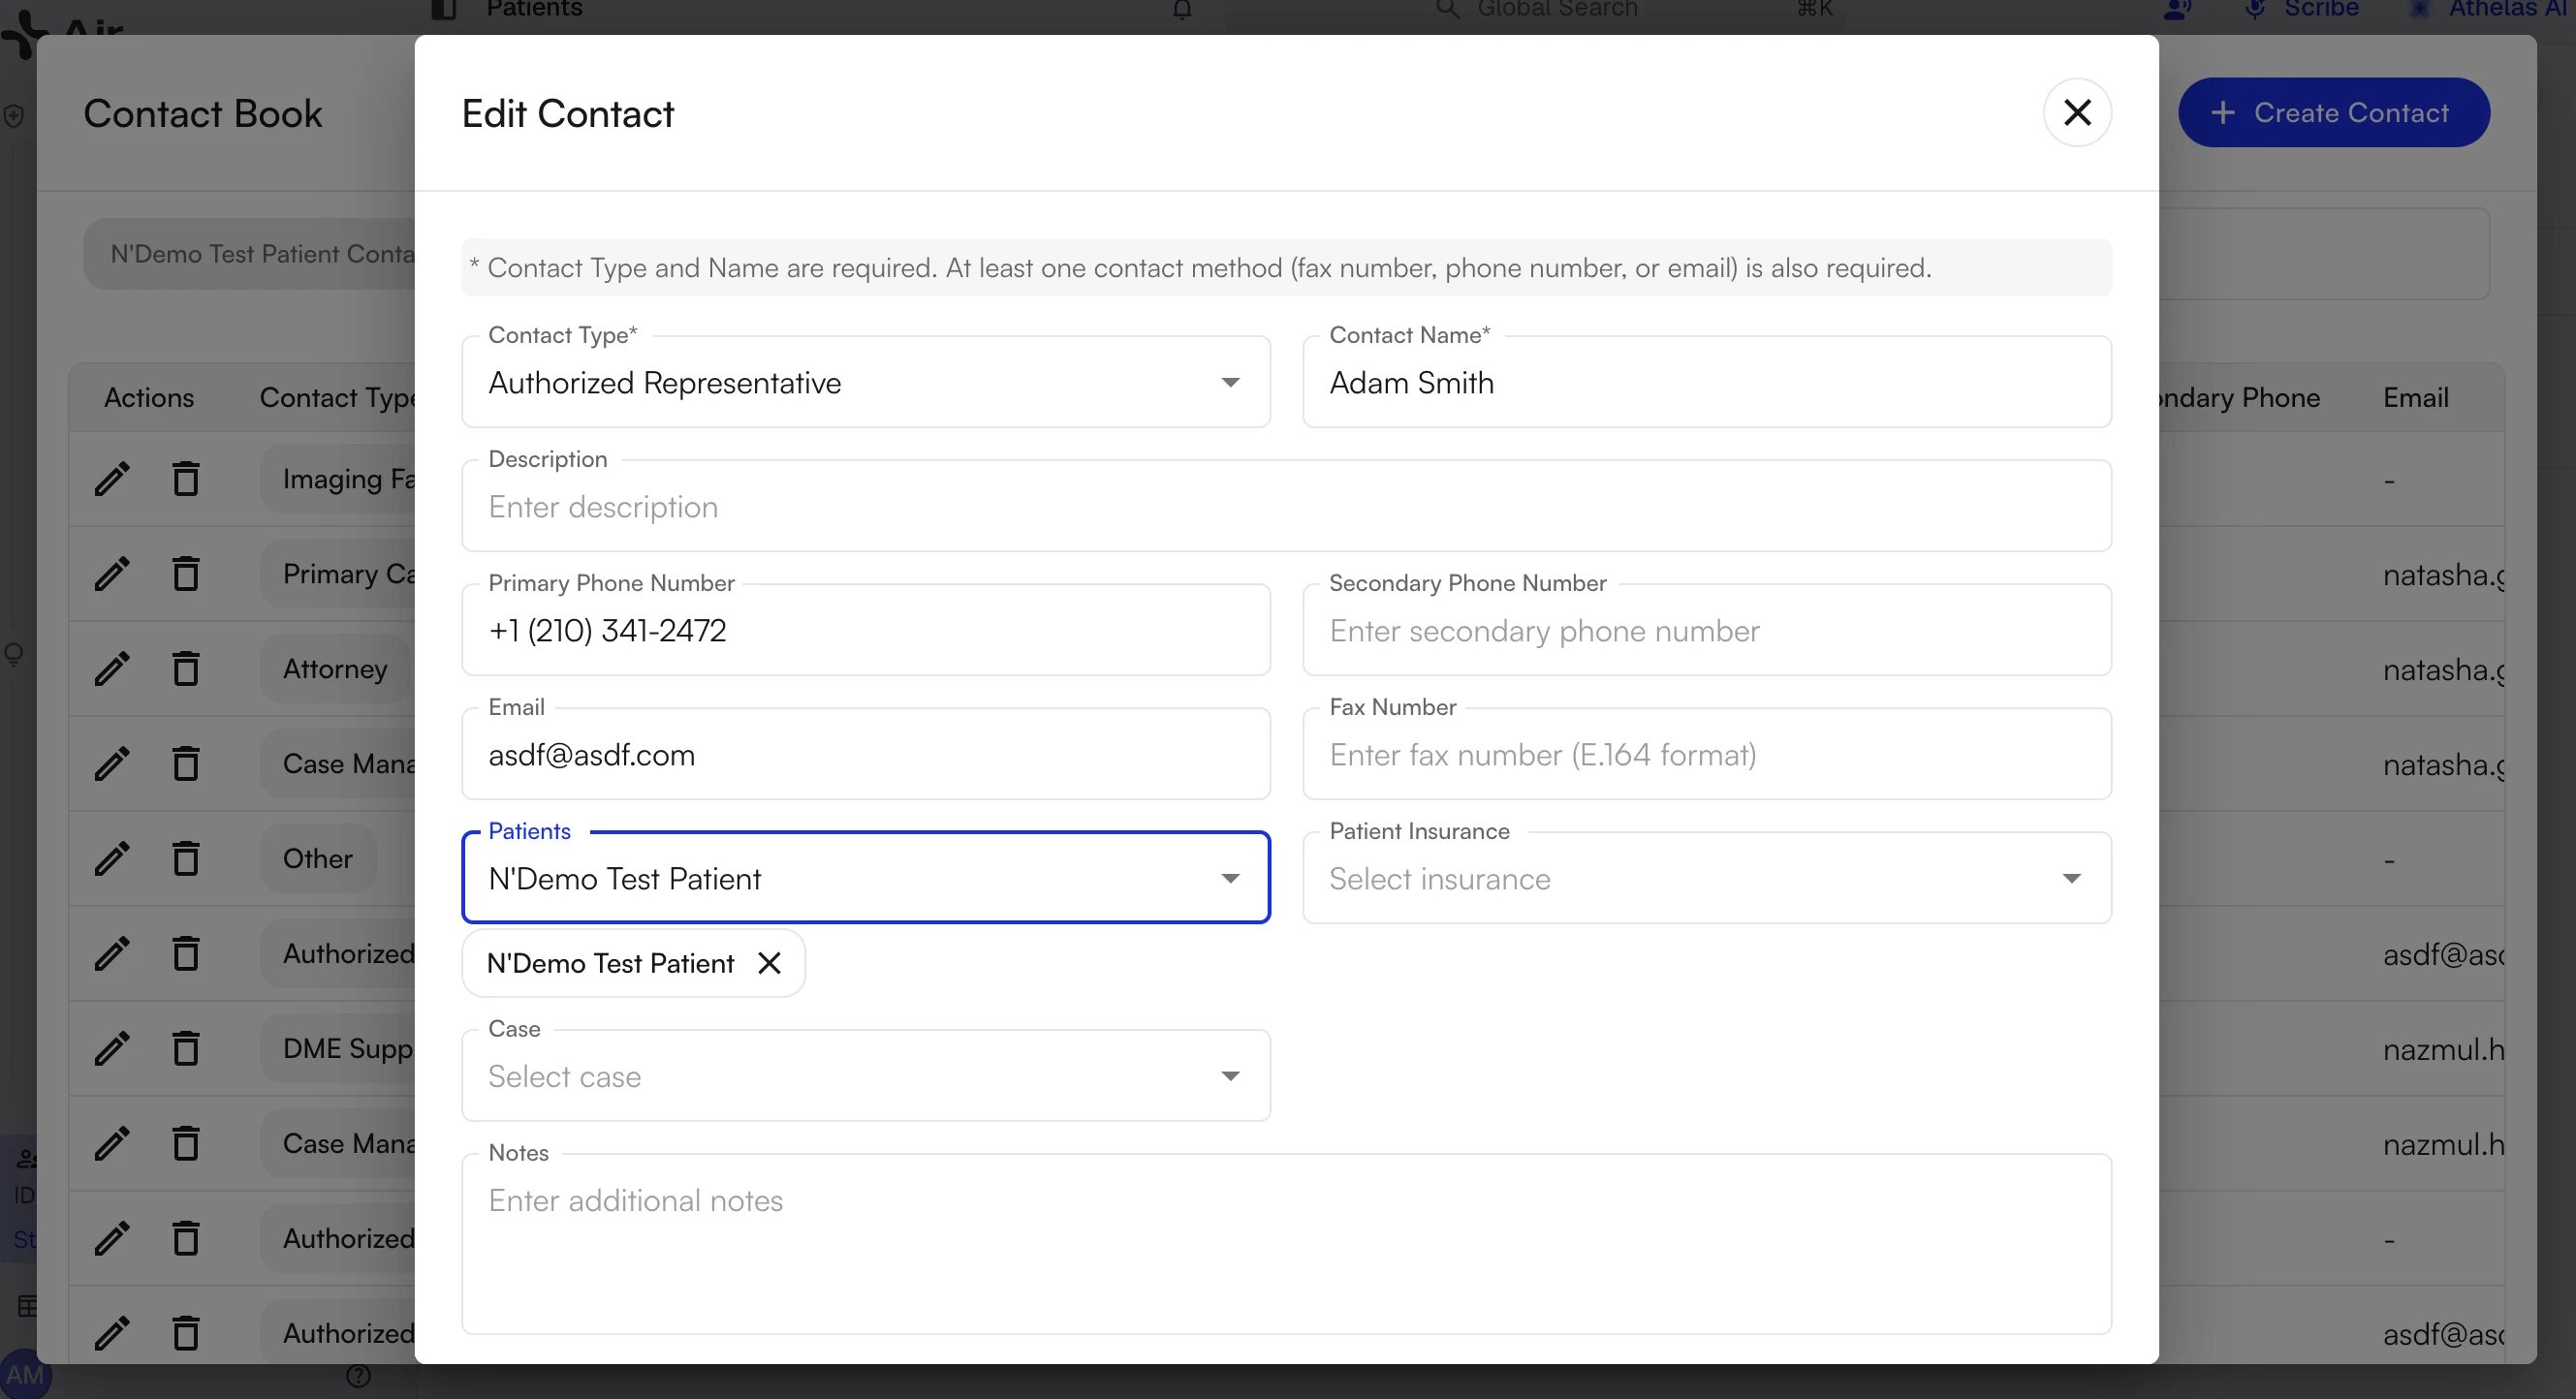
Every contact you create is added to Site-wide Contacts automatically, so a primary care physician you entered for one patient never has to be entered again. Adding a contact from a patient chart does not lock the contact to that patient.- Open the Contact Book and switch to Site-wide Contacts.
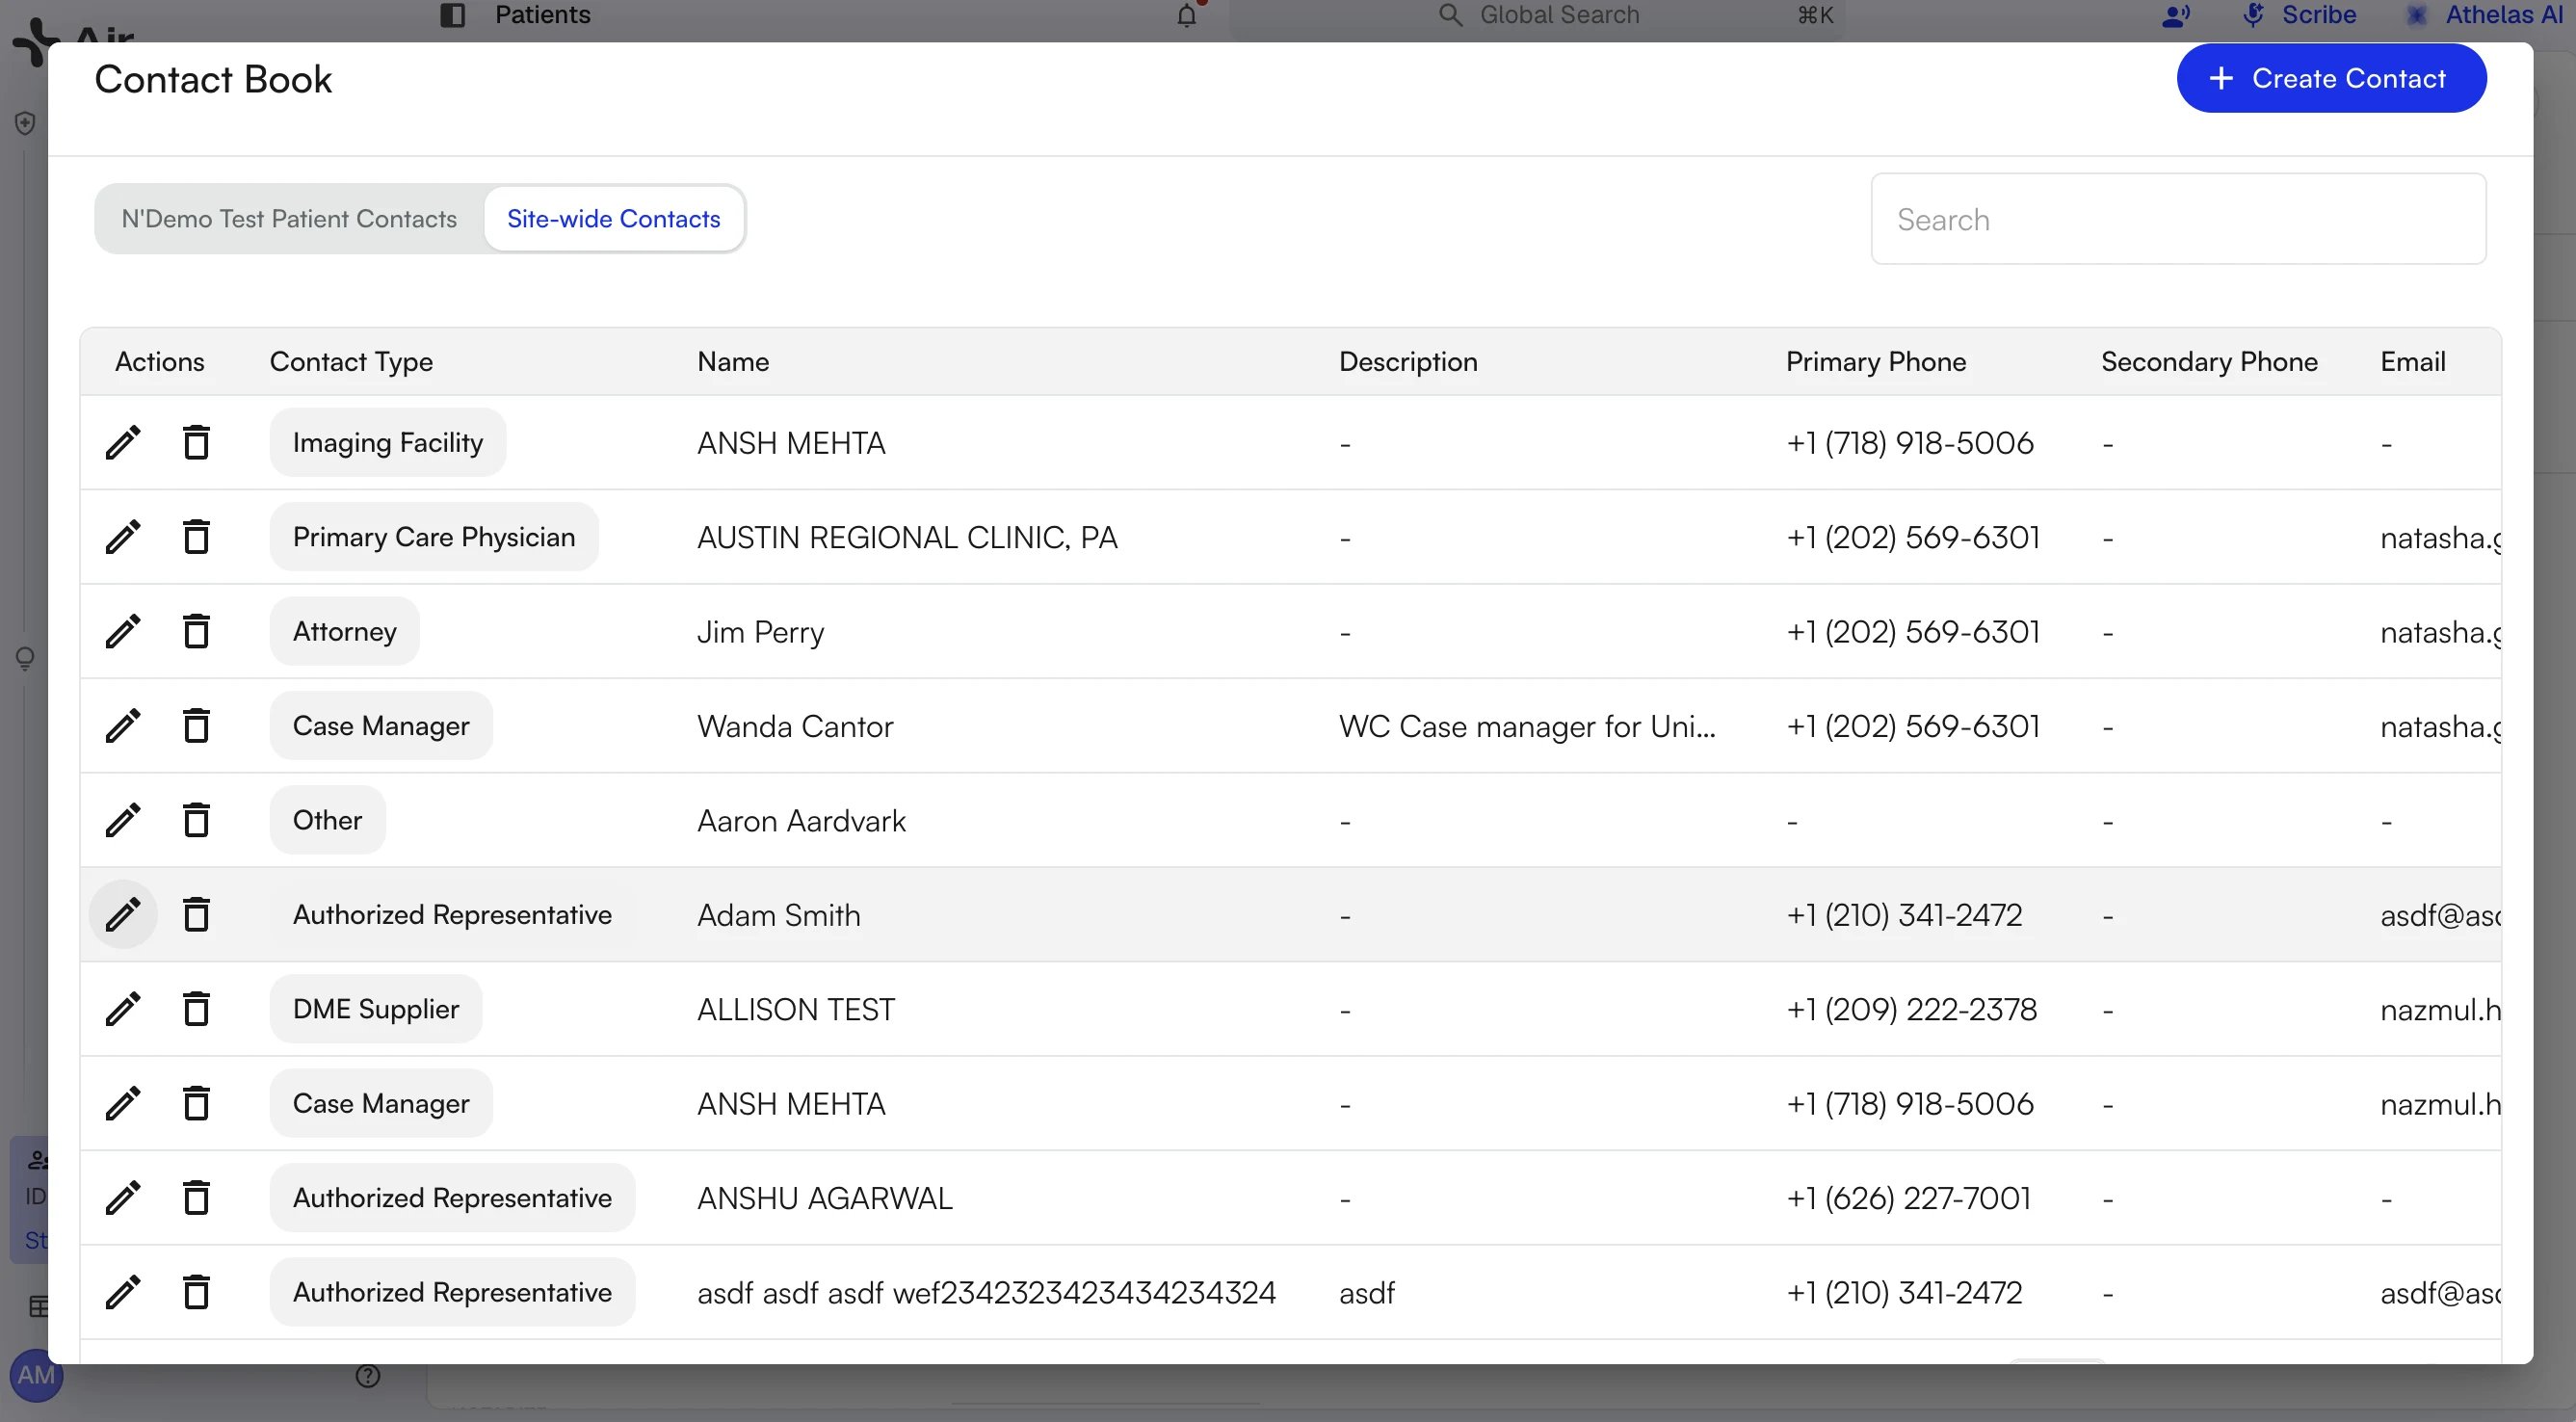
- Click the pencil icon on the contact you want to reuse.
- In Edit Contact, add the patient in the Patients field. Each patient you pick appears as a chip below the field. Use Case if the contact is relevant to only one of that patient’s cases.
- Save. Every detail on the contact carries over, with no re-entry.
Choose who gets what
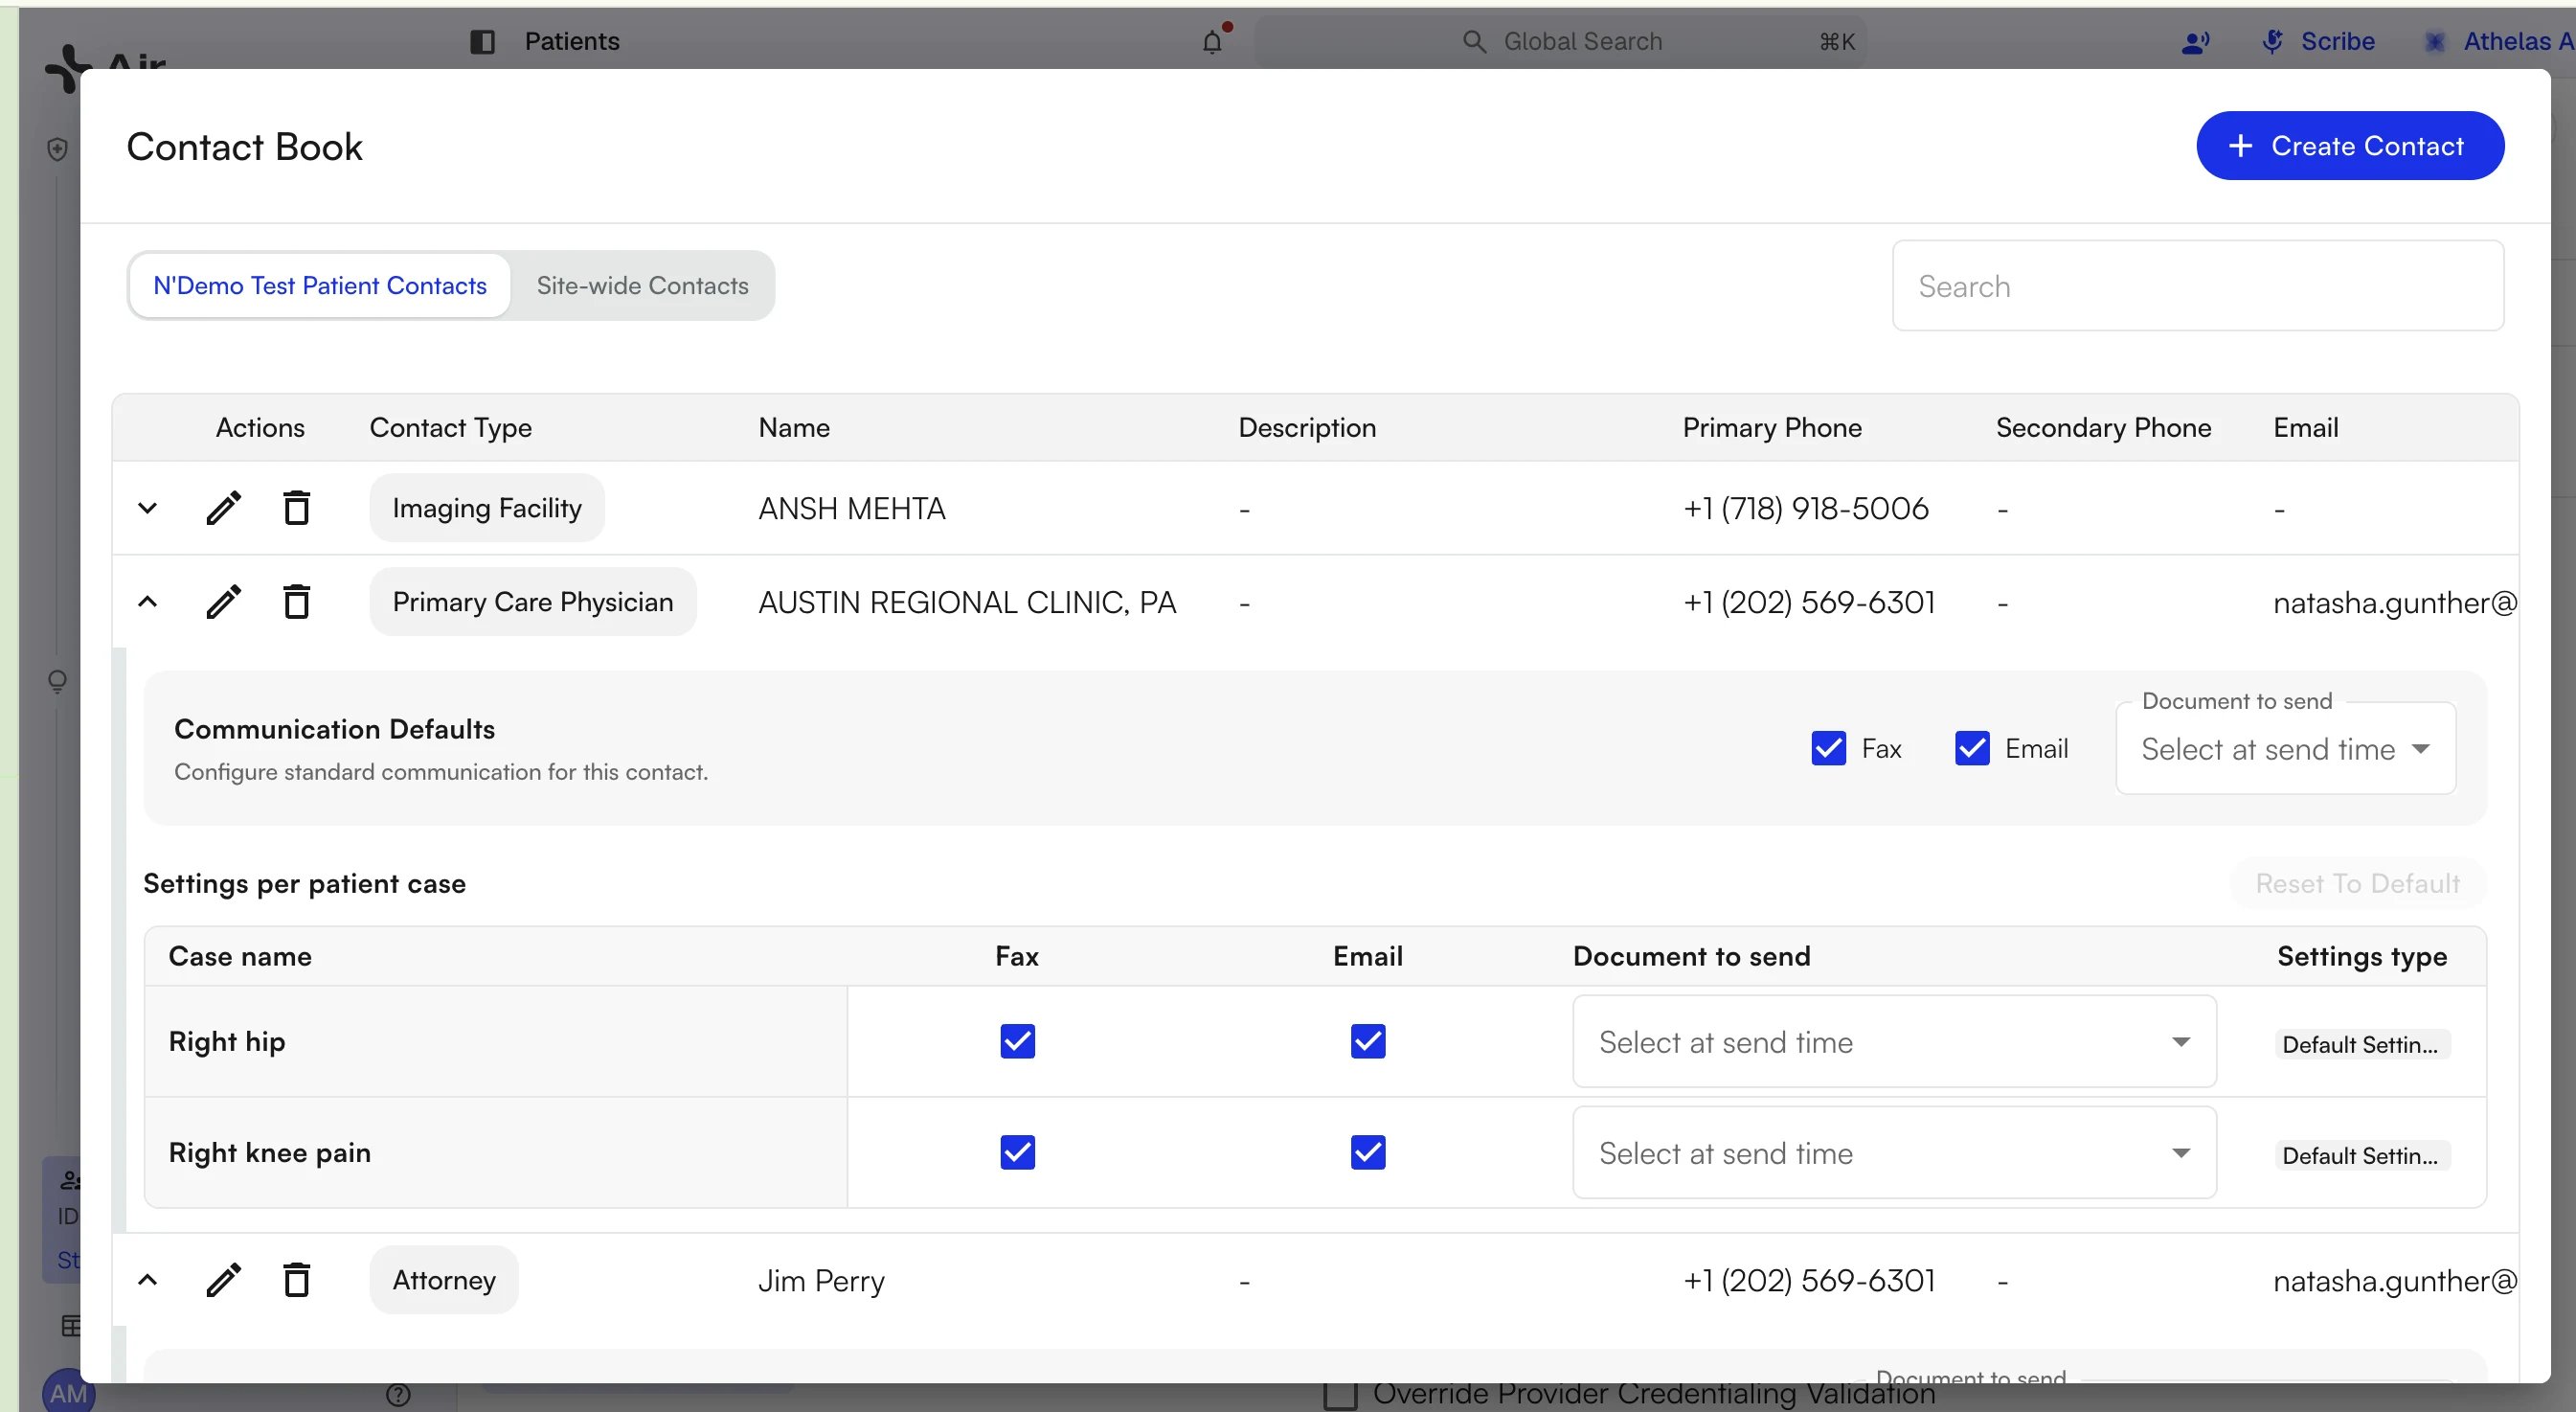
For each care team member you decide two things: which channels to use, and which document to send. Set a patient-level default first, then override it on the cases where that default does not fit.Communication Defaults
- On the patient’s tab in the Contact Book, click the caret at the start of a contact’s row to expand it.

- In the Communication Defaults box, check Fax, Email, or both.
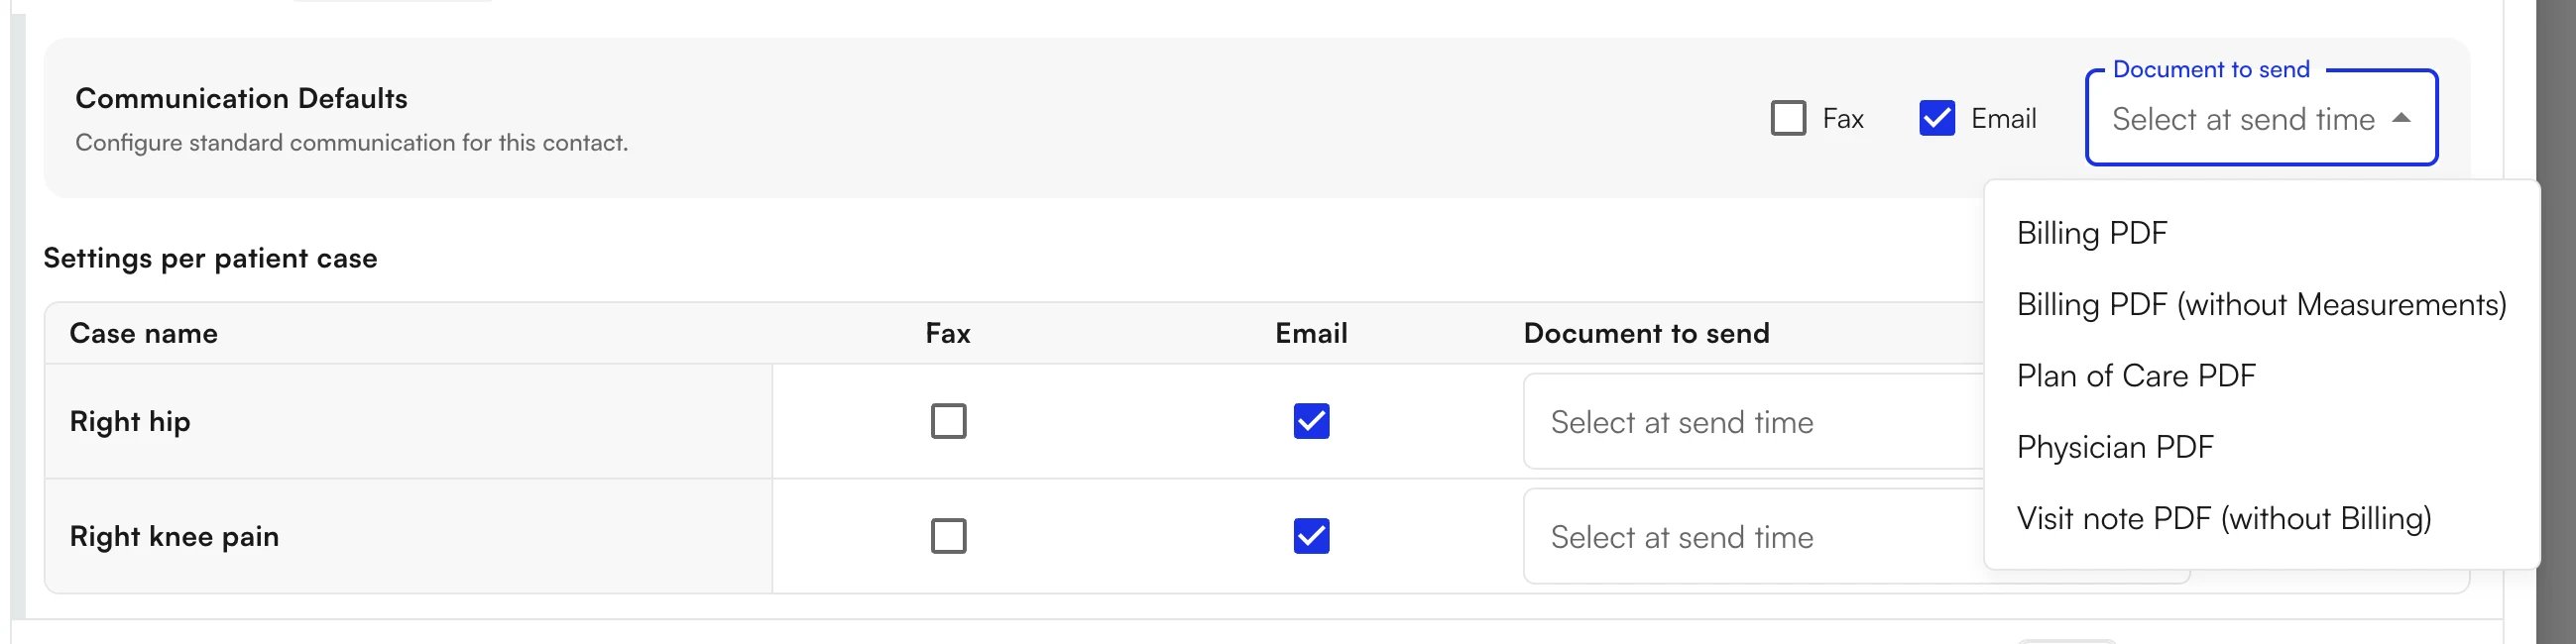
- Choose the document in Document to send.
Settings per patient case
A patient with more than one case often needs different recipients for each. Settings per patient case lists every case as its own row, with Fax and Email checkboxes, a Document to send selector, and a Settings type chip showing whether the row still follows the defaults or carries a custom override.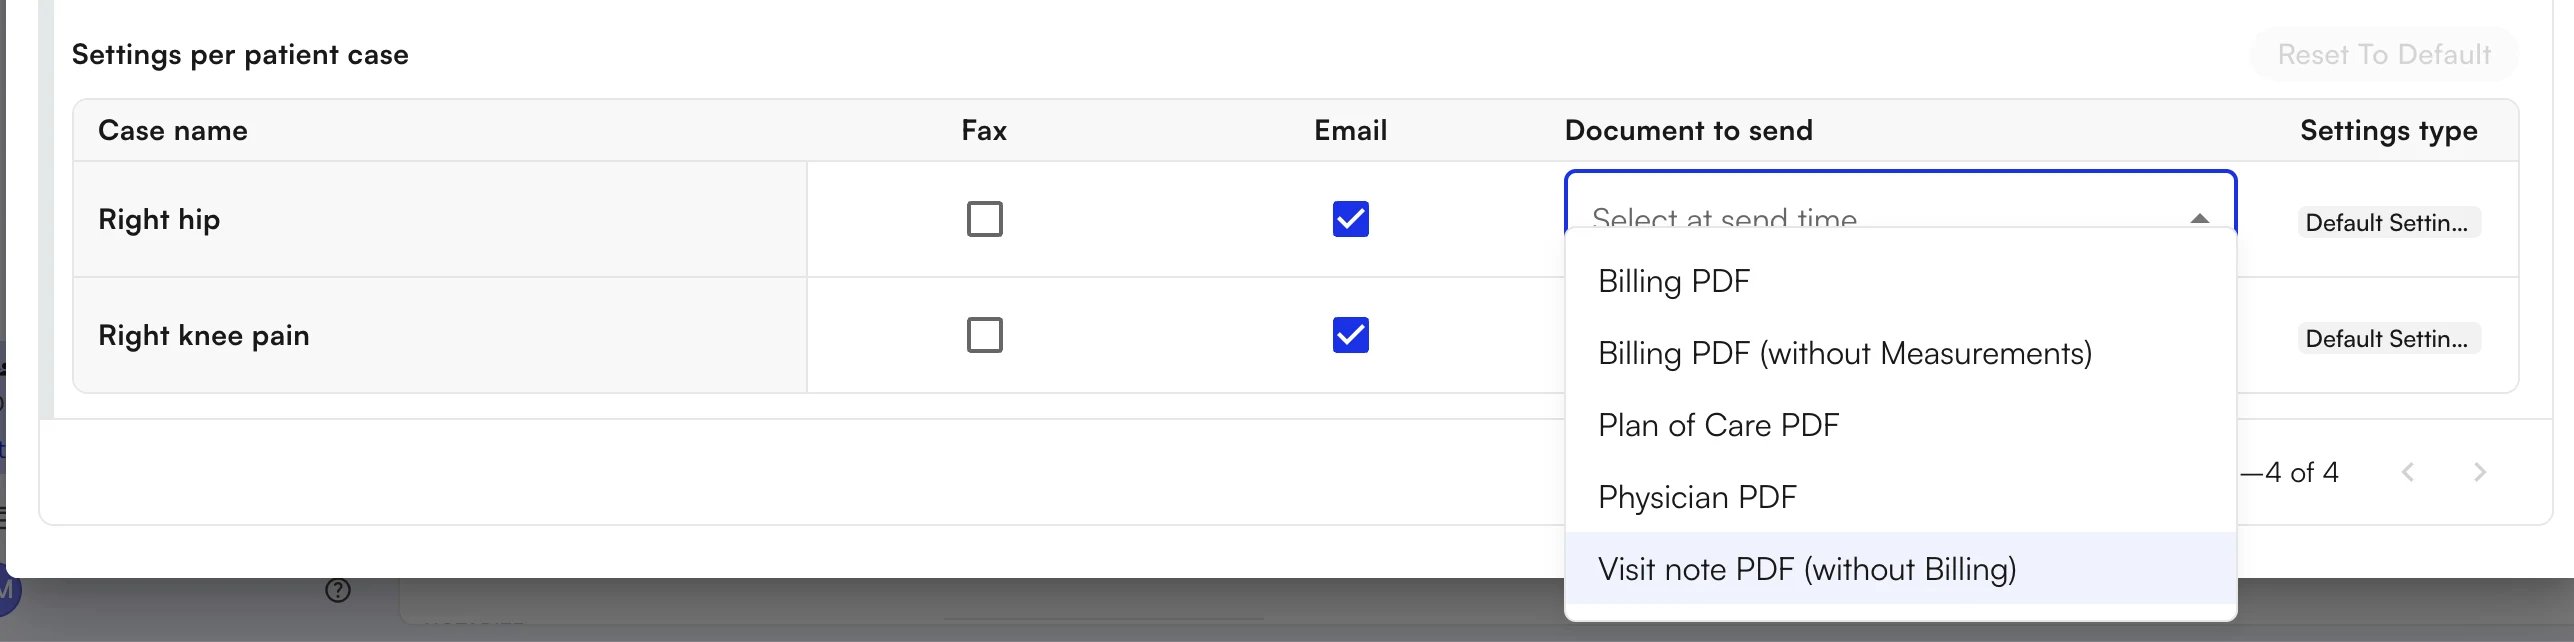
- A case follows the Communication Defaults until you change something on its row.
- Reset To Default reverts every custom row to the patient-level defaults. The button is grayed out when no row is custom.
Send from the chart note
When the feature is enabled for your site, every chart note carries an External Communications section under Communications. The recipients you configured in the Contact Book are already listed and pre-checked, and the section reminds you that the selected channels send automatically when you sign and submit.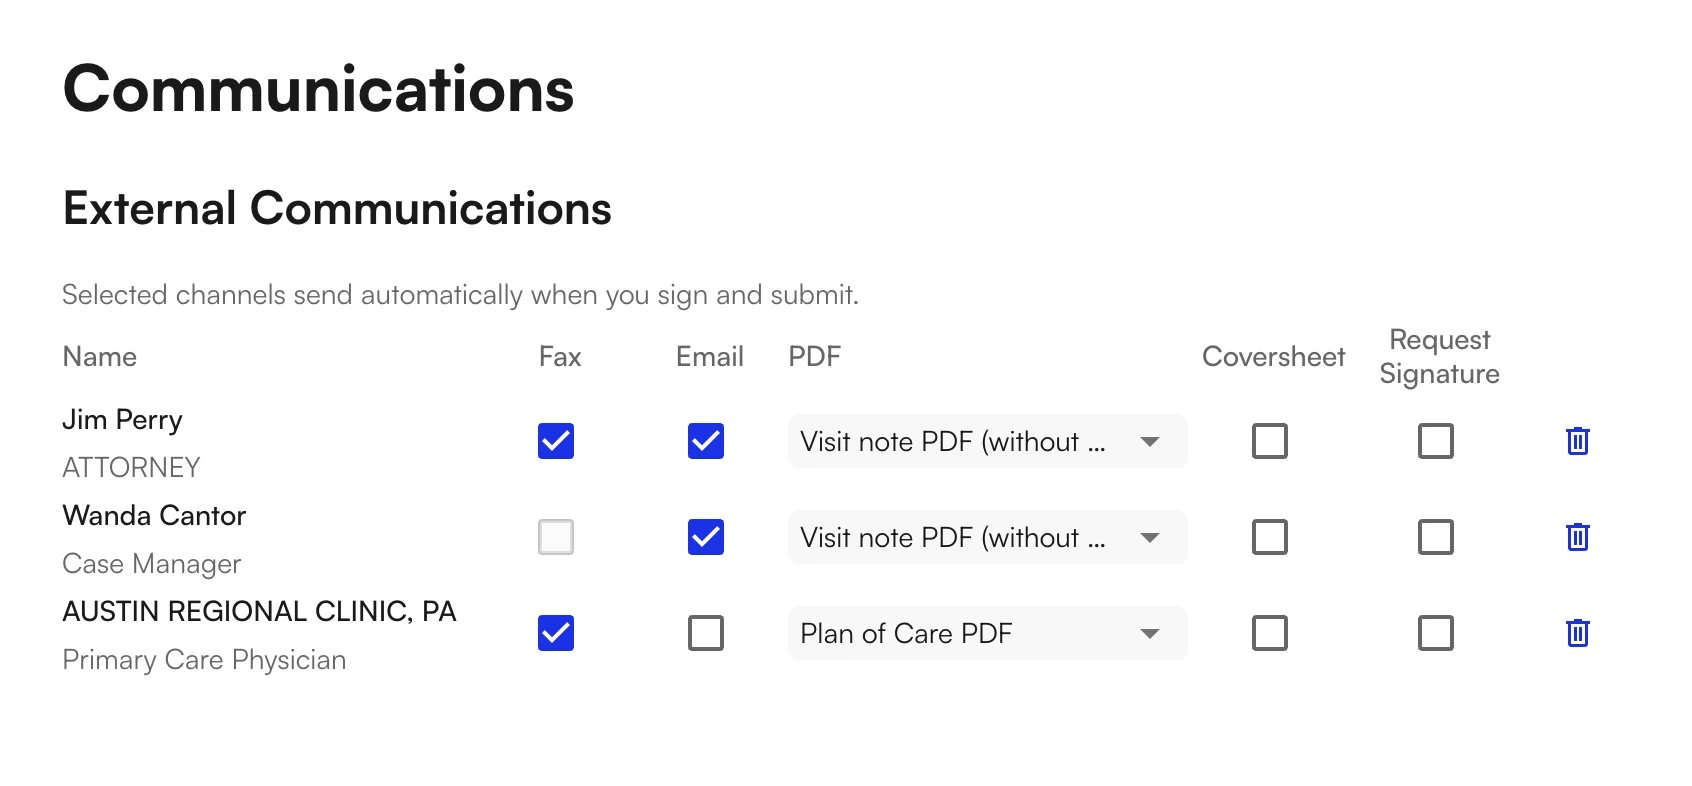
Review the recipients
- The list is filtered to the care team relevant to this note’s case.
- Each contact is a single row. Fax and Email are separate checkboxes on that row, not separate rows per channel.
- The contact type appears on a line under the contact’s name.
- PDF, Coversheet, and Request Signature are set per recipient and apply to both channels for that contact, so one person cannot receive one document by fax and a different one by email.
- A channel the contact has no destination for stays disabled. Add the missing fax number or email address to the contact to enable that channel.
Add a recipient
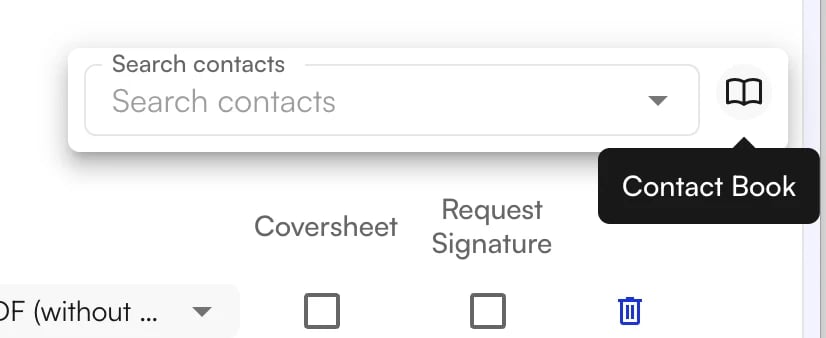
- Click + Add Recipient at the top right of the section.

- Find the contact in Search contacts. Only contacts with a fax number or an email address appear here; one with neither cannot be selected.
- Pick the contact. The row appears immediately, with whichever channels that contact actually has already checked.
Adjust channels and documents
- Unchecking one channel drops only that channel. The row stays as long as the other channel is still checked.
- Unchecking the last remaining channel removes the row, the same as deleting it with the trash icon.
Changes you make inside a note apply to that note alone. The contact’s saved Communication Defaults are left exactly as they were.
After you submit
- Each enabled channel sends independently on submission.
- Recipient rows can no longer be deleted, and the channel checkboxes are disabled, once the note is submitted.
- Submitting a note with no recipients selected works normally. No communications are created.
Delivery status and audit trail
- Fax and email send independently, so one bad fax number does not hold up the rest. The failure stays isolated to that recipient.
- Per-recipient delivery status is shown on the note and updates as the status changes, so a failed fax is visible where you sent it from.
- Faxes appear in your existing fax channels, and emails flow through the email reporting you already use, including failed-email reports. See Faxing for the Outbound tab and delivery history.
- Every send is recorded — recipient, document type, timestamp, delivery status, and the sending user — which is what a workers’ comp audit or a HIPAA request asks for.
FAQ
I don't see the External Communications section in my chart note.
I don't see the External Communications section in my chart note.
The feature is enabled per site. If the section does not render at all, the feature is not turned on for your organization yet — contact your account manager for access.
Why won't a contact show up when I search in Add Recipient?
Why won't a contact show up when I search in Add Recipient?
Add Recipient only lists contacts that have a fax number or an email address on file. Open the Contact Book, add a valid destination to that contact, and search again.
Why can't I turn on a channel for one of my recipients?
Why can't I turn on a channel for one of my recipients?
A channel stays disabled when the recipient has no matching destination — no fax number for fax, or no email address for email. Add the missing detail to the contact and the checkbox becomes available.
I changed a recipient inside a note and my saved defaults look different. Which one wins?
I changed a recipient inside a note and my saved defaults look different. Which one wins?
Neither overwrote the other. An in-note change is a one-time override that applies to that note alone and never rewrites the contact’s Communication Defaults, so the defaults still govern the next note.
Can I still just fax the referring provider the way I always have?
Can I still just fax the referring provider the way I always have?
Yes. The single referring-provider auto-fax flow is unchanged when no broader care team is configured, and a referring provider who is also on the care team maps into it without producing duplicate sends.