
Creating and managing flowsheets
Adding procedure codes
Every flowsheet starts with a CPT block. The CPT-centric structure mirrors actual billing practices, so the codes that determine what you bill are the scaffolding for everything else on the page. To add a procedure code:- Click + CPT at the top of the flowsheet.
- Search by CPT number (e.g.,
97110) or by description (e.g., “therapeutic exercise”), then select the code from the dropdown. - Fill in the CPT block — modifiers, minutes, provider, and status.
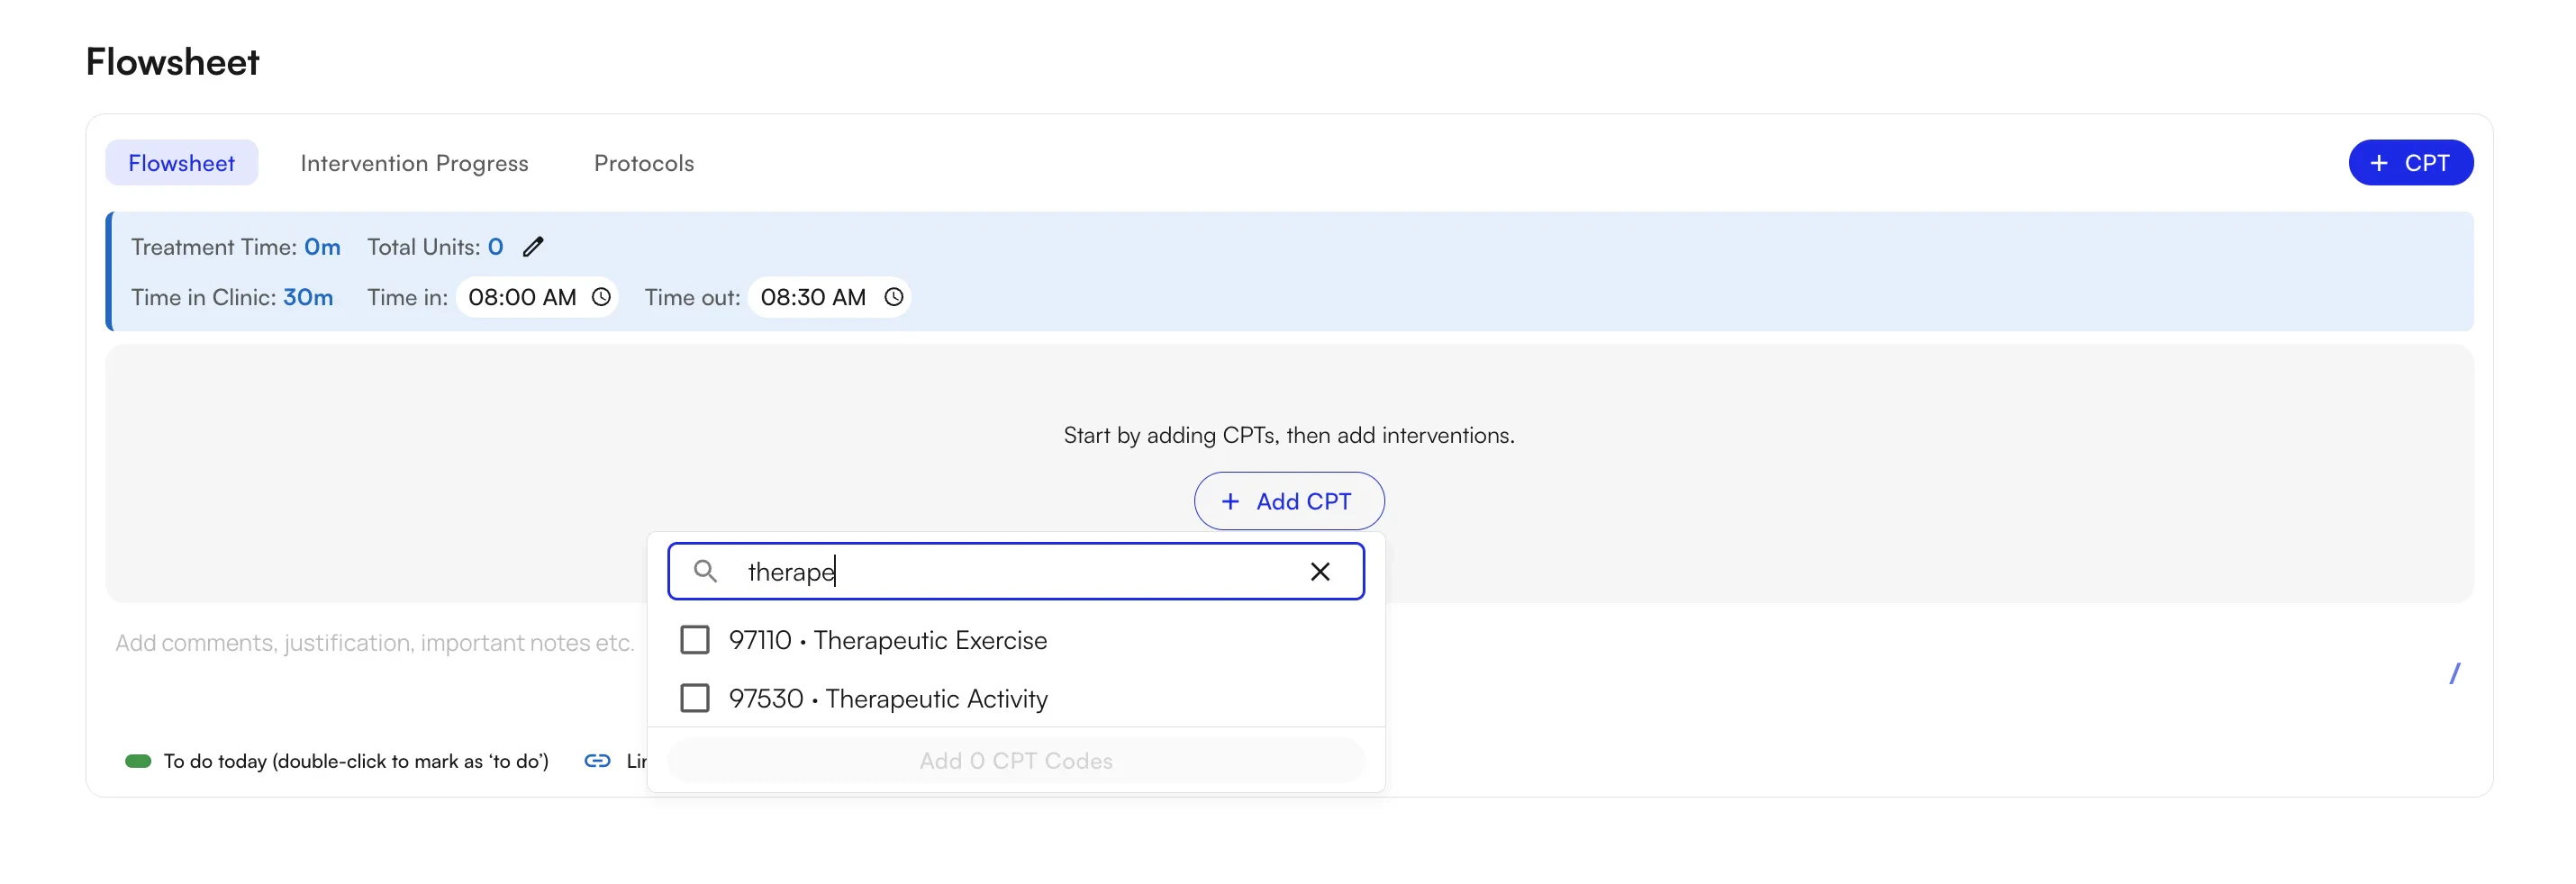
CPT codes in the + CPT dropdown are sorted by how often you’ve used them — the codes you’ve added to chart notes most frequently show up at the top. The order is per provider, so each provider sees their own usage-based list. If the code you want isn’t near the top yet, just type to search for it.
Tracking interventions
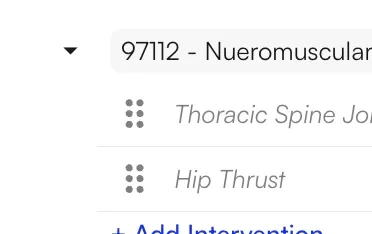
With a CPT block in place, add the interventions you performed underneath it. You can use free text, the exercise library, or intervention groups — and you can mix all three on the same flowsheet. Free text Use this when you already know what you want to write and don’t need structured parameters.- Click + Add Intervention under the CPT block.
- Type the intervention name directly (e.g., “Hip abduction”, “TheraBand rows”).
- Press Enter or Tab to confirm.
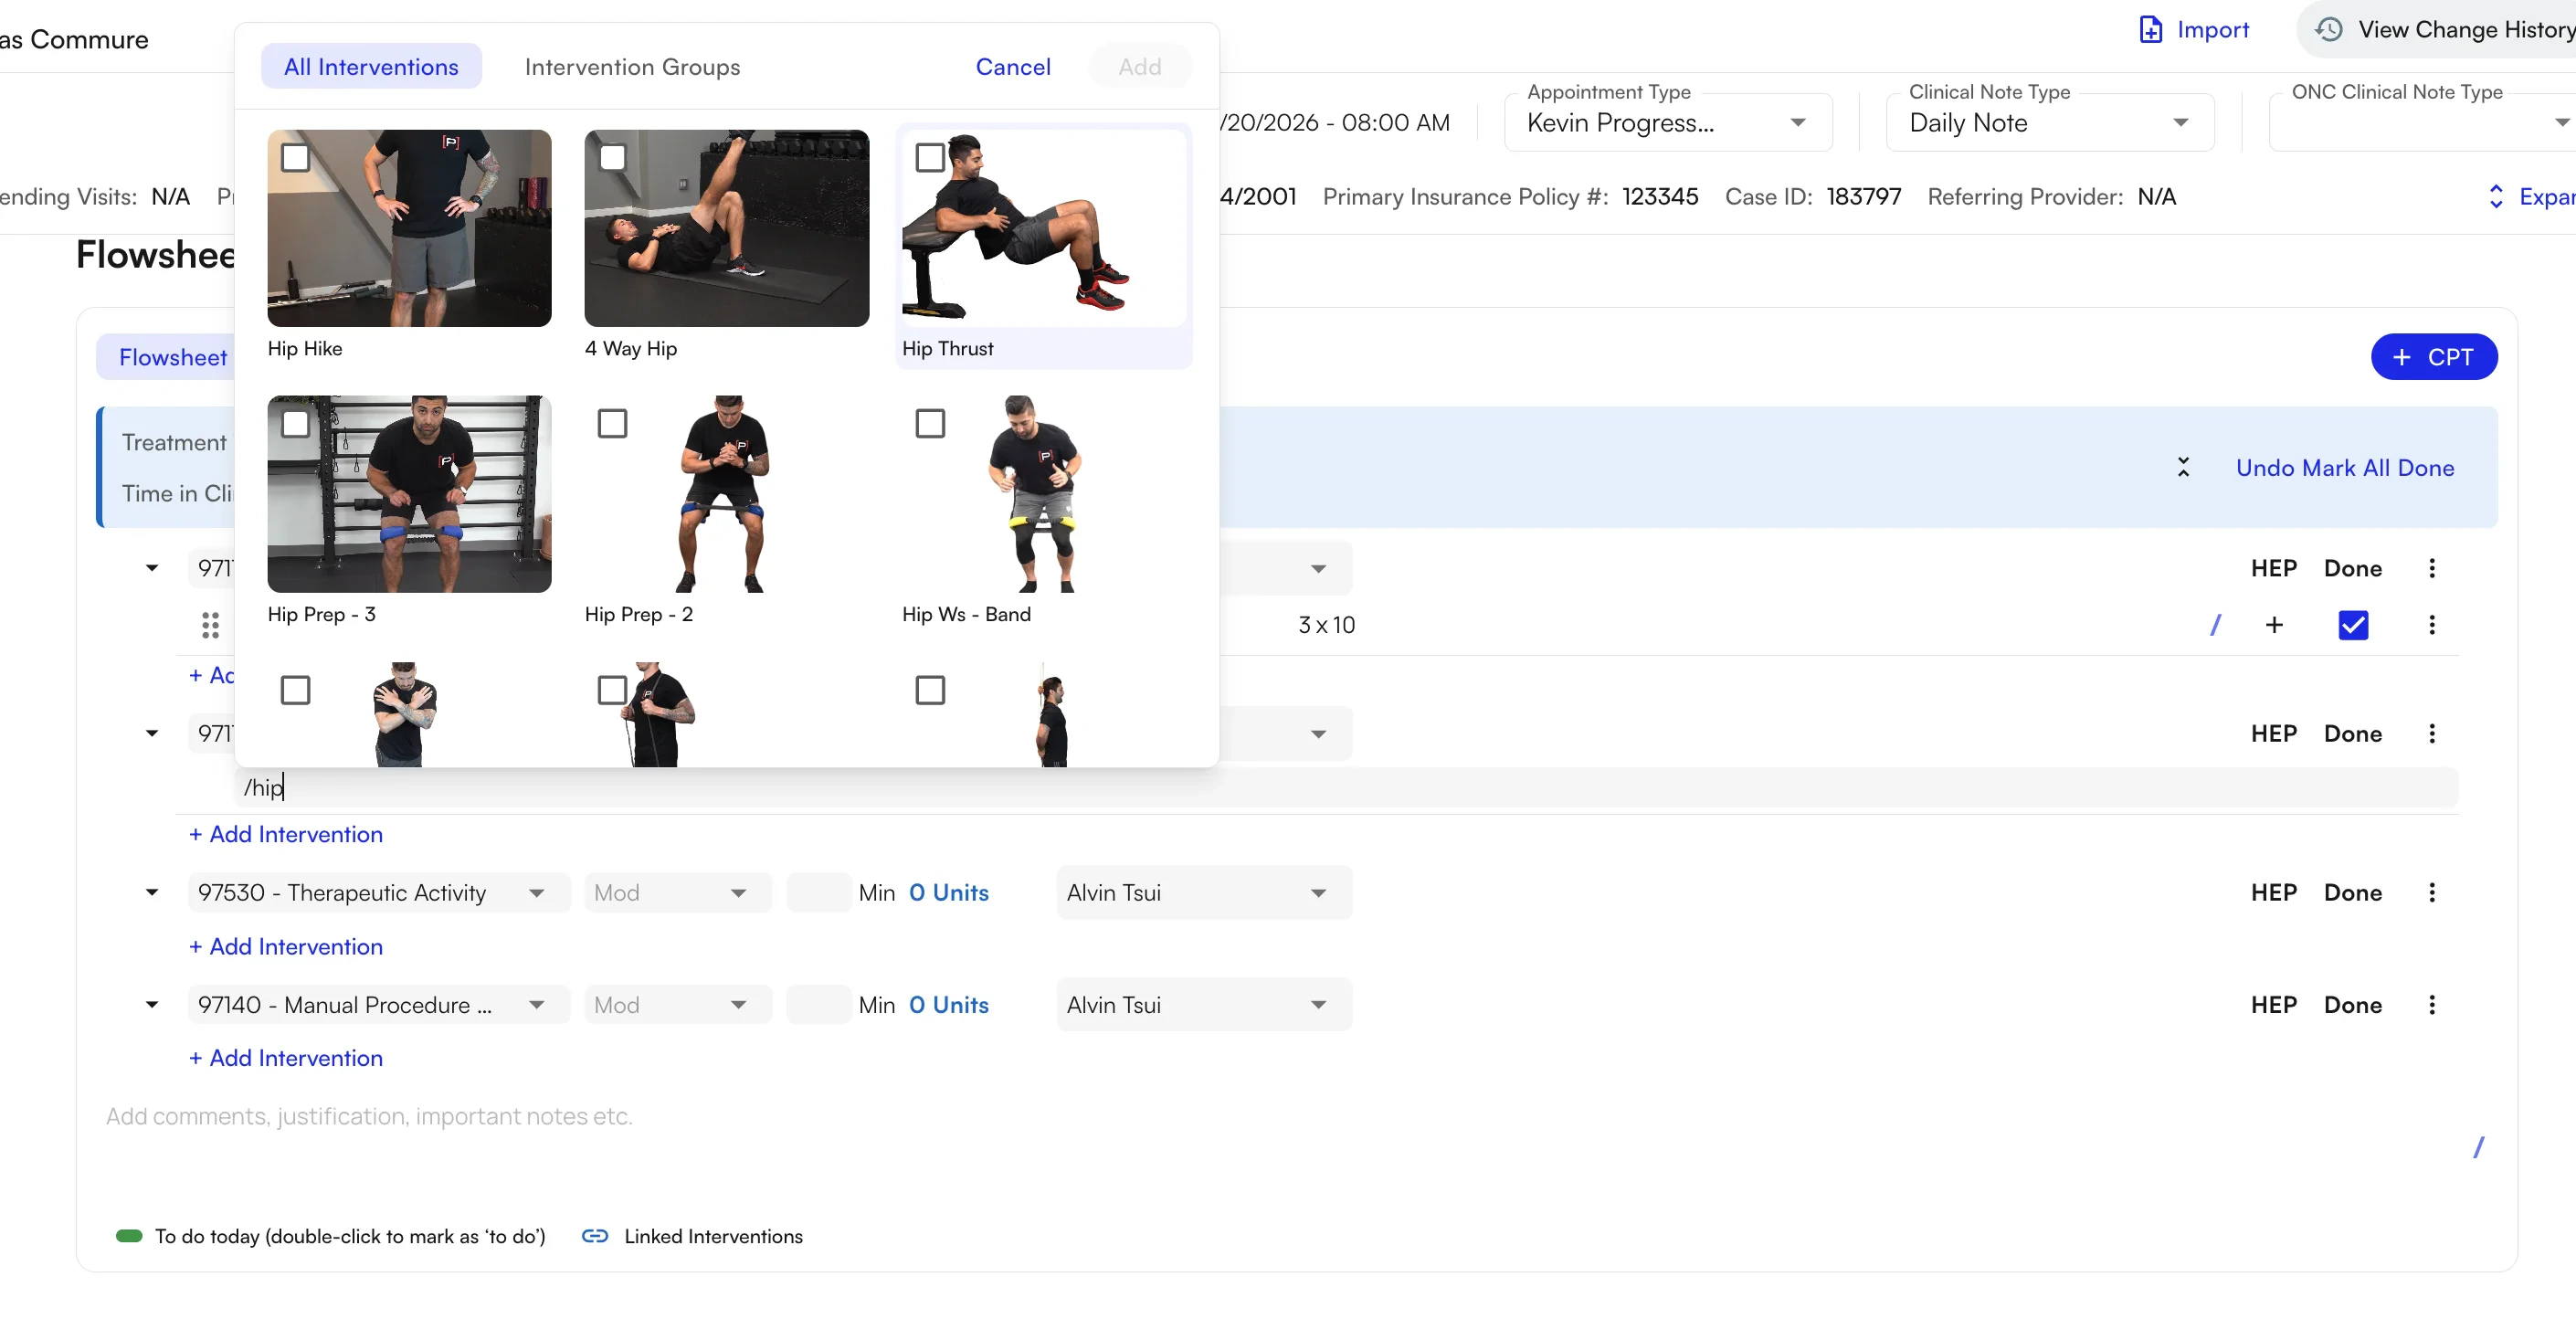
- Click + Add Intervention under the CPT block.
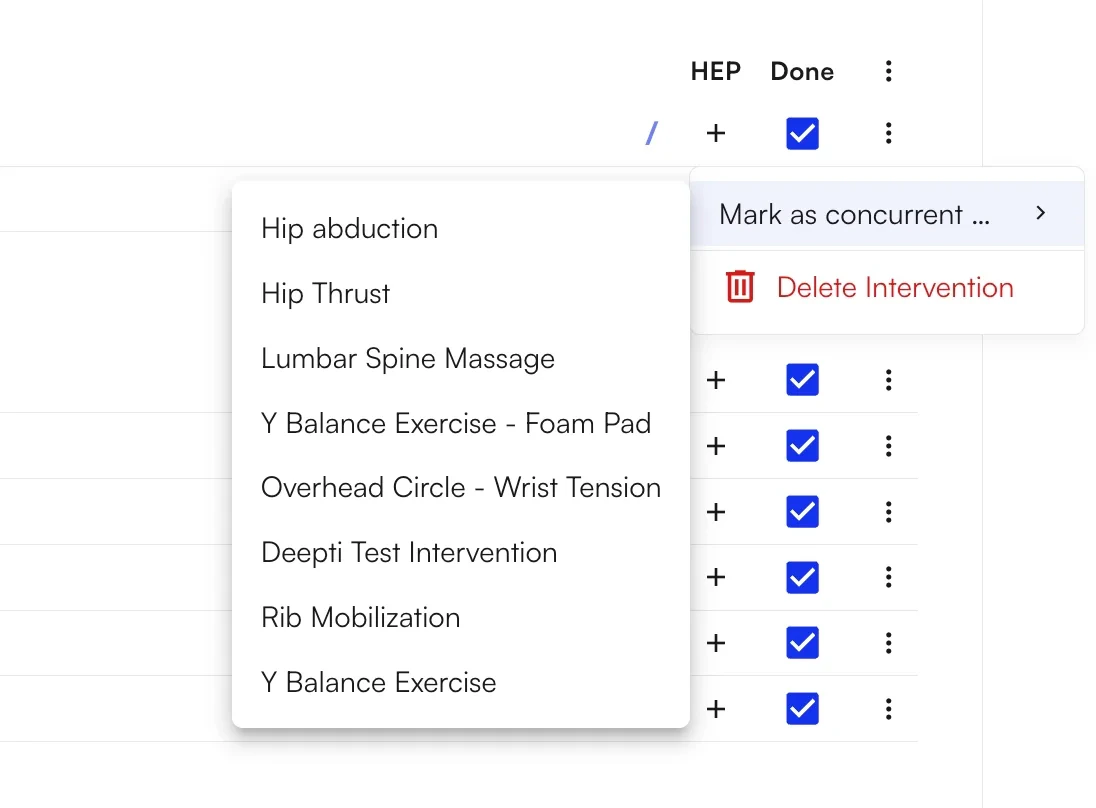
- Type
/to open the library search. - Search by exercise name and select a result to insert the structured intervention.
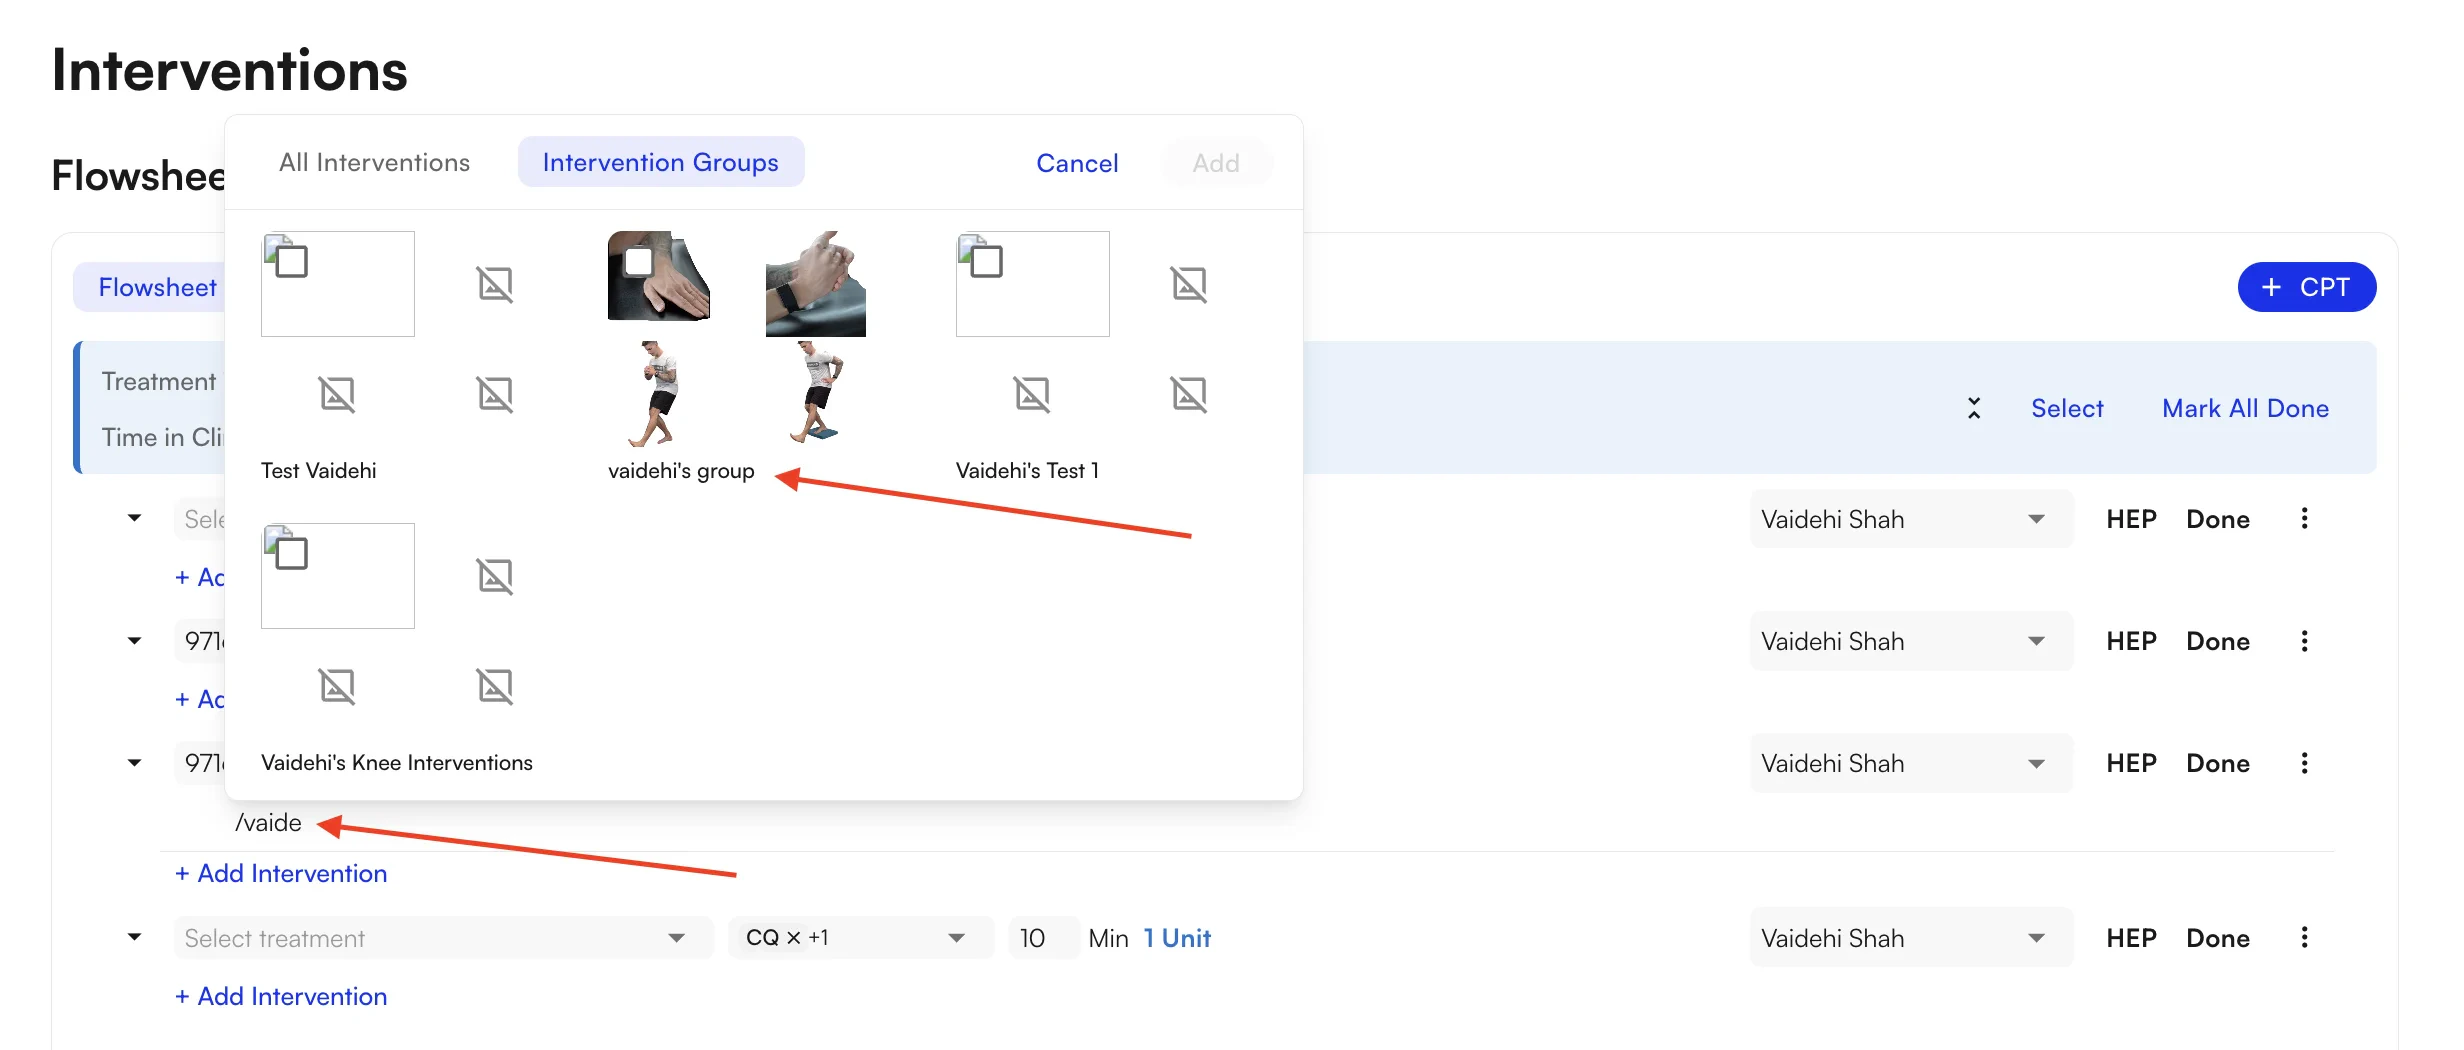
- Click + Add Intervention under the CPT block.
- Switch to the Intervention Groups tab.
- Search by group name and select a group to add its full set of structured interventions.
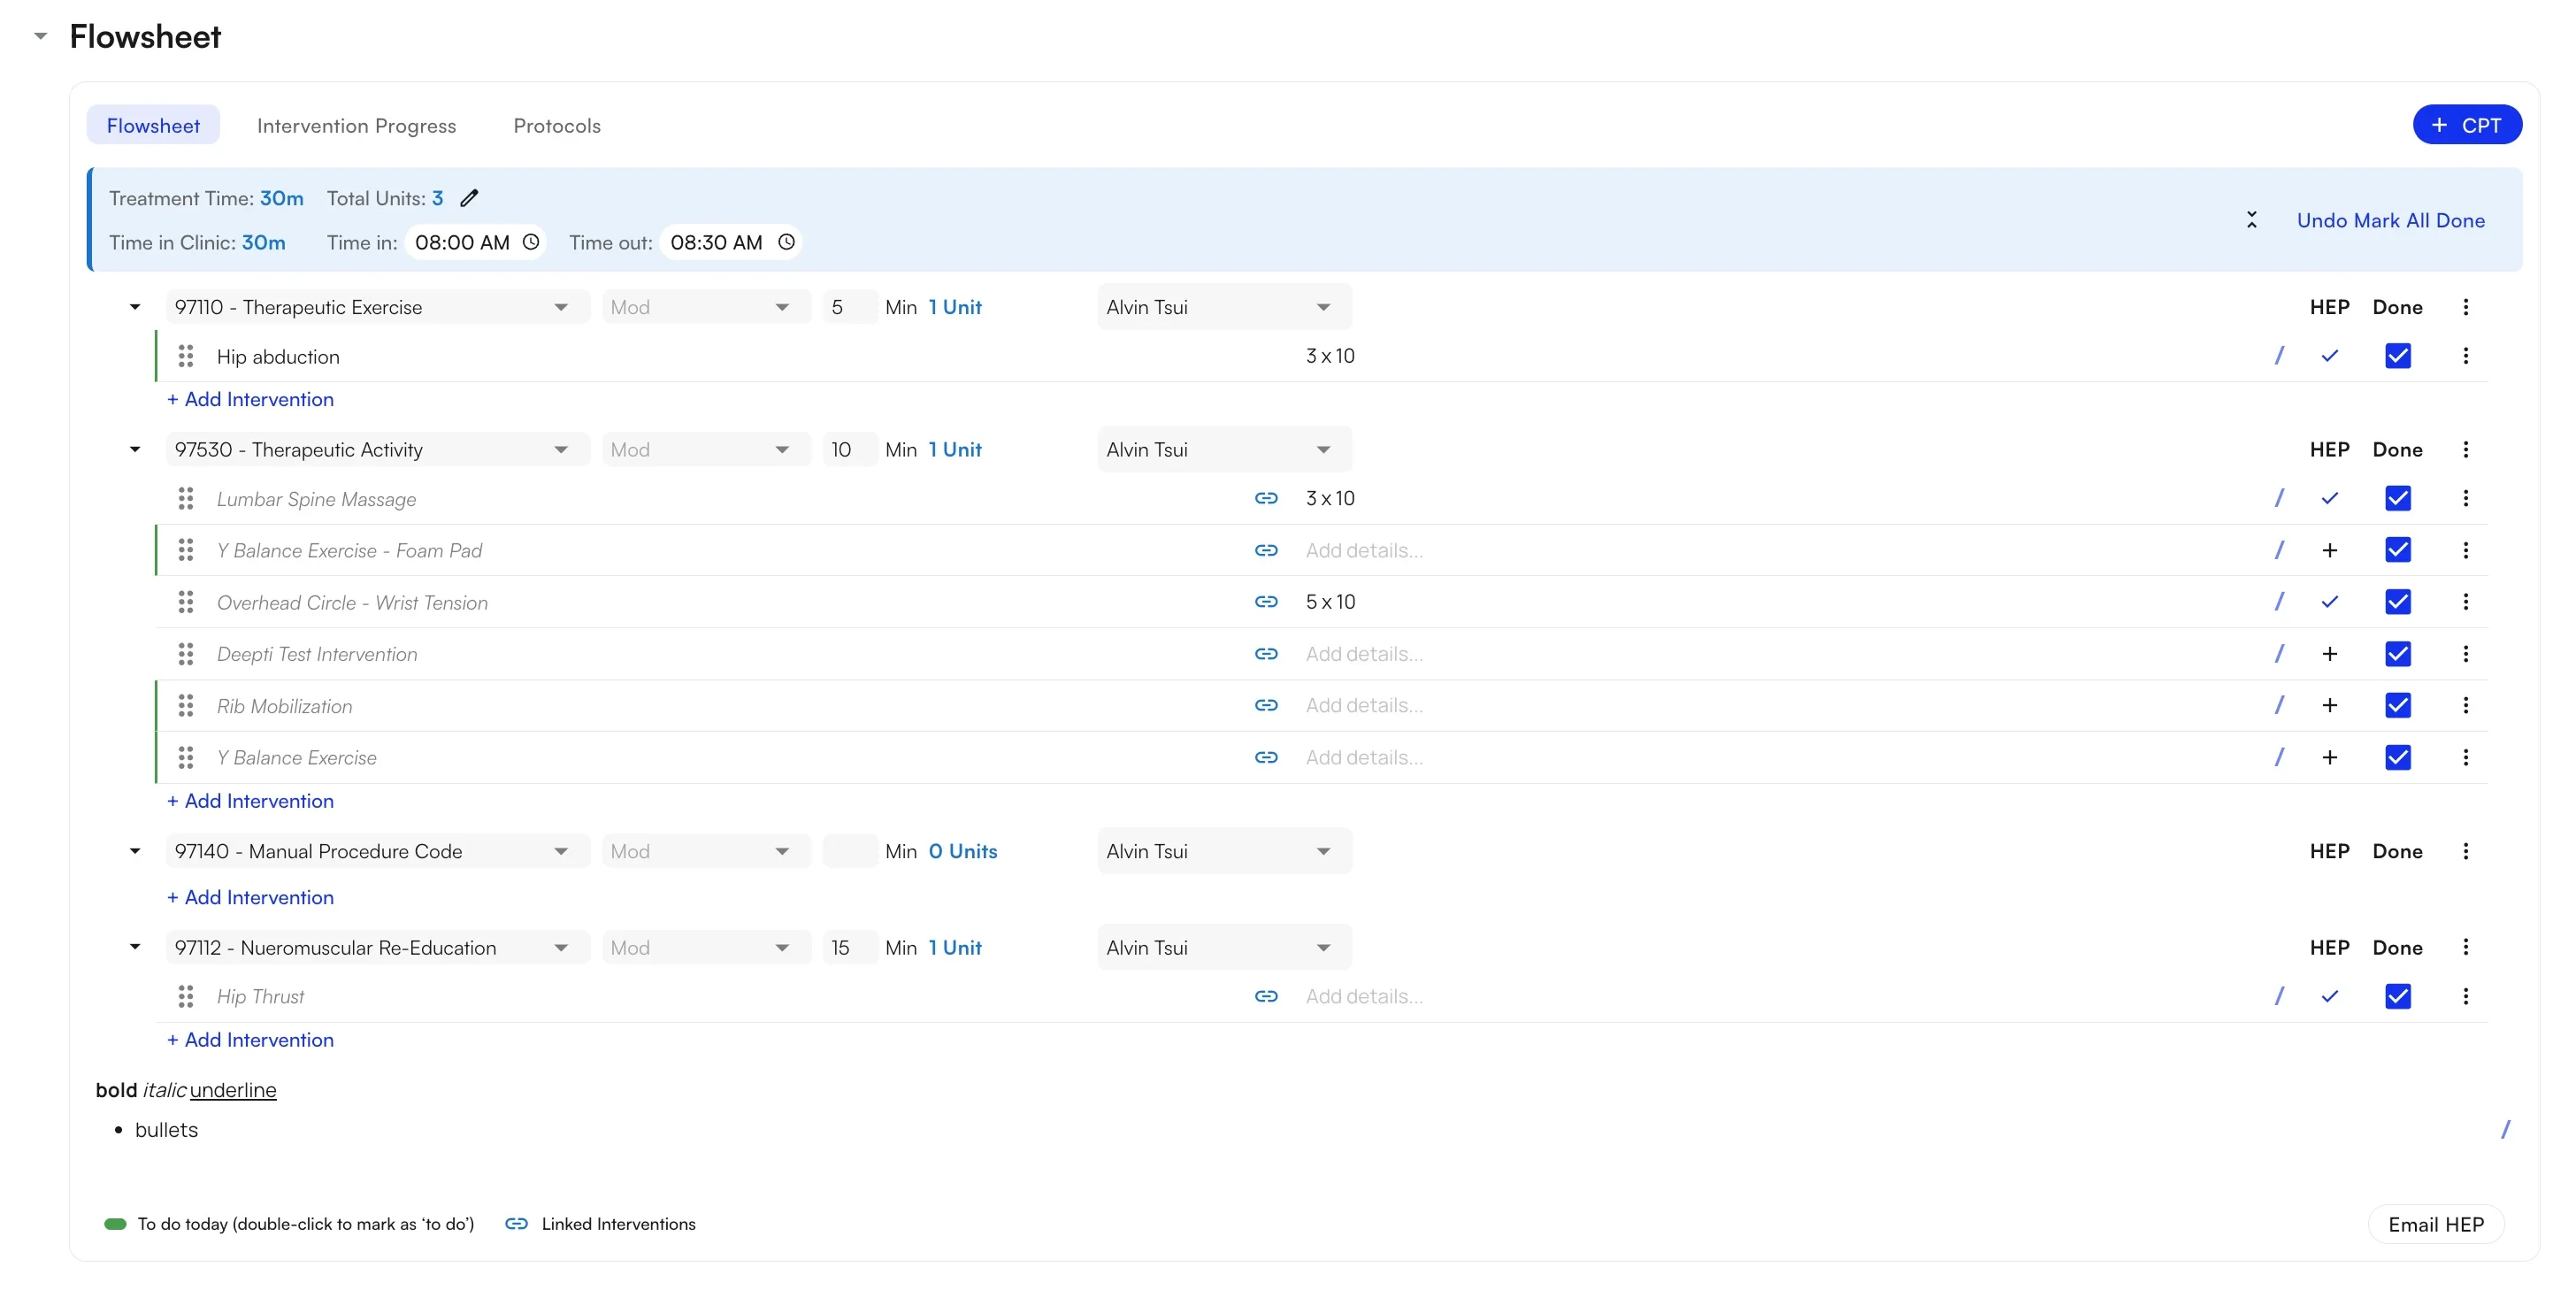
Managing interventions
Marking interventions done Click the checkmark on any individual intervention to mark it complete, or use Mark All Done in the Summary Bar to complete every intervention on the flowsheet at once.Mark All Done does not trigger any billing actions. Marking interventions as done is for documentation cleanliness and PDF generation — it has no impact on what is billed. Billing is driven entirely by the procedure codes on the flowsheet and their associated minutes and units. As long as a CPT code has minutes and units, it will be billed.
Carrying interventions forward
For patients who do roughly the same exercises each visit, Carry Forward pulls interventions from the previous visit into the current one so you aren’t rebuilding the flowsheet every time. It runs automatically when the chart note loads.| Note type | Pulled from | Gates and rules |
|---|---|---|
| Initial eval | N/A | No carry forward — this is the first note in the case. |
| Daily note | Latest note in case | Pulls interventions, CPT codes, and details; the source must be a Flowsheets visit note (not from the older flowsheet system). |
| Progress note | Latest note in case | Same rules as daily note. |
Creating and managing Home Exercise Programs (HEPs)
Creating HEPs
Toggle the HEP option on any intervention to mark it as something the patient should perform at home. This is optional — only use it for exercises intended for home practice.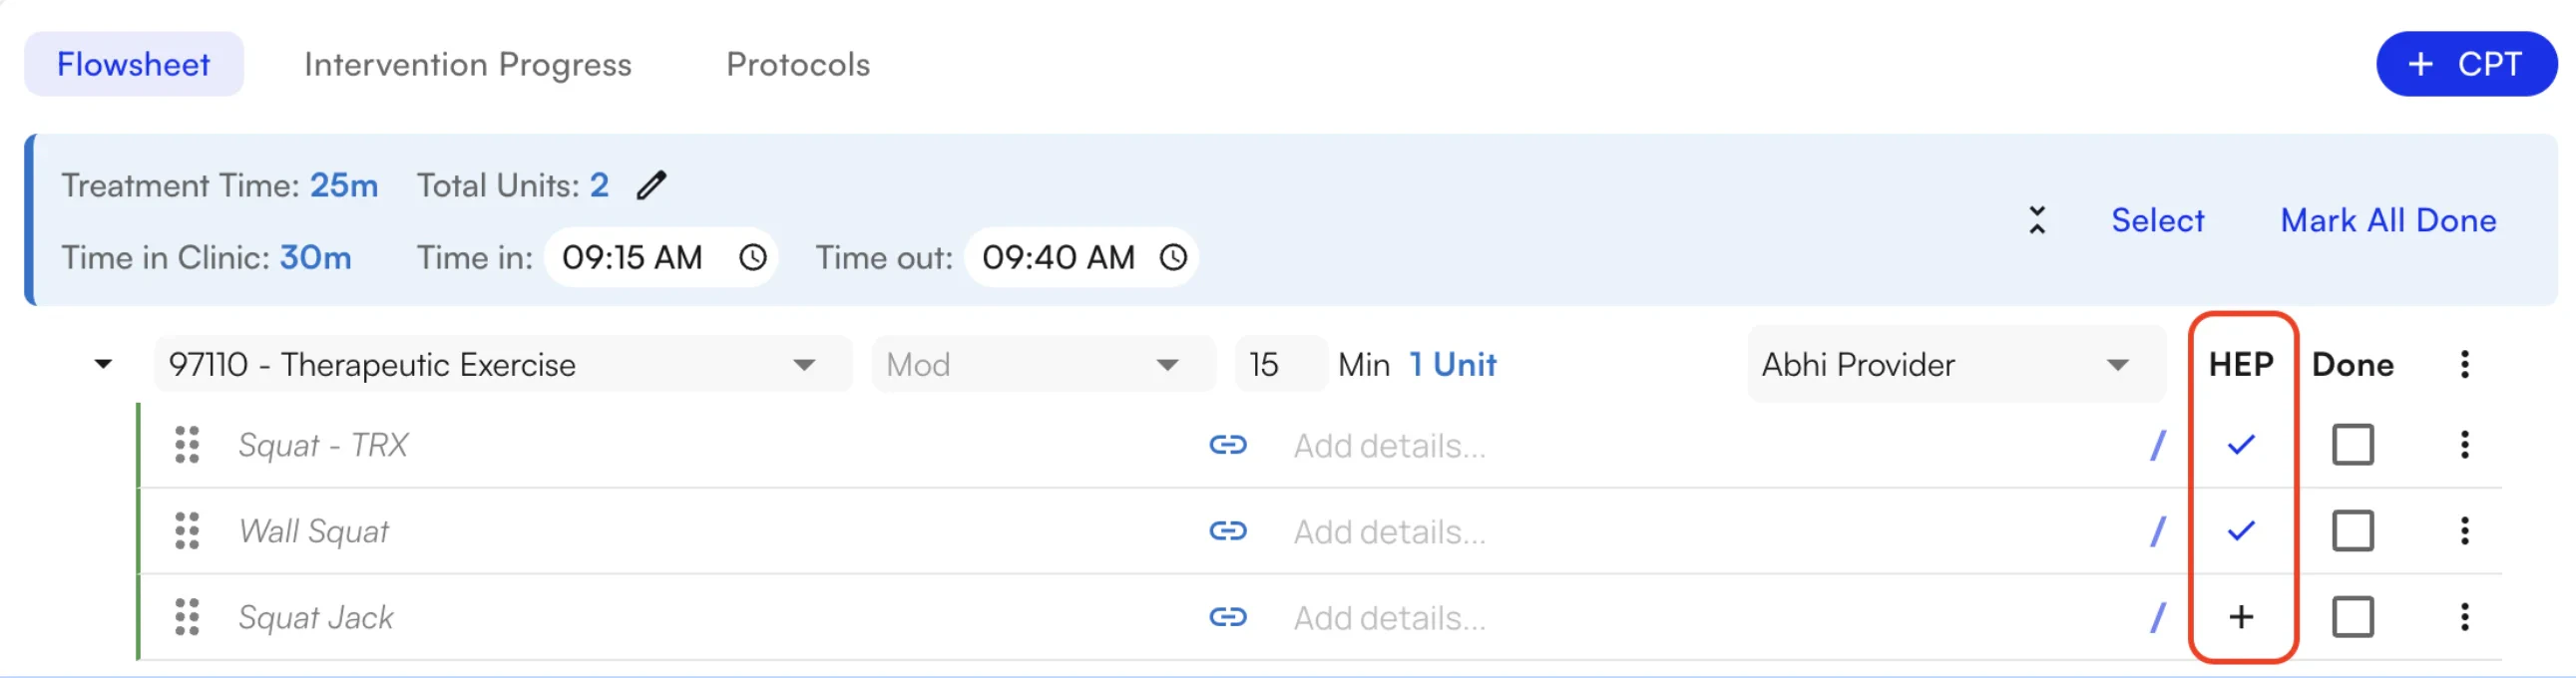
Sending the HEP email
When the flowsheet is complete, you can generate a PDF summary and send the patient their Home Exercise Program. To send the HEP:- Click Send HEP Email in the flowsheet.
- Review the PDF — only interventions marked HEP are included.
- Confirm the patient’s email address or phone number before sending.
Flowsheets add-ons
Summary bar
The Summary Bar sits at the top (or bottom) of the flowsheet and gives a real-time view of the entire visit:- Total treatment time — sum of minutes across all CPT blocks.
- Total units — sum of auto-calculated units across all CPT blocks.
- Completion status — interventions marked done vs. total.

Comments
The Comments section is a rich-text area for anything that doesn’t fit into structured fields — clinical observations, patient feedback, session highlights, or context for the next provider.- Click the Comments area to open the editor.
- Format with bold, italic, bullet lists, and more.
- Comments are saved with the flowsheet and visible in the visit record.

Time in clinic
Track the patient’s actual time in the clinic separately from treatment time using the Time in Clinic fields:- Time In — when the patient arrived and treatment began.
- Time Out — when the patient’s visit ended.
Keyboard shortcuts
Most of the flowsheet can be filled out without ever leaving the keyboard.| Shortcut | What it does |
|---|---|
| Tab | Move forward through fields (minutes → modifier → provider, etc.). |
| Shift + Tab | Move backward through fields. |
/ (forward slash) | While in the intervention field, open the library search. |
| Enter | Confirm a free-text intervention, library selection, or active button. |
Power user tips
FAQ
Does Mark All Done affect what's billed?
Does Mark All Done affect what's billed?
No. Mark All Done only updates documentation status and the visit PDF — it does not change billing.Billing is driven entirely by the procedure codes on the flowsheet and their associated minutes and units. As long as a CPT code has minutes and units, it will be billed regardless of whether interventions are marked done.
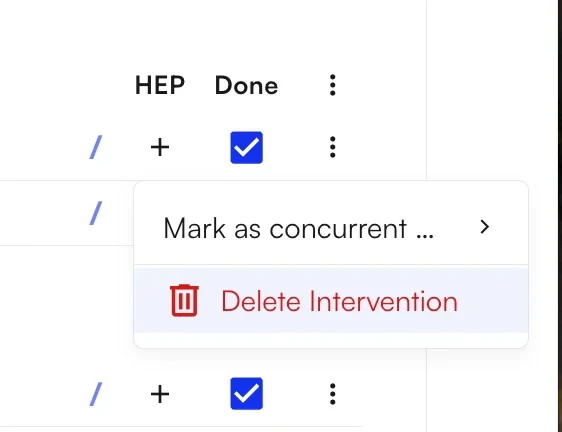
What happens if I delete a CPT block that has interventions under it?
What happens if I delete a CPT block that has interventions under it?
The CPT block and every intervention nested under it are removed.If you want to keep the interventions but move them to a different billing code, drag and drop them into another CPT block before deleting the original.
Can I mix free-text interventions with library interventions on the same flowsheet?
Can I mix free-text interventions with library interventions on the same flowsheet?
Yes. You can use free text, library search, and intervention groups in any combination on a single flowsheet, even within the same CPT block. Use free text for quick entries you know by name; use the library or groups when you need structured parameters like sets, reps, and weight.
Why didn't carry-forward populate my flowsheet?
Why didn't carry-forward populate my flowsheet?
Carry-forward only runs in specific scenarios:
- Initial evals never carry forward — they’re the first note in the case.
- Daily notes and progress notes carry forward from the latest note in the same case, but only if that note is itself a current Flowsheets visit note.
How are units calculated, and can I override them?
How are units calculated, and can I override them?
Units are auto-calculated from minutes at the CPT block level — you enter minutes once per block, and the system computes units for you.If you need a different value, switch from automatic to manual unit calculation from the Summary Bar and enter the units directly.
Questions or issues? Reach out to your clinic administrator or the Commure support team. The latest version of this guide is maintained at the Flowsheets User Guide.