
Creating a Kiosk Login
Request Kiosk Access
- Reach out to your Account Manager (AM) to request kiosk access for your site.
- Once approved, your site is added to the kiosk user list and you can proceed with setup.
Prepare your hardware & card reader
Before you enable kiosk in Insights, make sure your site has the right setup:- Tablet device:
- Any Android tablet or iPad will work.
- Optional: You may also use a kiosk stand for a professional, dedicated setup.
- Card reader options:
- Use an existing reader — Any card readers already configured to your account will appear in the kiosk dropdown.
- Request a dedicated reader — If you’d like a separate card reader specifically for kiosk, let us know.
- We’ll send you a pre-configured reader tied to your account.
- The reader hardware is purchased by your practice and invoiced to your site; your AM confirms the cost before it ships.
Enable Kiosk in Insights
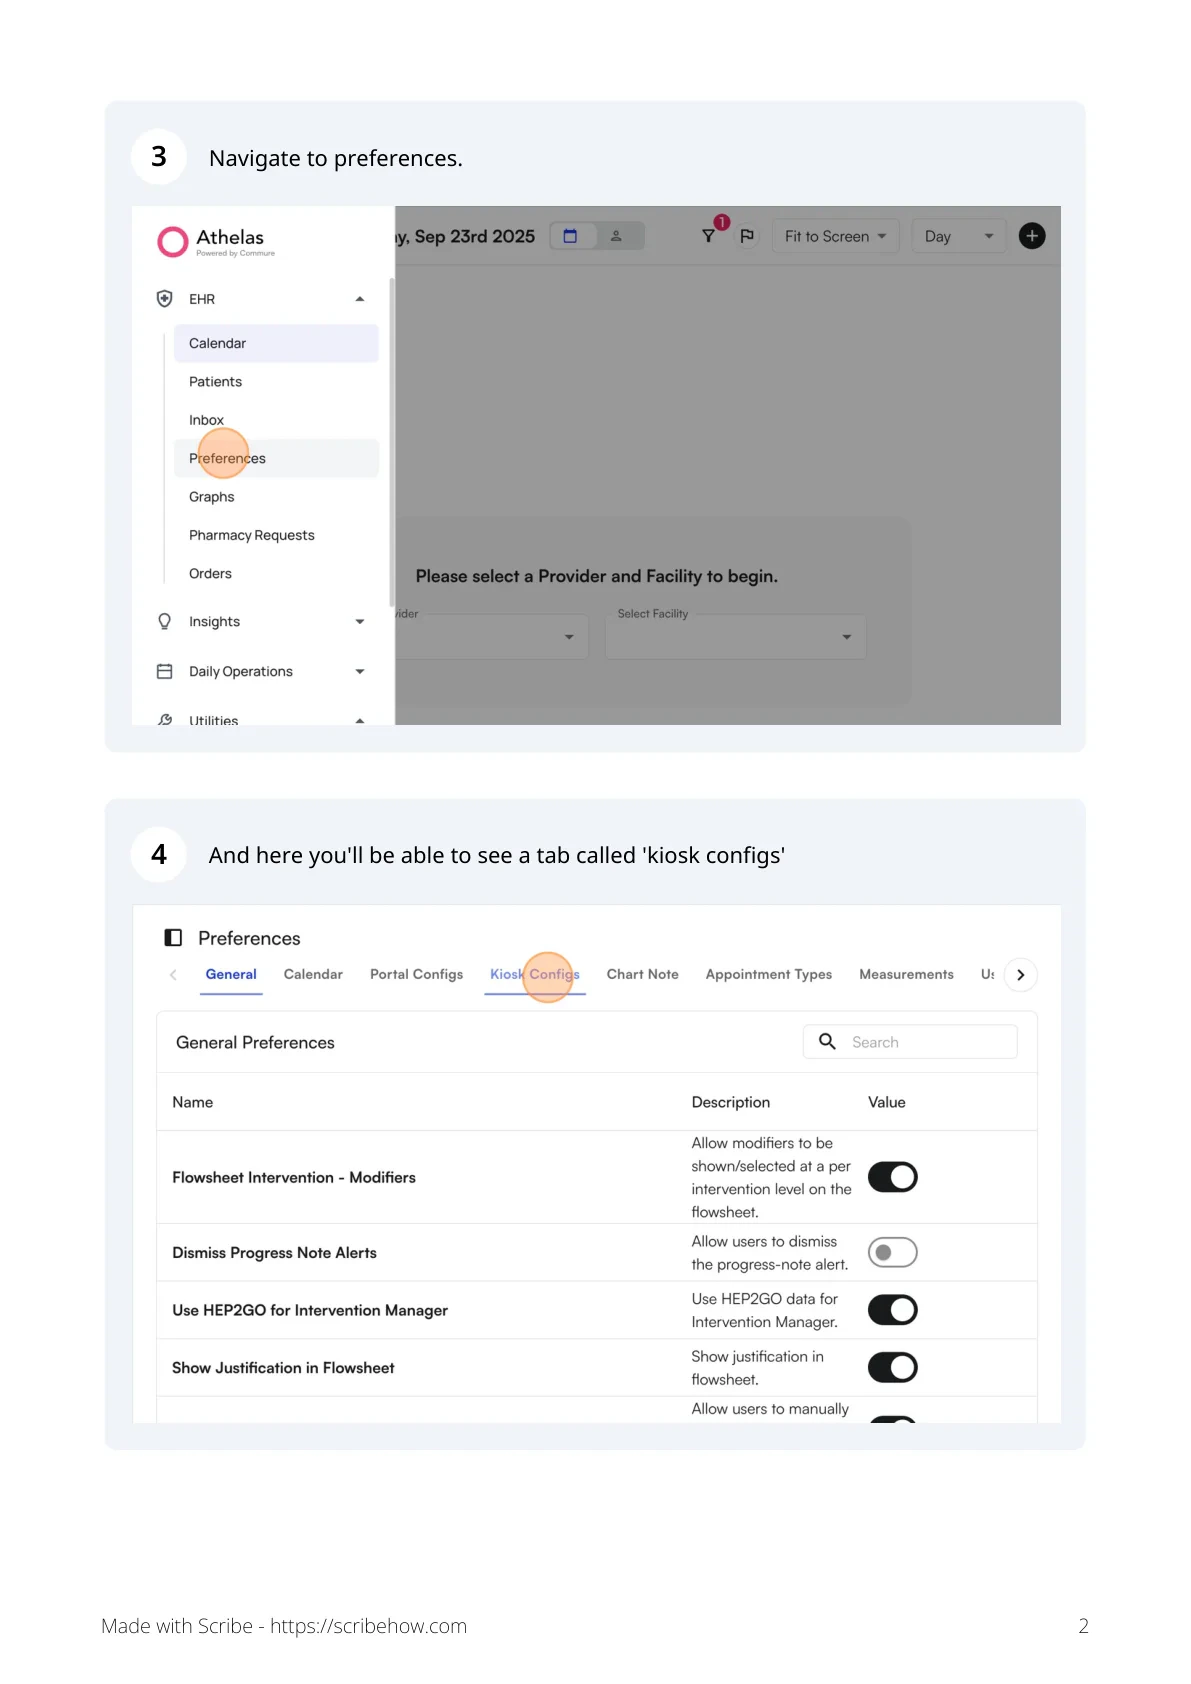
Once your AM has confirmed your site is on the kiosk user list, go to insights.athelas.com and open Preferences from the EHR sidebar.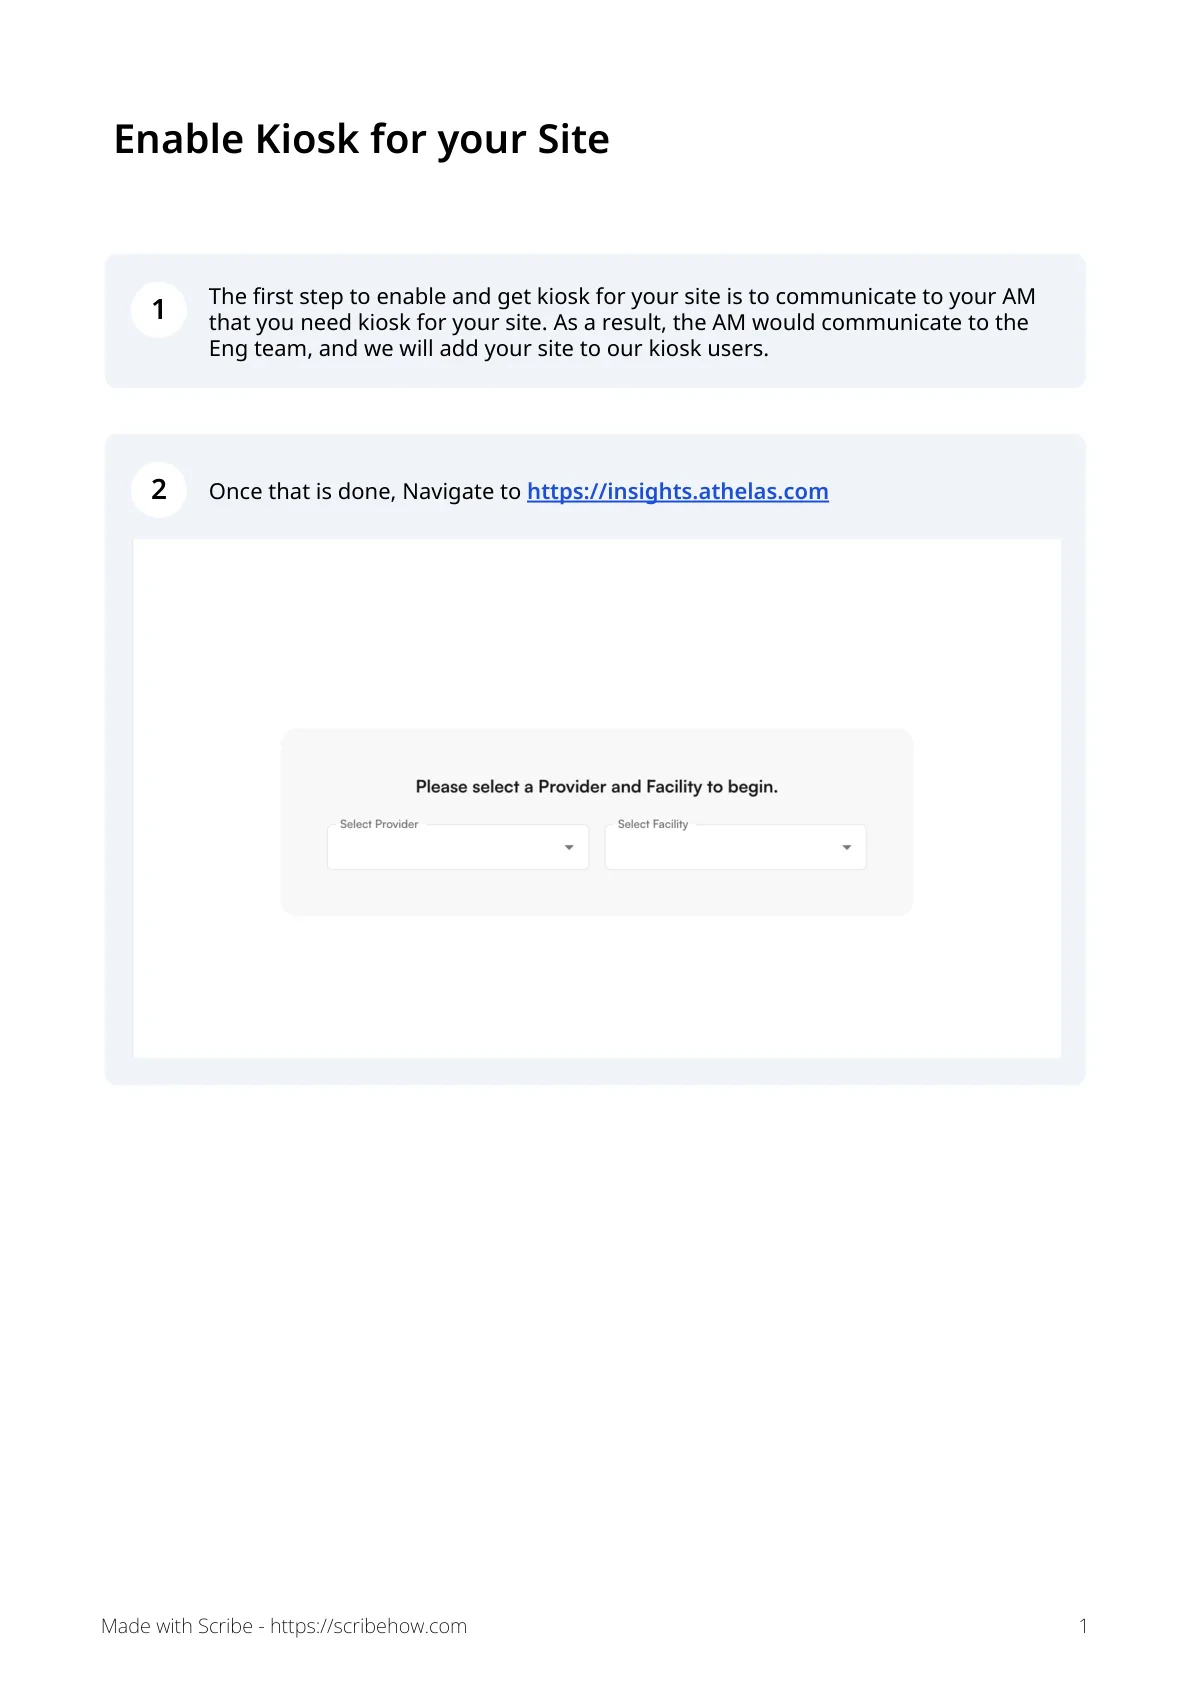
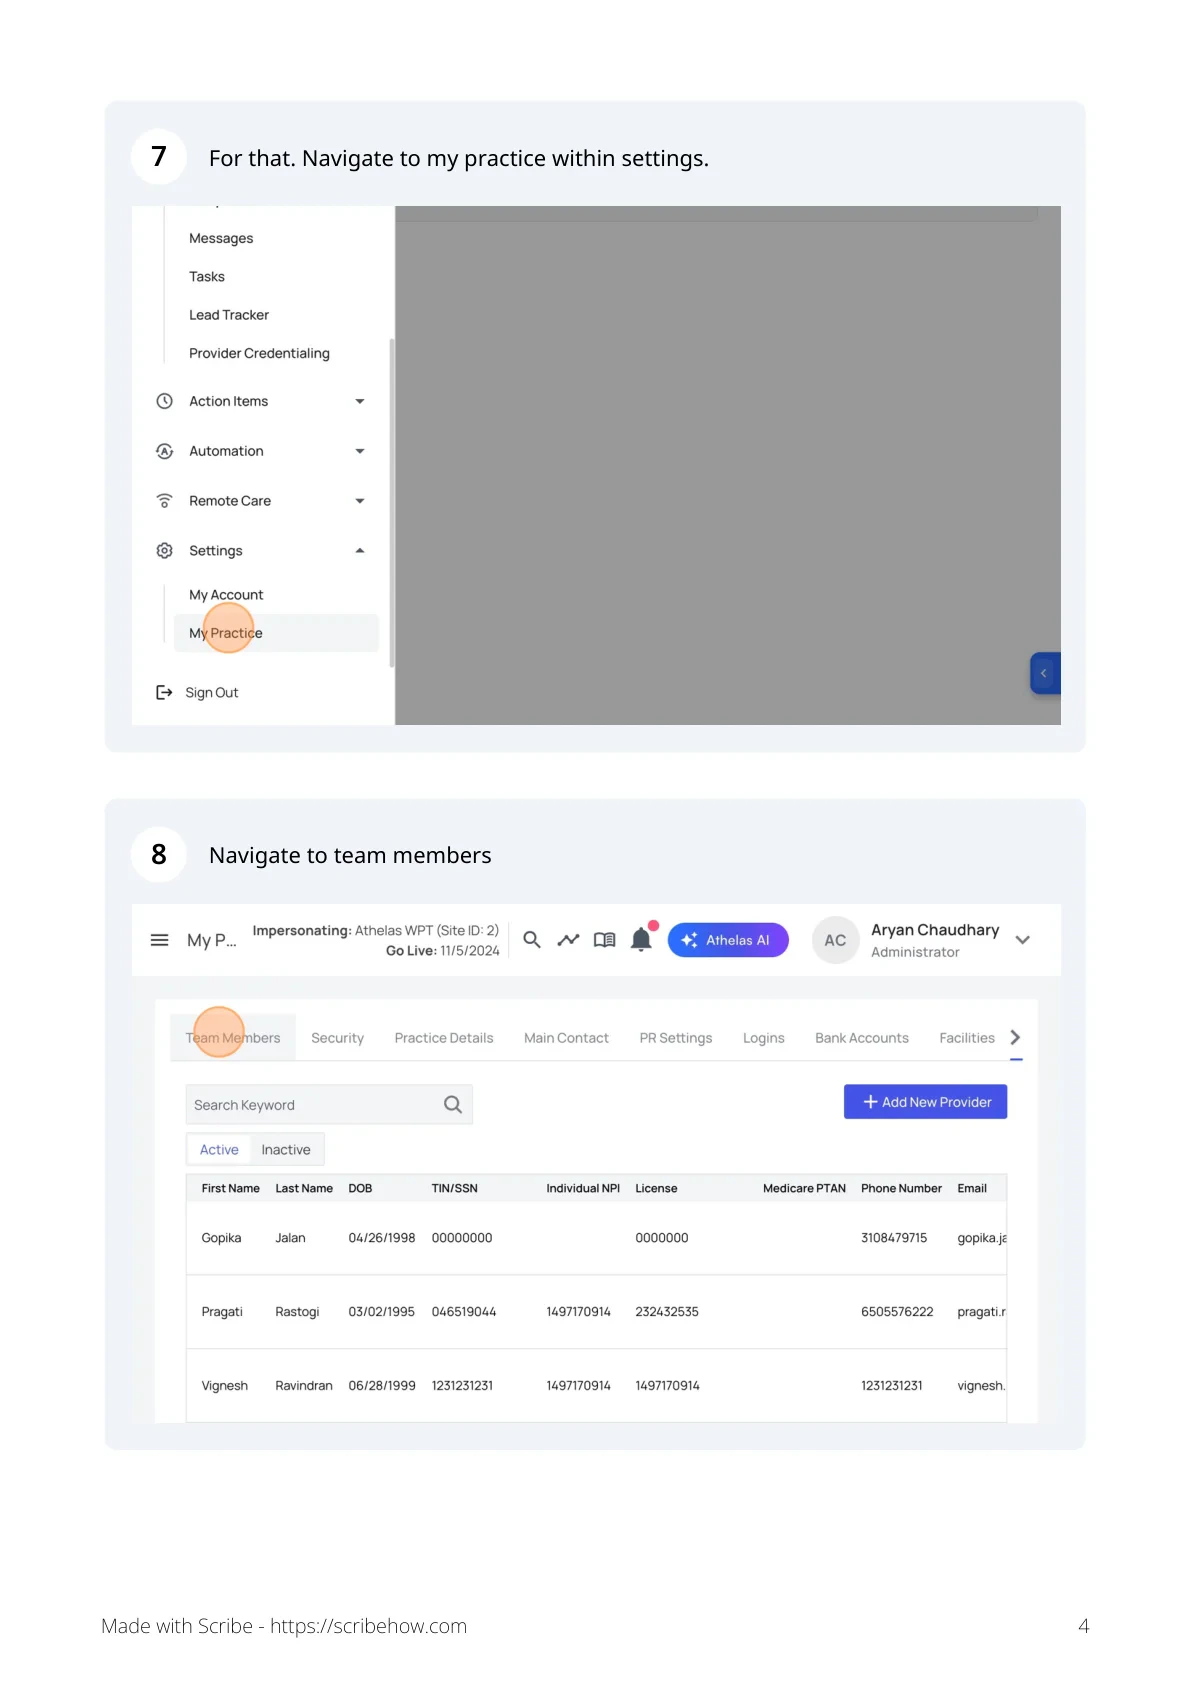
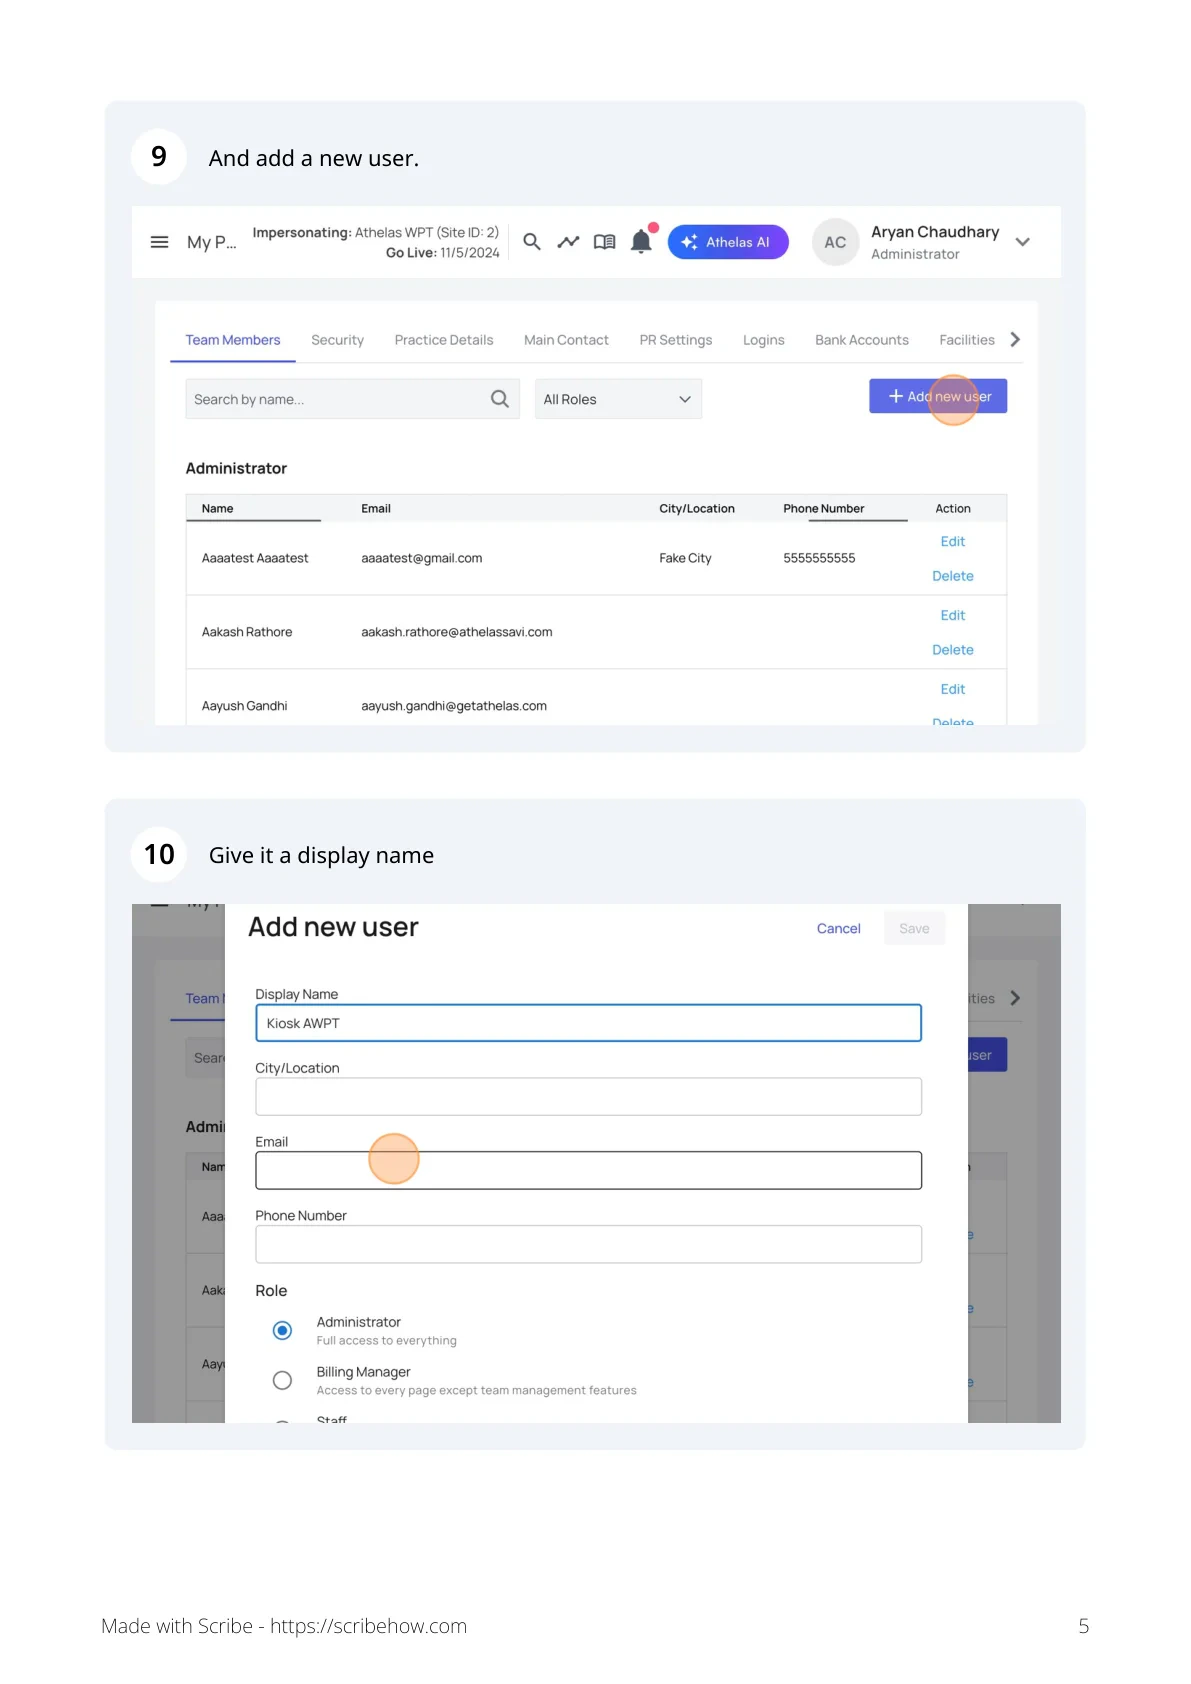
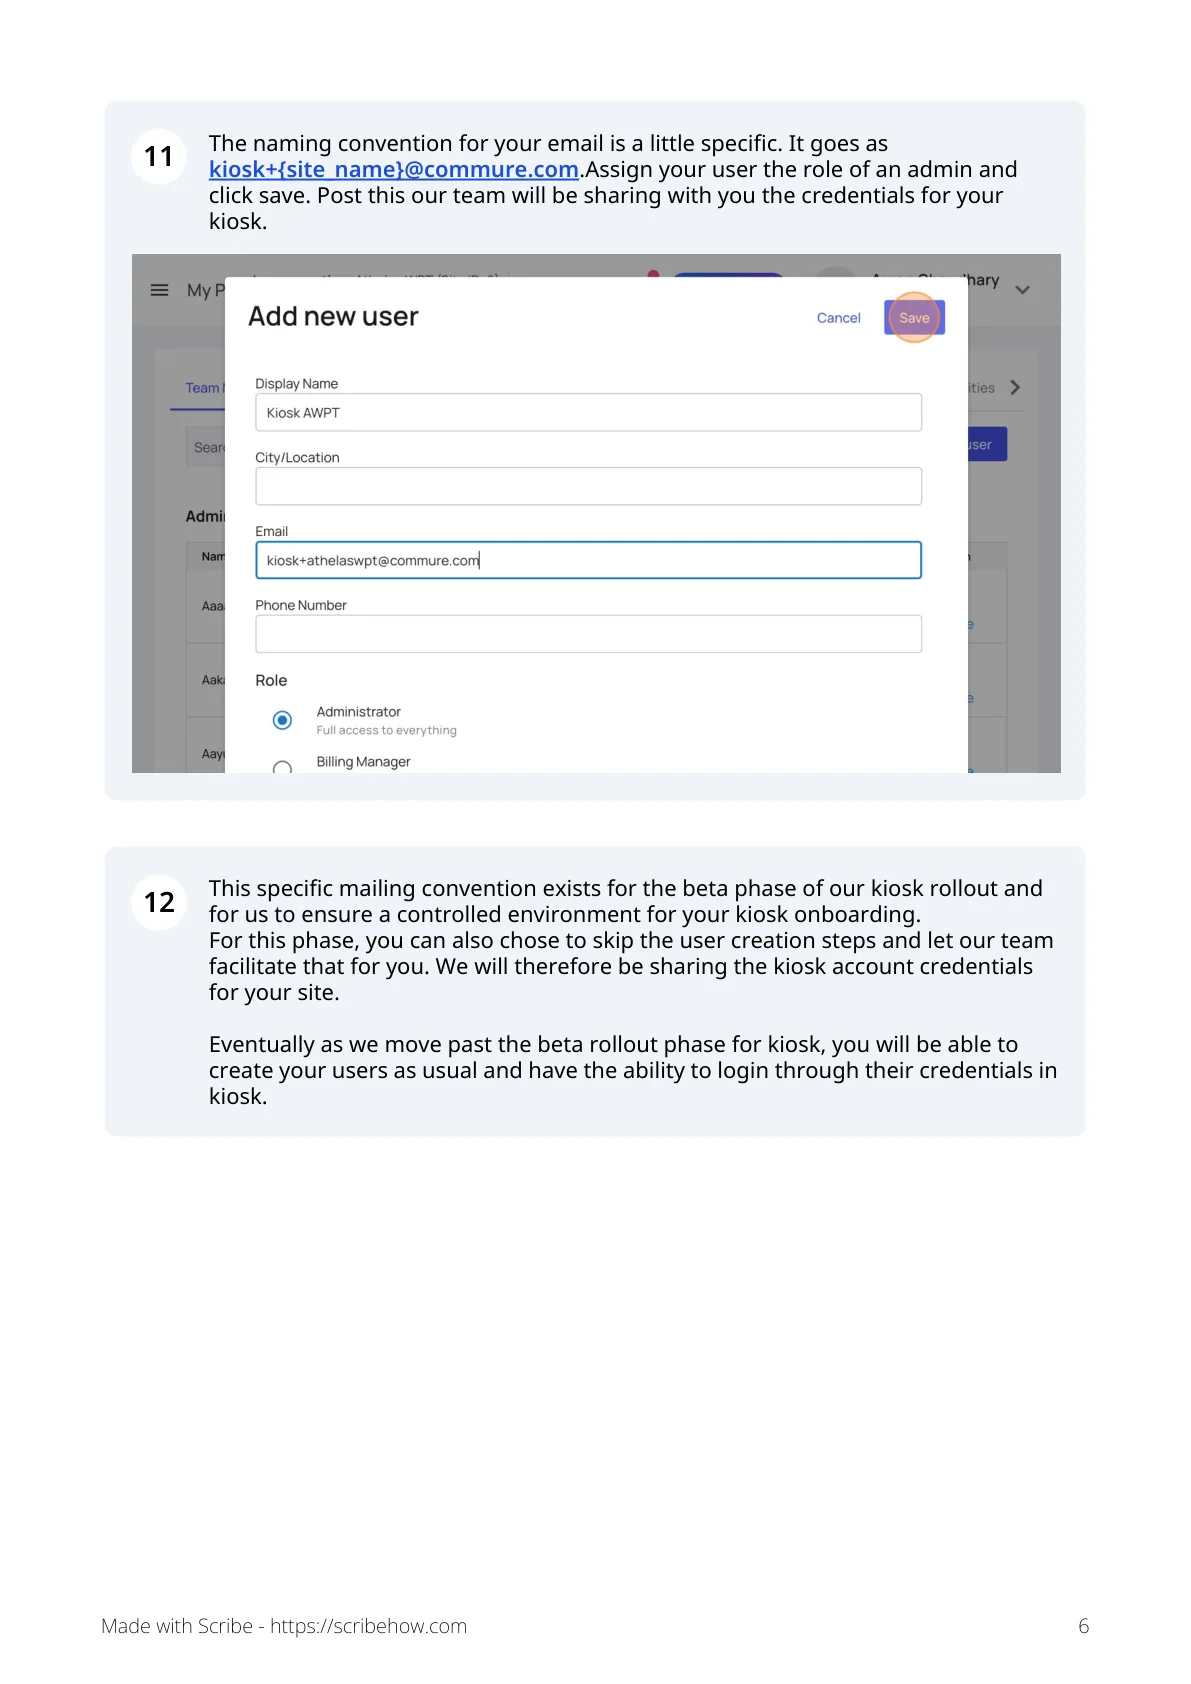
This naming convention exists for the beta phase of the kiosk rollout to ensure a controlled environment for kiosk onboarding. During the beta, you can also skip the user-creation steps and let our team set up the kiosk account for you. After the beta, you’ll be able to create kiosk users like any other user and log in with their credentials.
Before you begin
- Kiosk access and credentials: Ask your Athelas Account Manager to confirm access for your site and help provision the kiosk login. Use the dedicated kiosk credentials on the patient-facing device, not a staff member’s everyday login.
- Device and connection: Prepare a tablet with a reliable internet connection. Confirm your device and browser setup with your Athelas team before purchasing hardware. A stand is useful for a dedicated front desk station.
- Payments: If you plan to use a card reader, make sure it is configured for your site and active. You can use an existing reader or ask your Account Manager about a dedicated one. Entering a new card directly on the kiosk requires Stripe; it is not available with MX Merchant.
- If using camera capture: Use the secure kiosk.athelas.com site and allow camera access on the device. Camera capture and the Plustek scanner cannot be used together.
- Staff support: Keep a staff-assisted check-in option available for patients who cannot find their appointment or complete a required step.
Set up the tablet
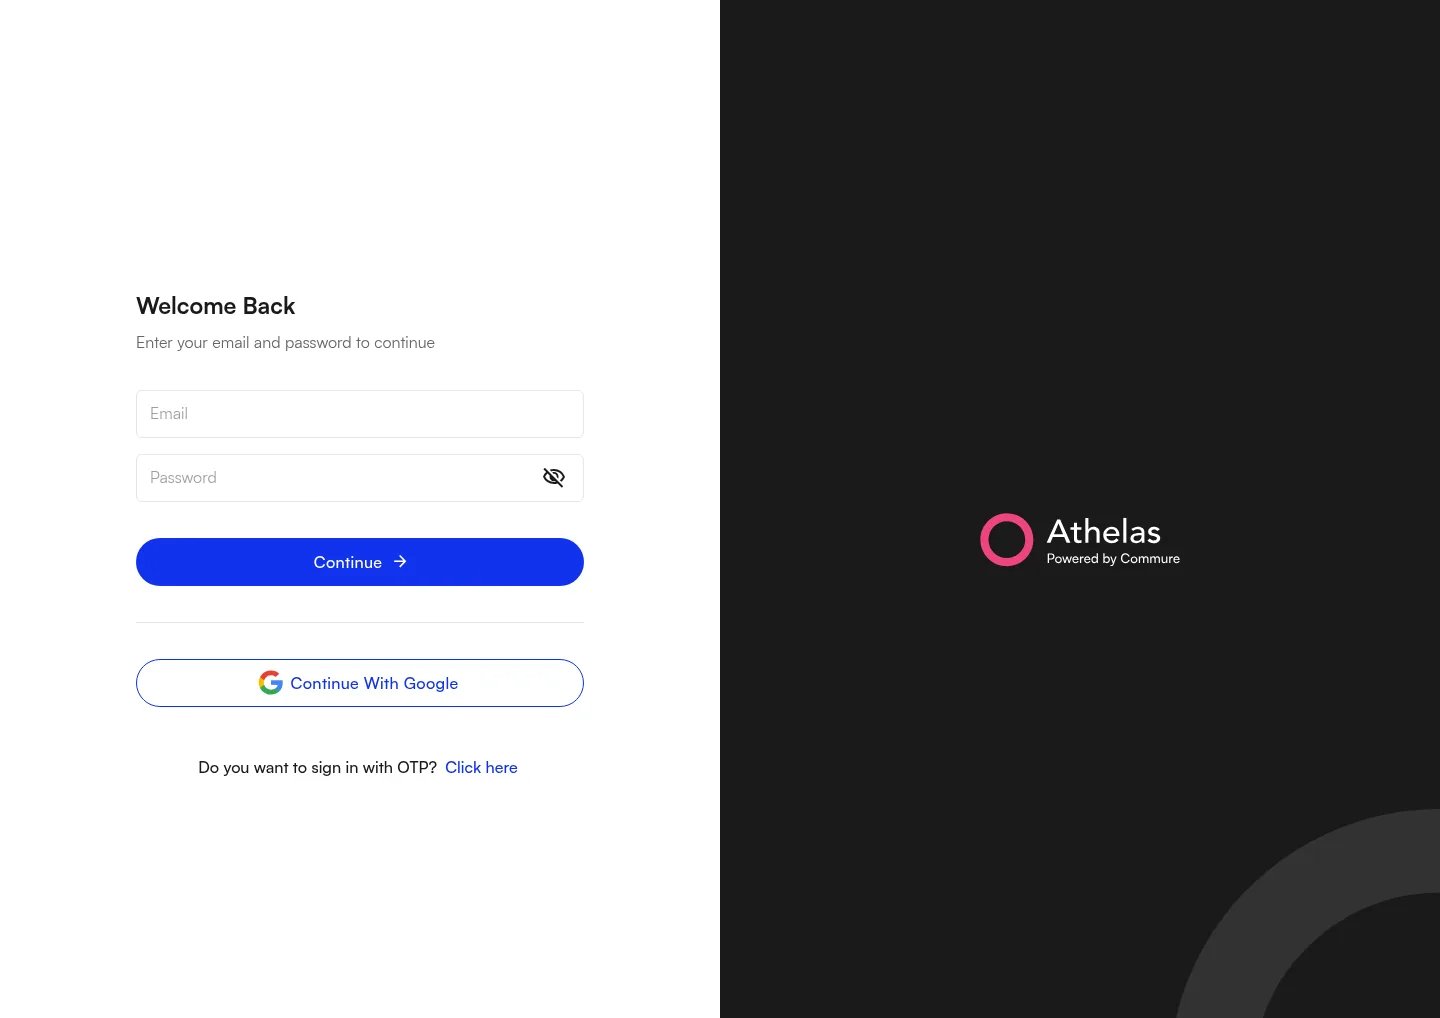
- On the tablet, open kiosk.athelas.com and sign in with the kiosk credentials provided for your site.
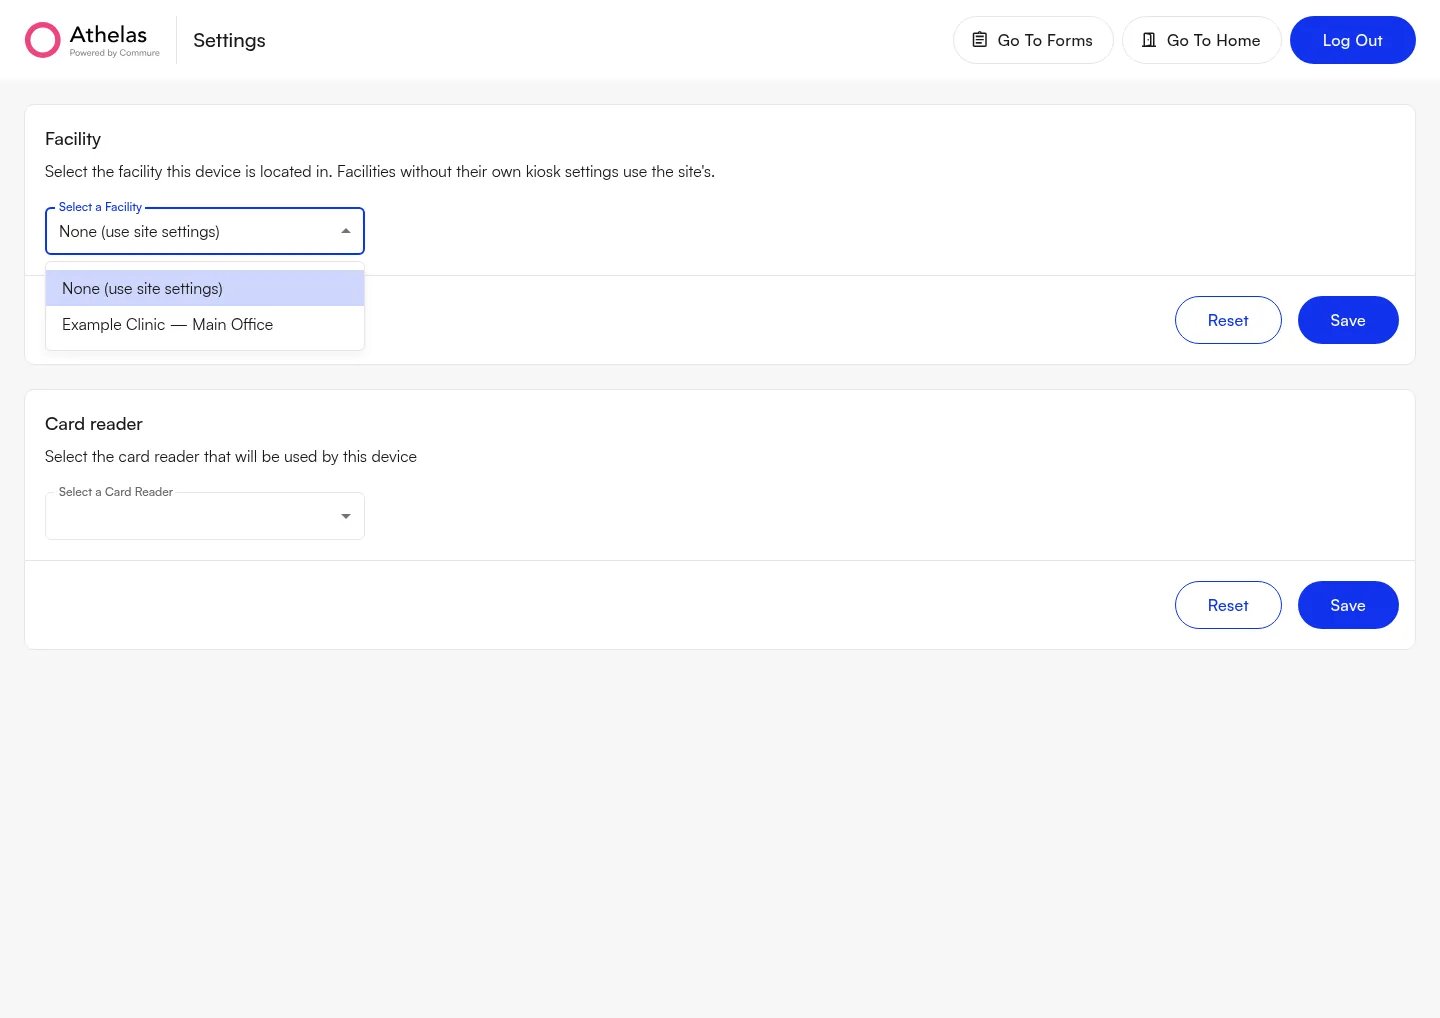
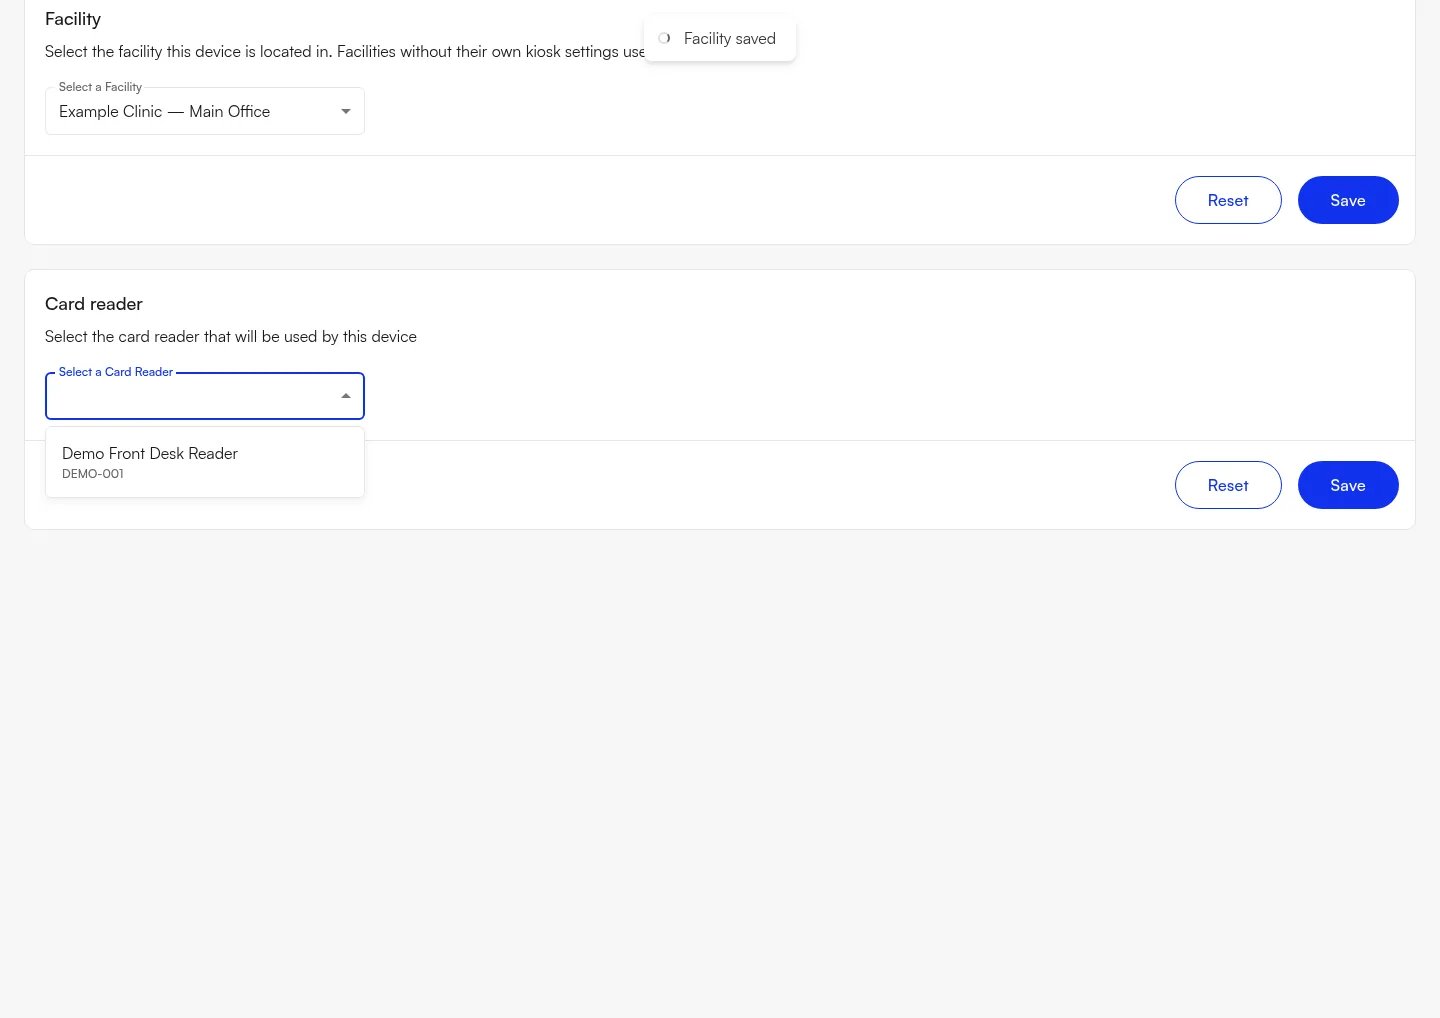
- Tap the practice logo three times in quick succession to open the device-specific Settings.
- Select the facility where this device will be used. Choose None (use site settings) only when the device should use the site’s default settings rather than a facility’s settings.
- Tap Save in the facility settings panel. The selection is saved for this device.
- If you will collect payments through a reader, select the reader in the card-reader settings panel and tap its Save button. Only active readers configured for the site are available.
Choose a kiosk mode
The kiosk can be operated in two modes: Check-in and Forms-only. The differences are explained in the table below.Use Check-In Mode
Patients begin at the welcome screen and follow the steps enabled for the practice. The sections below describe what each step does; your screen order may differ.You will see “Welcome to [practice name] Check-In” when Check-In Mode is enabled.
Find the appointment
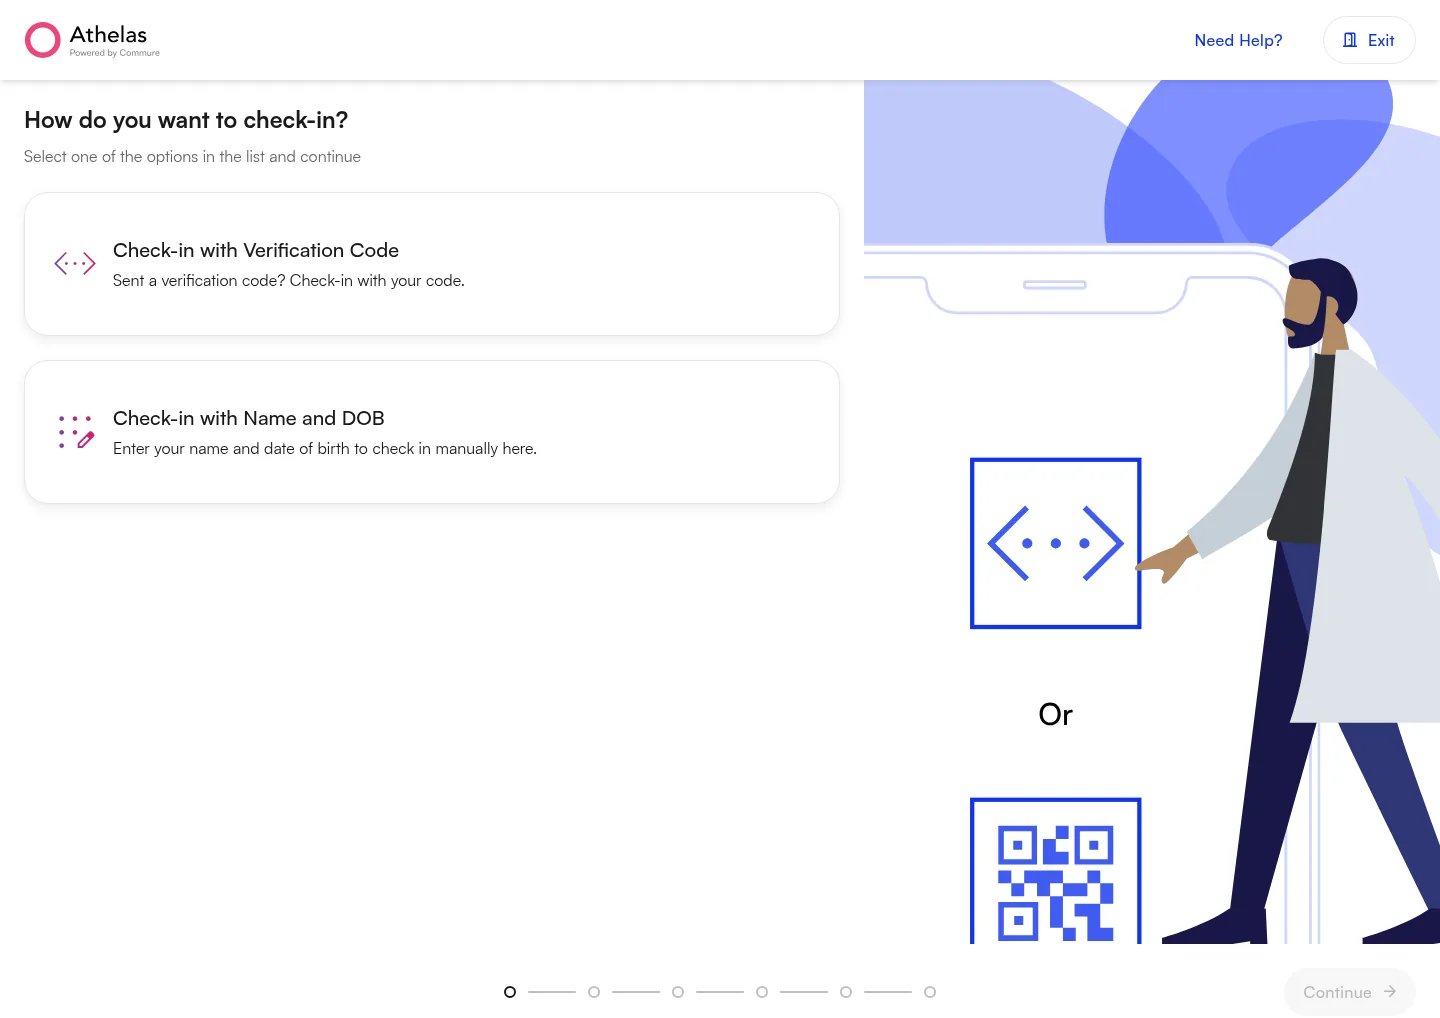
- The patient taps Tap to Get Started.
- When Verification code is enabled, the patient can choose Check-in with Verification Code and enter the five-character code from their text message, or choose Check-in with Name and DOB.
- For manual lookup, the patient enters their first and last name, then their date of birth. They do not need to enter a phone number.
- If Patient info is enabled, the patient reviews the appointment shown before continuing.
Review patient information
The patient checks the information on file. When Patients can edit their info is on, they can update their date of birth, phone number, email, and address. First and last names are read-only in this form; staff should handle name corrections. Example: Jamie Example reviews a 2:00 PM appointment and checks the contact information before continuing.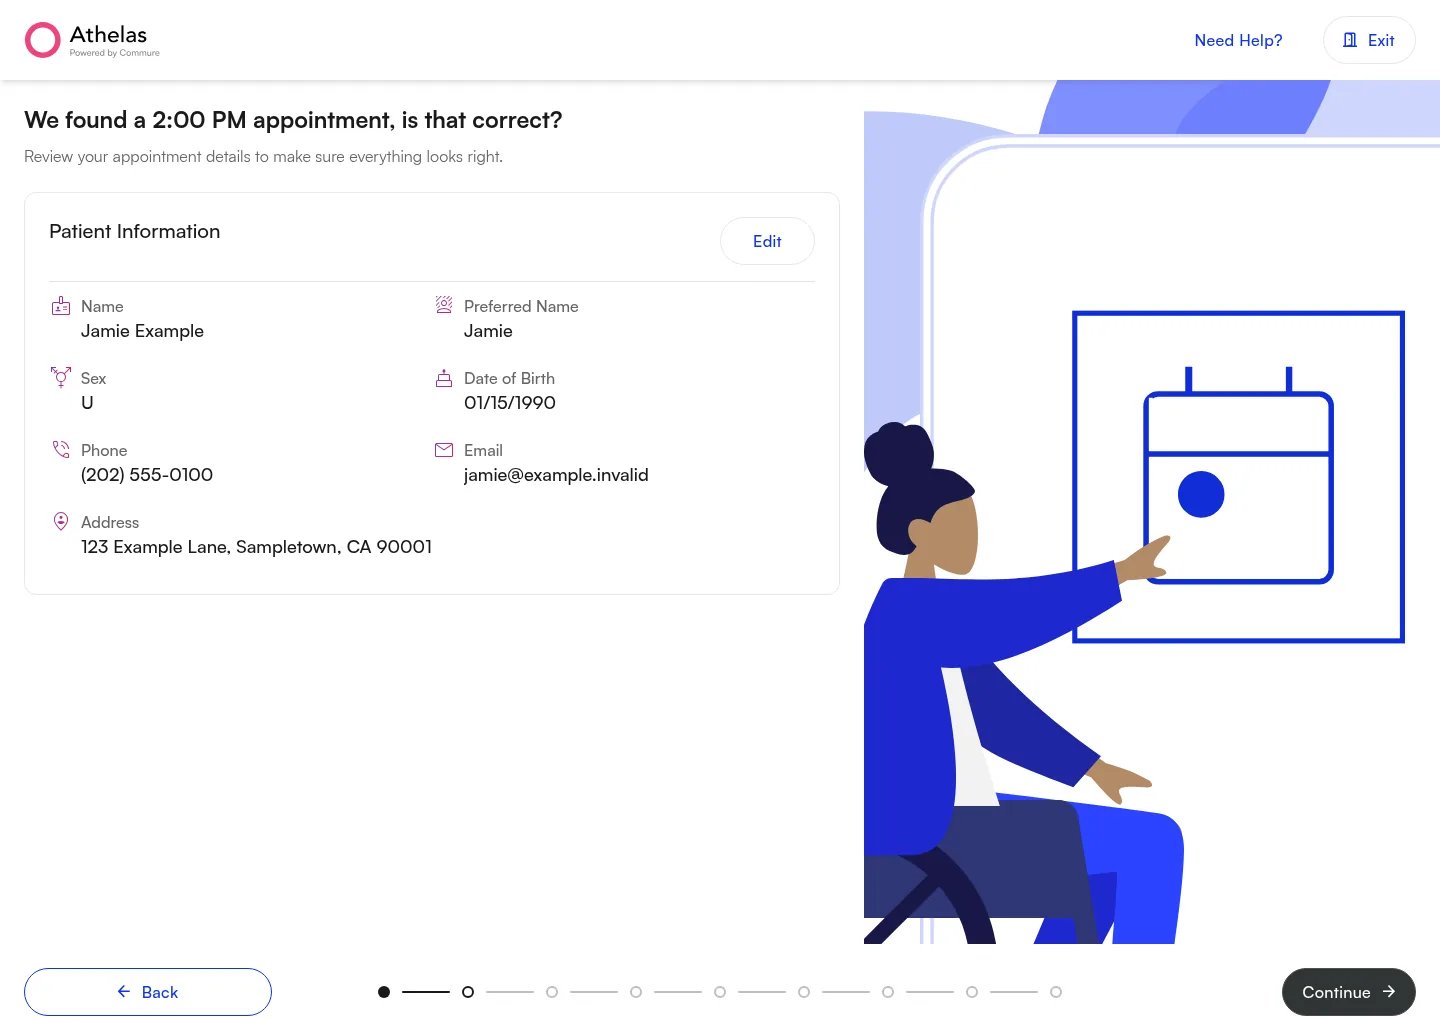
Review insurance
When the Insurance screen is included, the patient reviews their coverage or selects the self-pay option offered by the kiosk. The Patients can select or edit insurance setting controls whether they can change this information.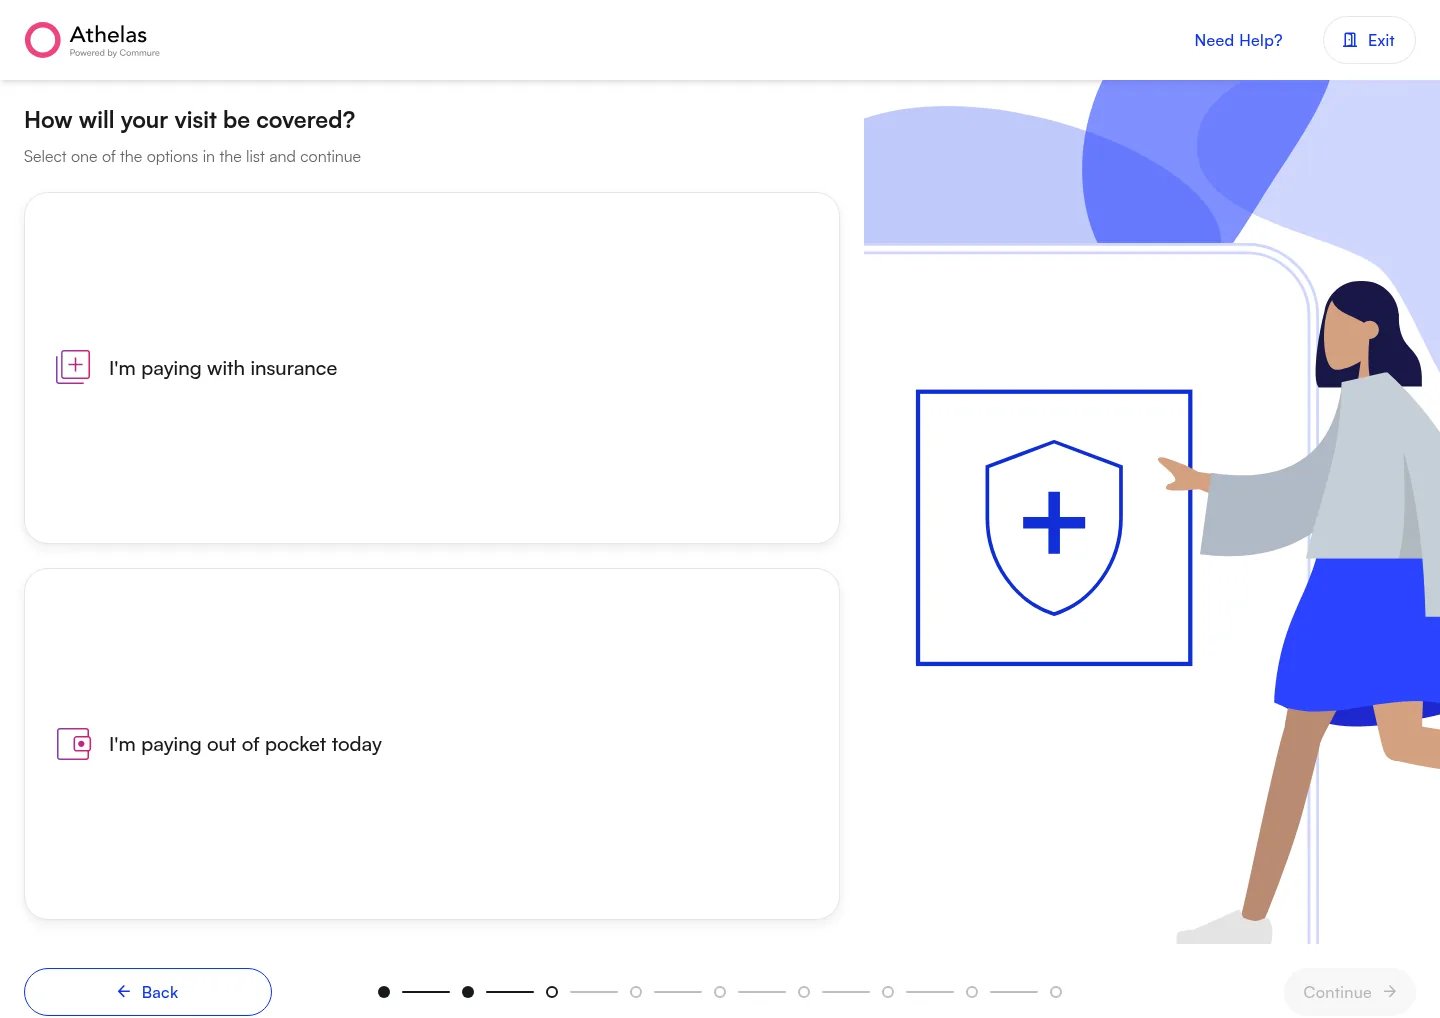
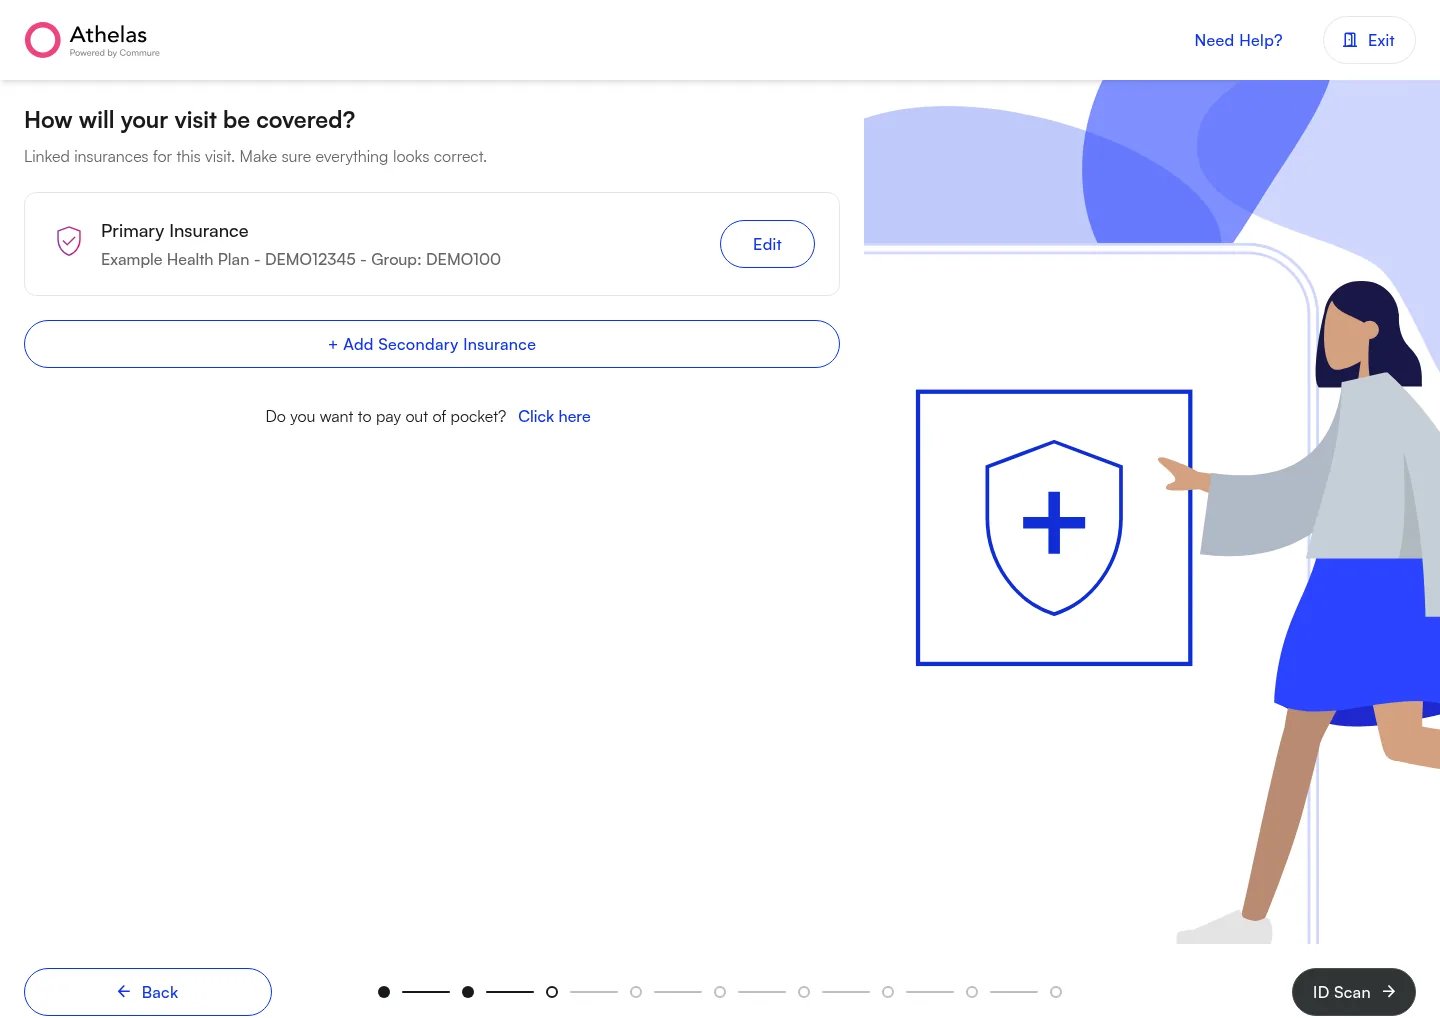
Capture insurance cards and photo ID
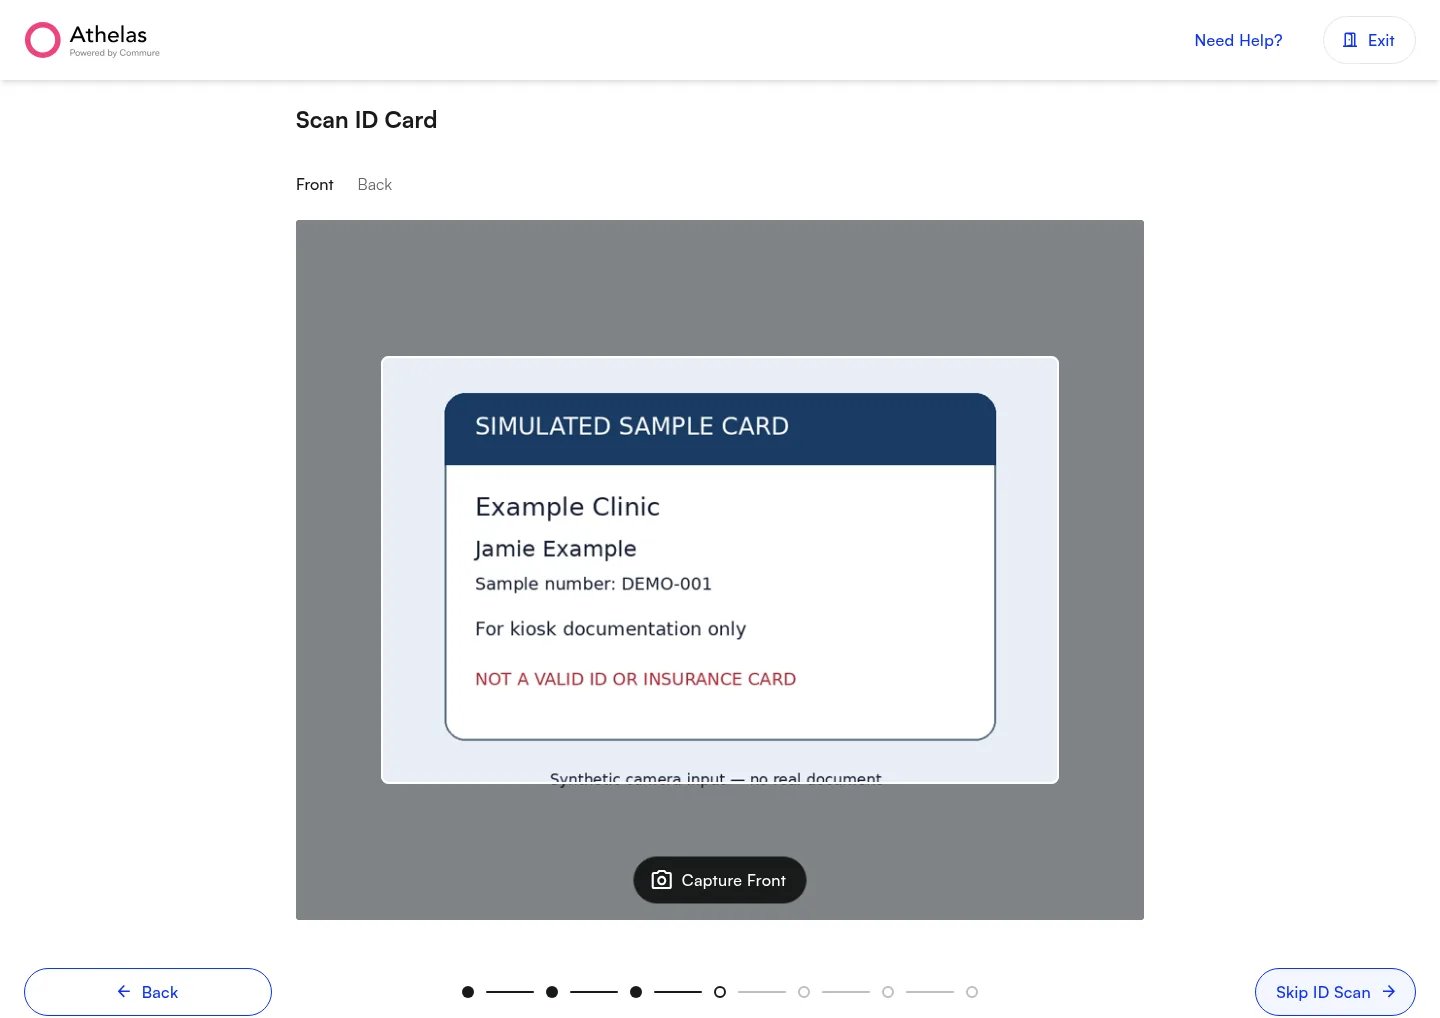
When Camera card capture is enabled, eligible initial-evaluation visits can include camera capture within the Insurance section. The Insurance screen must be enabled and Plustek must be off. The kiosk asks for the relevant insurance-card and photo-ID images; additional insurance-card prompts depend on the coverage already on file. Have the patient complete these steps, with staff assistance for browser permissions if needed:- Allow camera access when the browser asks.
- Position the requested card or ID so the full document is visible and readable. Use the camera-switch control if needed.
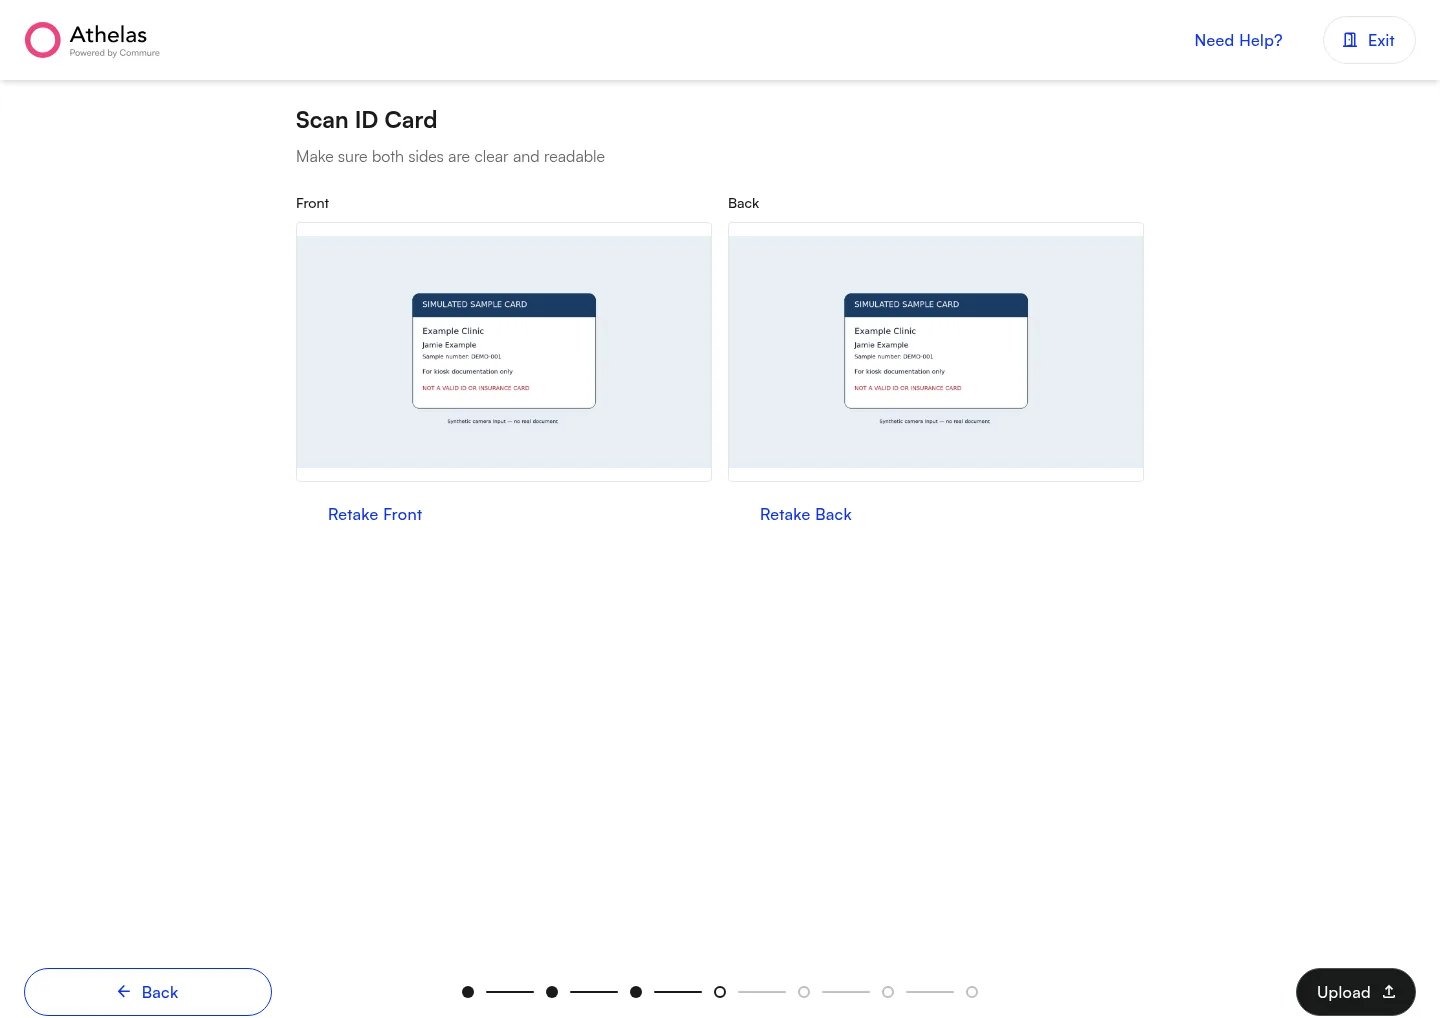
- Capture the image and review it. If it is unclear, use the retake control to capture that side again.
- Capture both sides requested, then tap Upload.
- Wait for the upload success message, then tap the next-step or Continue button.
Complete intake forms
When Intake forms is on and the appointment has outstanding forms, the kiosk shows those forms during check-in. The screen appears at the position set in Screen order. The patient must finish all displayed assigned forms before Continue becomes available. After submitting a form, allow a moment for completion to be confirmed. If a form still appears unfinished, return to it and check that it was submitted, not just filled out. Completing a form and approving a demographic or insurance change are separate actions. If a submitted form proposes changes that need Front Desk Inbox review, the form can be complete while the chart update remains pending.Review charges and choose a payment method
The Payment screen appears according to the Payment screen setting. It can show charges for today’s visit, an outstanding balance, and available credits. Have the patient review the amounts on screen before paying. Today’s Charge is included in Total Due Now when present. Patients can choose whether to include an outstanding balance and, when enabled, apply available credits. Both checkboxes start unchecked. Have the patient review the resulting total before continuing. Example: Today’s copay is $25 and the patient chooses to include a $15 outstanding balance. With $0 in credits, Total Due Now is $40. The balance box is selected in this example.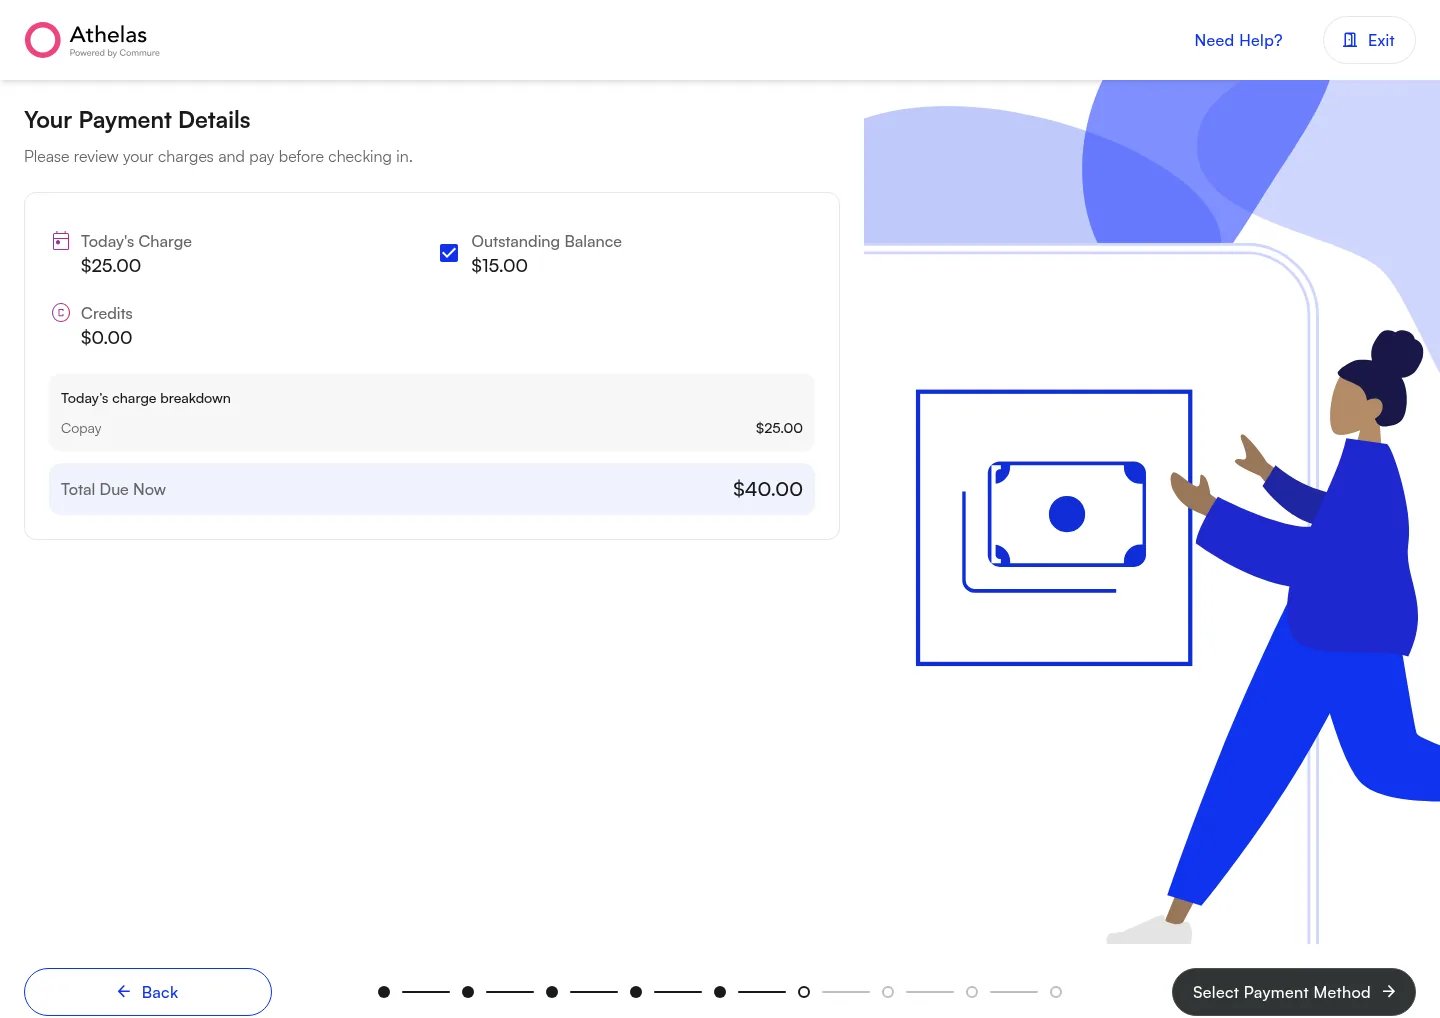
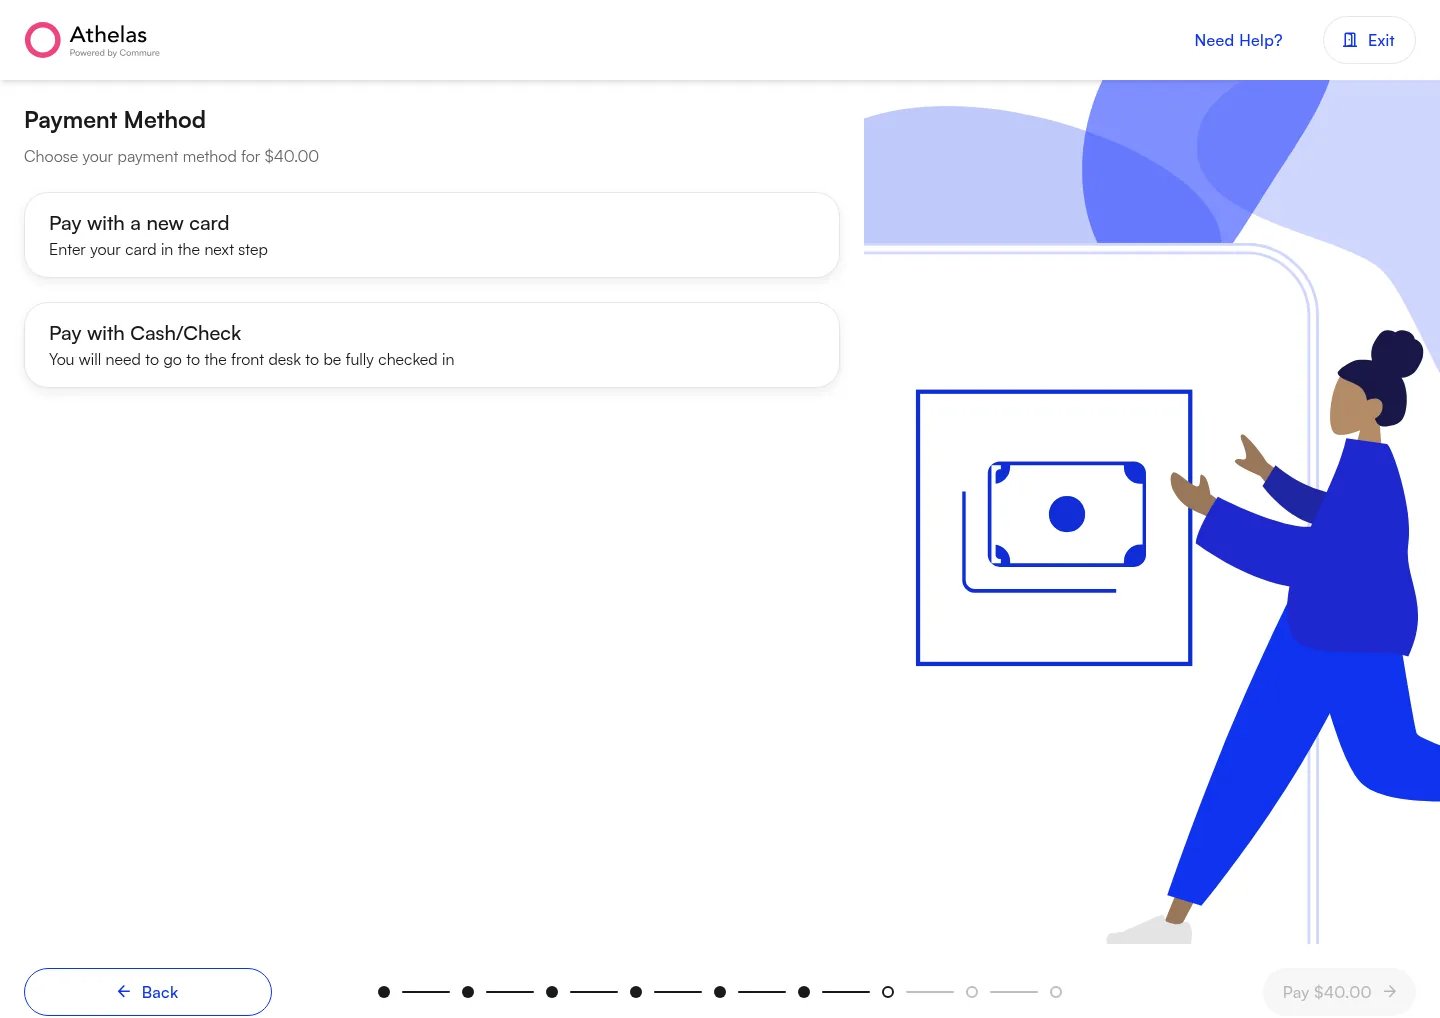
Pay with a saved card
The patient selects a saved card, reviews the amount, and uses the payment button to submit the charge. They should wait for confirmation before continuing.Add and pay with a new card
For Stripe sites, Pay with a new card appears when the kiosk has successfully loaded the patient’s saved payment methods. The patient does not need an existing saved card to use it. Have the patient complete these steps:- Select Pay with a new card, then tap Continue.
- Enter the card details in the full-screen card form and review the notice that the card will be saved on file for future payments.
- Tap Save card. After saving succeeds, the kiosk selects the new card in the payment flow.
- Review the total, then tap Pay [amount] with [card ending] to charge it.
Pay with the card reader
The patient chooses Pay in Terminal and follows the instructions on the selected reader, then waits for payment confirmation on the kiosk. Paying on the reader does not automatically save the card for future visits.Pay with cash or check
When enabled, Pay with Cash/Check lets the patient continue and directs them to the front desk to pay. Selecting this option does not record a cash or check payment as collected. Staff must collect and record the payment through the usual payment workflow.Finish check-in
The patient completes the remaining steps until the kiosk displays You’re All Set!. From this confirmation screen, they can choose:- Finish to return to the welcome screen.
- Start Another Check-In if another check-in is needed.
Use Forms-only mode
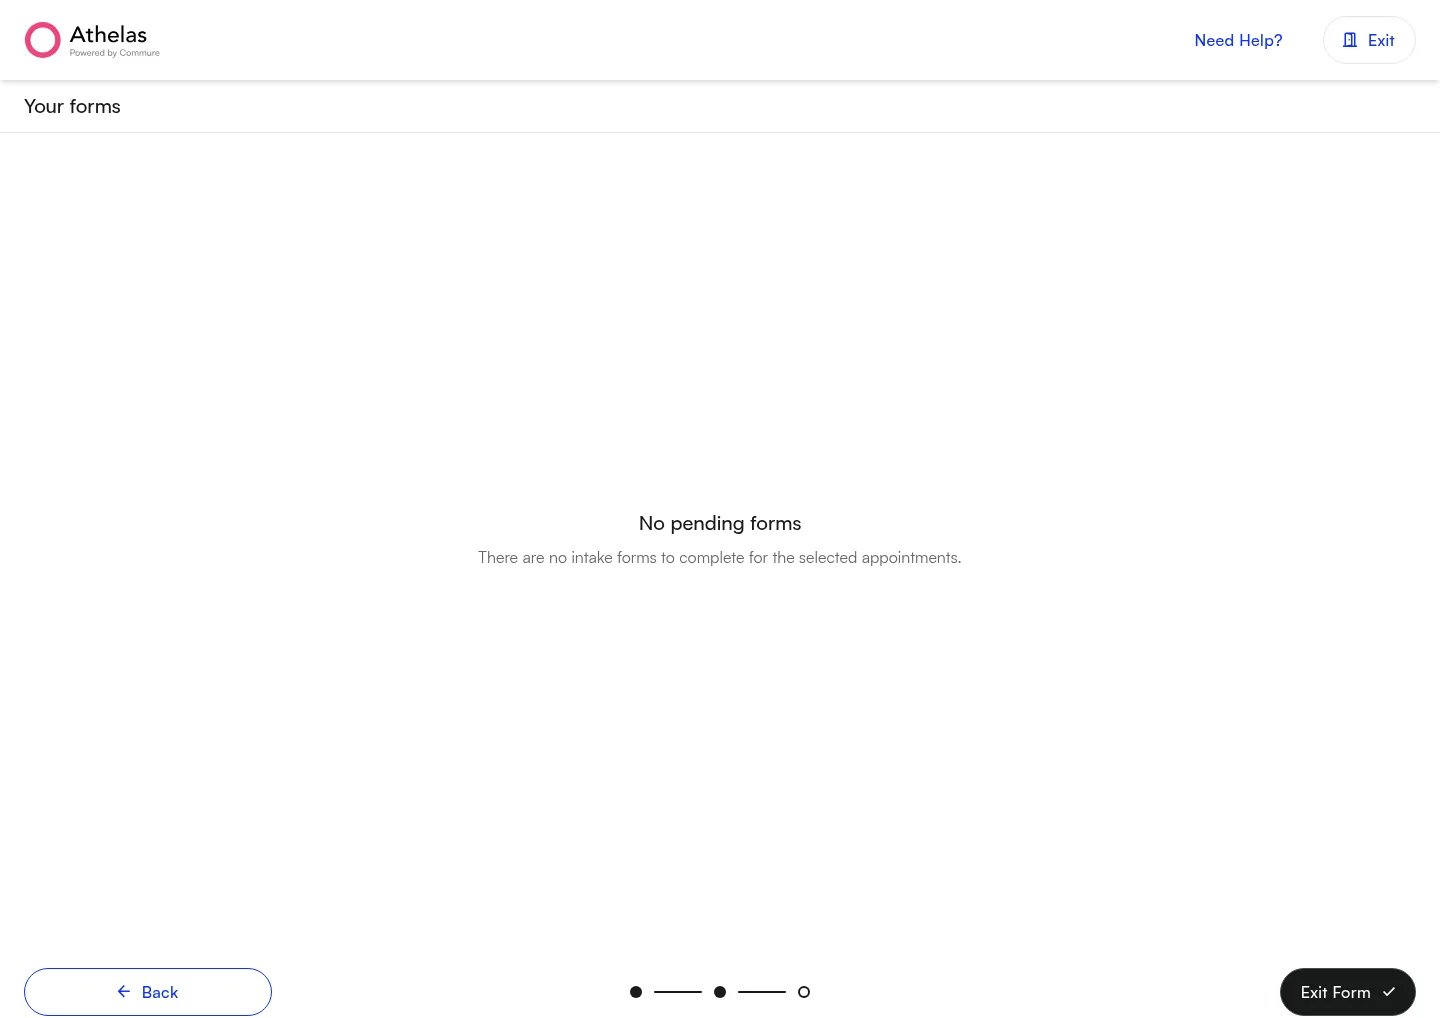
You will see “Welcome to [practice name] Forms” when Forms-only Mode is enabled.
- On the kiosk, tap the practice logo three times quickly to open Settings.
- Select Go to Forms. The welcome screen now shows “Welcome to [practice name] Forms”.
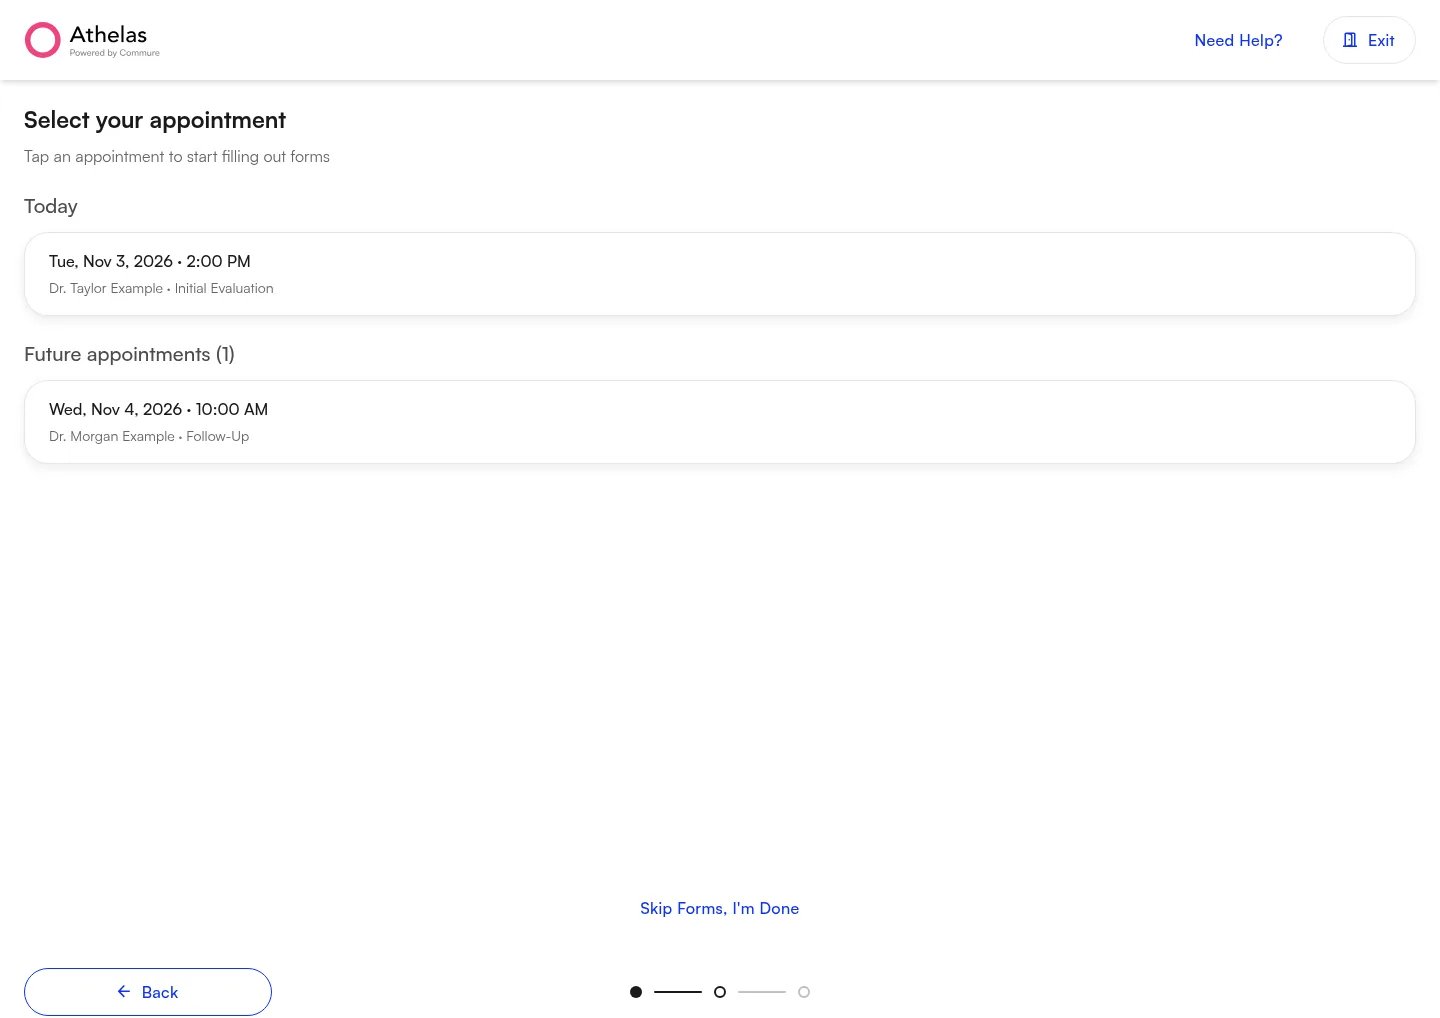
- The patient starts the flow and enters their name and date of birth. If more than one appointment has outstanding forms, they select the visit. If there is only one, its forms open directly.
- The patient completes and submits the forms for that visit, then selects Exit Form. The kiosk checks whether the forms are finished.
Configurations and settings
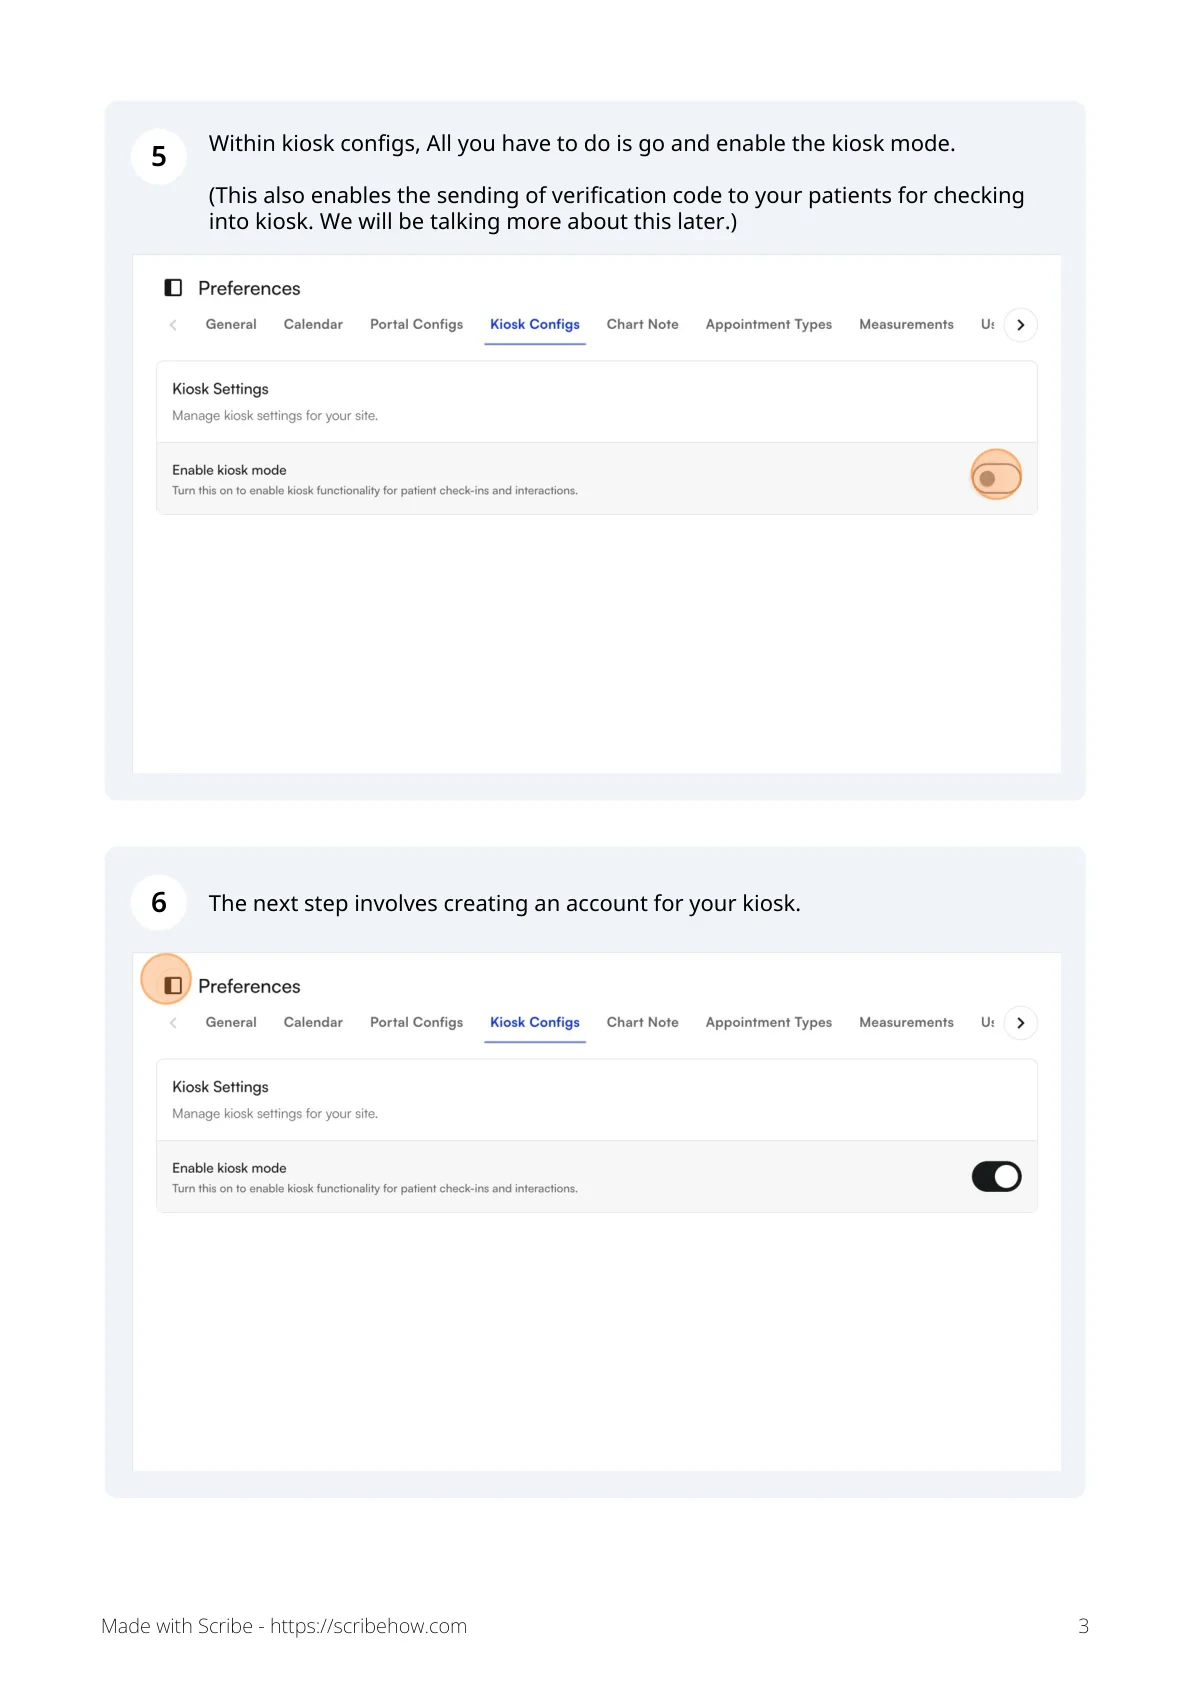
Kiosk settings live under Preferences → Kiosk Configs. Select Site default or the appropriate facility before making changes. The controls below follow their order in the configuration page.Enable kiosk
- Enable kiosk mode is the site master switch.
- Enable kiosk for this facility controls an individual facility and defaults to on. The site’s master switch must also be on.
Check-in window
Choose 15, 30, 45, 60, 90, 120, 180, or 240 minutes. The default is 90 minutes. The window applies before and after the scheduled appointment time. Set Site default to the window patients should use for regular kiosk lookup. A window control also appears at facility level, but regular kiosk lookup currently uses the site-level window. The appointment’s facility-level window affects when verification codes are sent. Do not rely on the facility control alone to give a particular kiosk a different appointment-lookup window.Payment screen
Choose when patients see Payment:
This setting determines whether the screen appears. It does not erase an existing balance or confirm that a payment has been collected.
Screen order
At Site default, drag the configurable steps into the order your practice needs. The default order is Patient info → Insurance → Payment → Intake forms.- Verification stays first and Check-in stays last.
- Payment must remain after Insurance, including when one of these steps is turned off.
- Card capture stays with the Insurance section; it is not an independently movable step.
- Facilities inherit the site-level screen order.
- Turning off a step removes it from the patient flow. Patient info and Insurance are on by default. Payment and Intake forms also follow their respective settings and whether there is content to show.
Verification code
On by default. Shows Check-in with Verification Code. When off, patients go directly to manual name and date-of-birth lookup. Code delivery timing follows the configured window for the appointment’s facility, rather than always being 90 minutes before the visit.Intake forms
Off by default. When on, includes the appointment’s outstanding intake forms in the check-in flow. If there are no pending forms, there is no form for the patient to complete.Patients can edit their info
On by default. Allows patients to edit the supported demographic fields on Patient info. Turning this off leaves the review step available but removes editing. The screen itself is controlled separately in Screen order.Patients can select or edit insurance
On by default. Controls patient insurance-selection and editing behavior. The Insurance screen’s visibility is configured separately in Screen order. Patients can apply credits
On by default. Allows available patient credits to be shown and applied during kiosk payment. Turning this off does not remove those credits from the patient’s account.
Patients can pay with cash or check
On by default. Makes Pay with Cash/Check available as a payment choice. Staff still handle the physical payment.Plustek scanner
Off by default and only shown for sites with the scanner feature enabled. Turn it on only for a configured Plustek workflow. It takes precedence over camera capture; do not enable it for a tablet-only setup without a scanner.Camera card capture
Off by default. Enables camera capture for eligible initial-evaluation visits when the Insurance step is included. The setting is disabled while Plustek is on. Camera access also requires an HTTPS connection and browser permission on the device.Forms-only mode
Off by default and only shown when the feature is enabled for the site. Makes the separate forms-only workflow available from kiosk Settings. This setting is different from Intake forms, which includes forms within the full check-in flow.Troubleshooting
Patients can use Need Help? to find the front-desk assistance message.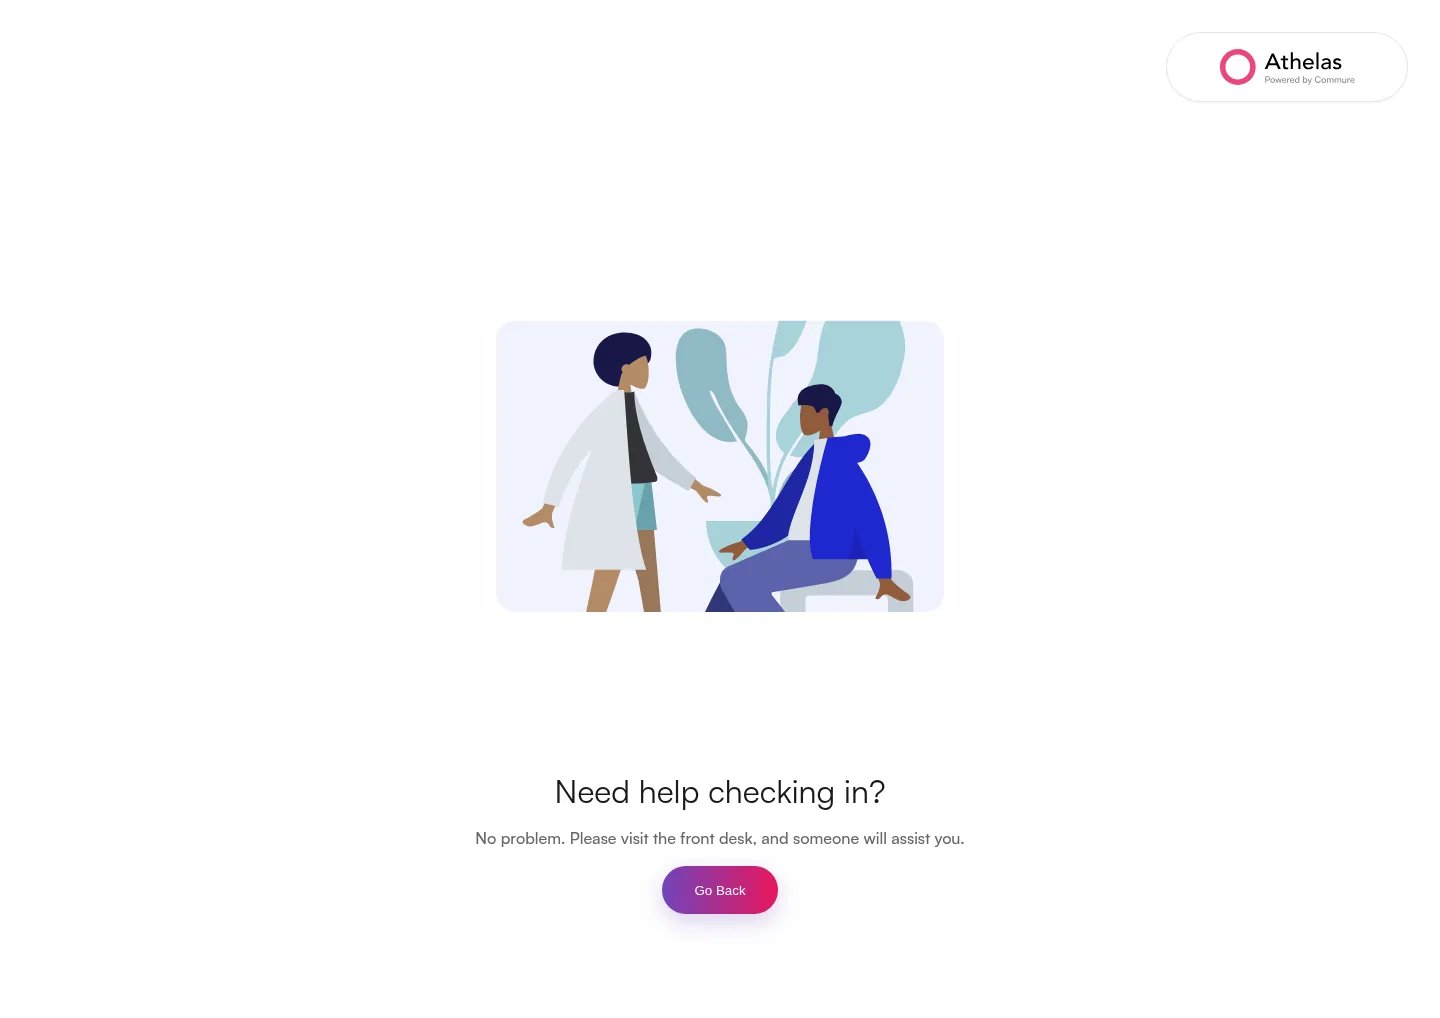
The kiosk shows the wrong location or settings
Open kiosk Settings with three quick taps on the logo. Check the device’s facility selection and save the correct choice. Then review that facility in Preferences → Kiosk Configs, including the site master switch. None (use site settings) uses site defaults rather than a facility’s configuration.The patient has no verification code
Use Check-in with Name and DOB. Staff can confirm that the patient’s phone number is correct and that verification codes are enabled for the intended scope. Do not hold up check-in waiting for a text when manual lookup is available.The appointment is not found
Check the patient’s name and date of birth against the chart, the appointment’s facility and time, and the configured check-in window. If the appointment is not eligible for the kiosk flow, use staff-assisted check-in rather than changing patient information or creating a duplicate appointment.Patient changes are not visible on the chart
When Front Desk Inbox is enabled, review EHR Inbox → Updates. Approve or modify the submitted request as appropriate. Access requires the Manage Front Desk Inbox Updates role permission. Pending submissions do not replace the chart’s current values until approved.The patient cannot add a new card
Confirm that the site uses Stripe. Pay with a new card is not offered for MX Merchant or when saved payment methods could not load. If the card form reports an error, correct the details and retry. If saving succeeded but the card is missing from the list, have staff resolve it before trying another save.The reader is missing or a payment did not complete
Confirm the reader is active, belongs to the correct site, and is selected in this device’s Settings. If the payment result is unclear, staff should check the patient’s transaction history before retrying so the patient is not charged twice. Use the practice’s staff-assisted payment workflow if needed.Camera capture does not appear or the camera will not open
Check that the visit is an initial evaluation, Insurance is enabled, Camera card capture is on, and Plustek is off. Then check camera permission for kiosk.athelas.com and that another app is not using the camera. If the capture screen is open, use its skip option when needed. If capture remains unavailable, have staff collect the document through the practice’s usual workflow.A payment or forms screen is missing
Check both the screen’s position and toggle in Screen order and its individual setting. Payment can be hidden because the visit does not meet the selected payment-screen condition. Intake forms only appear when enabled and the appointment has pending forms.The patient completed forms but is not checked in
Check which mode the device is using. Forms-only mode never checks in the appointment. Use staff check-in or return to the full flow with Settings → Go to Home.FAQ
What's the difference between Check-in Mode and Forms-only mode?
What's the difference between Check-in Mode and Forms-only mode?
Check-in Mode walks the patient through the steps your practice has enabled and checks them in for the visit. Forms-only mode only completes outstanding intake forms and does not check the appointment in — front desk staff must finish check-in separately.
How do I open kiosk Settings on the tablet?
How do I open kiosk Settings on the tablet?
Tap the practice logo three times in quick succession. From Settings you can choose the facility, select a card reader, switch to Go to Forms, or return to Go to Home.
What happens if a patient does not have a verification code?
What happens if a patient does not have a verification code?
Use Check-in with Name and DOB. A missing text message does not block check-in when manual lookup is available.
Can patients add a new card on the kiosk?
Can patients add a new card on the kiosk?
Yes on Stripe sites, through Pay with a new card. The option is not available with MX Merchant. Saving the card does not take the payment — the patient must submit the charge after the card is saved.
Does selecting Pay with Cash/Check record the payment?
Does selecting Pay with Cash/Check record the payment?
No. That option directs the patient to the front desk. Staff must collect and record the cash or check payment through the usual payment workflow.